Settings, keys and account
The settings page is your trust zone. It holds your profile and trading defaults, your Delta India API keys (the credentials that let Vecktor place orders for you), your security controls, your daily-loss circuit breaker, your alerts, and the buttons to export or delete everything. This guide walks through each card.
Set your profile and execution defaults
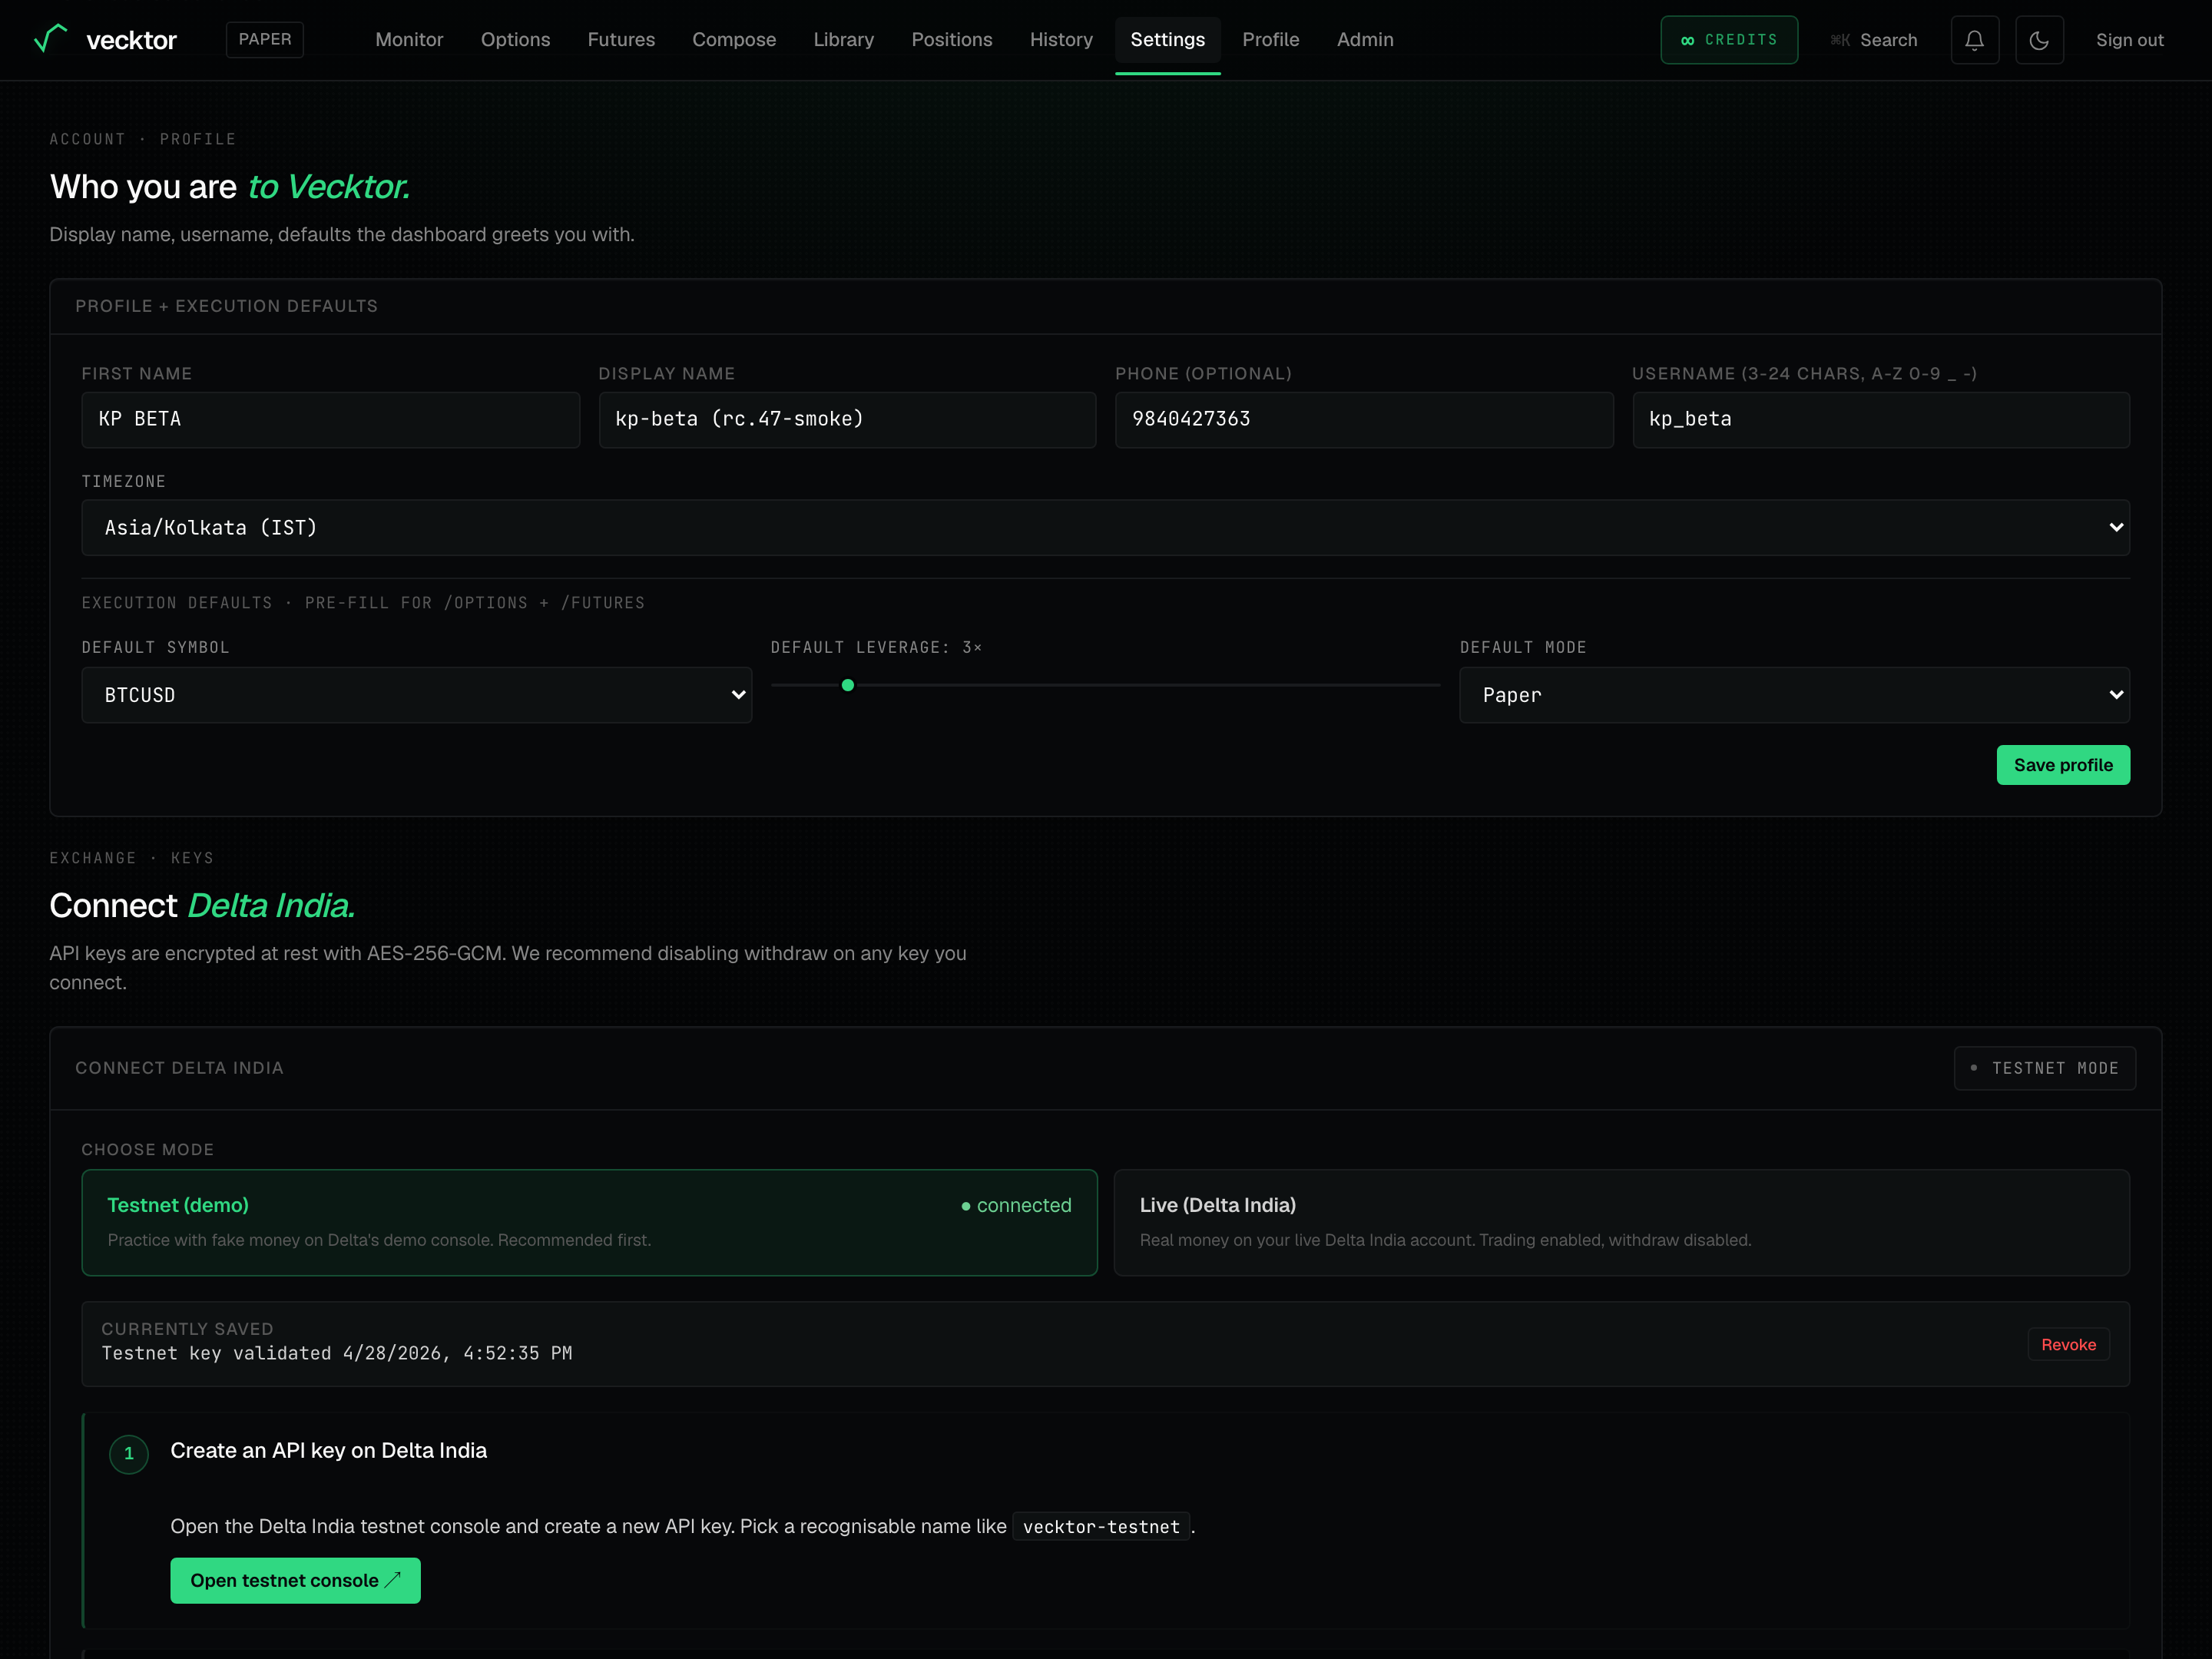
The Profile + execution defaults card holds who you are and the values that pre-fill the trade screens, so you do not retype them every time.
- Set your First name, Display name (the placeholder reads Shown in bot logs), and Phone (optional).
- Pick a Username. The field label is Username (3-24 chars, a-z 0-9 _ -). It must be unique, so a taken name shows an inline error.
- Choose your Timezone. Asia/Kolkata (IST) is the default.
- Under the Execution defaults heading (it reads pre-fill for /options + /futures), set Default symbol and Default leverage (the slider label reads Default leverage: N×, range 1 to 20).
- Click Save profile.
 1Unique username2Mode that pre-fills the trade screens3Save profile
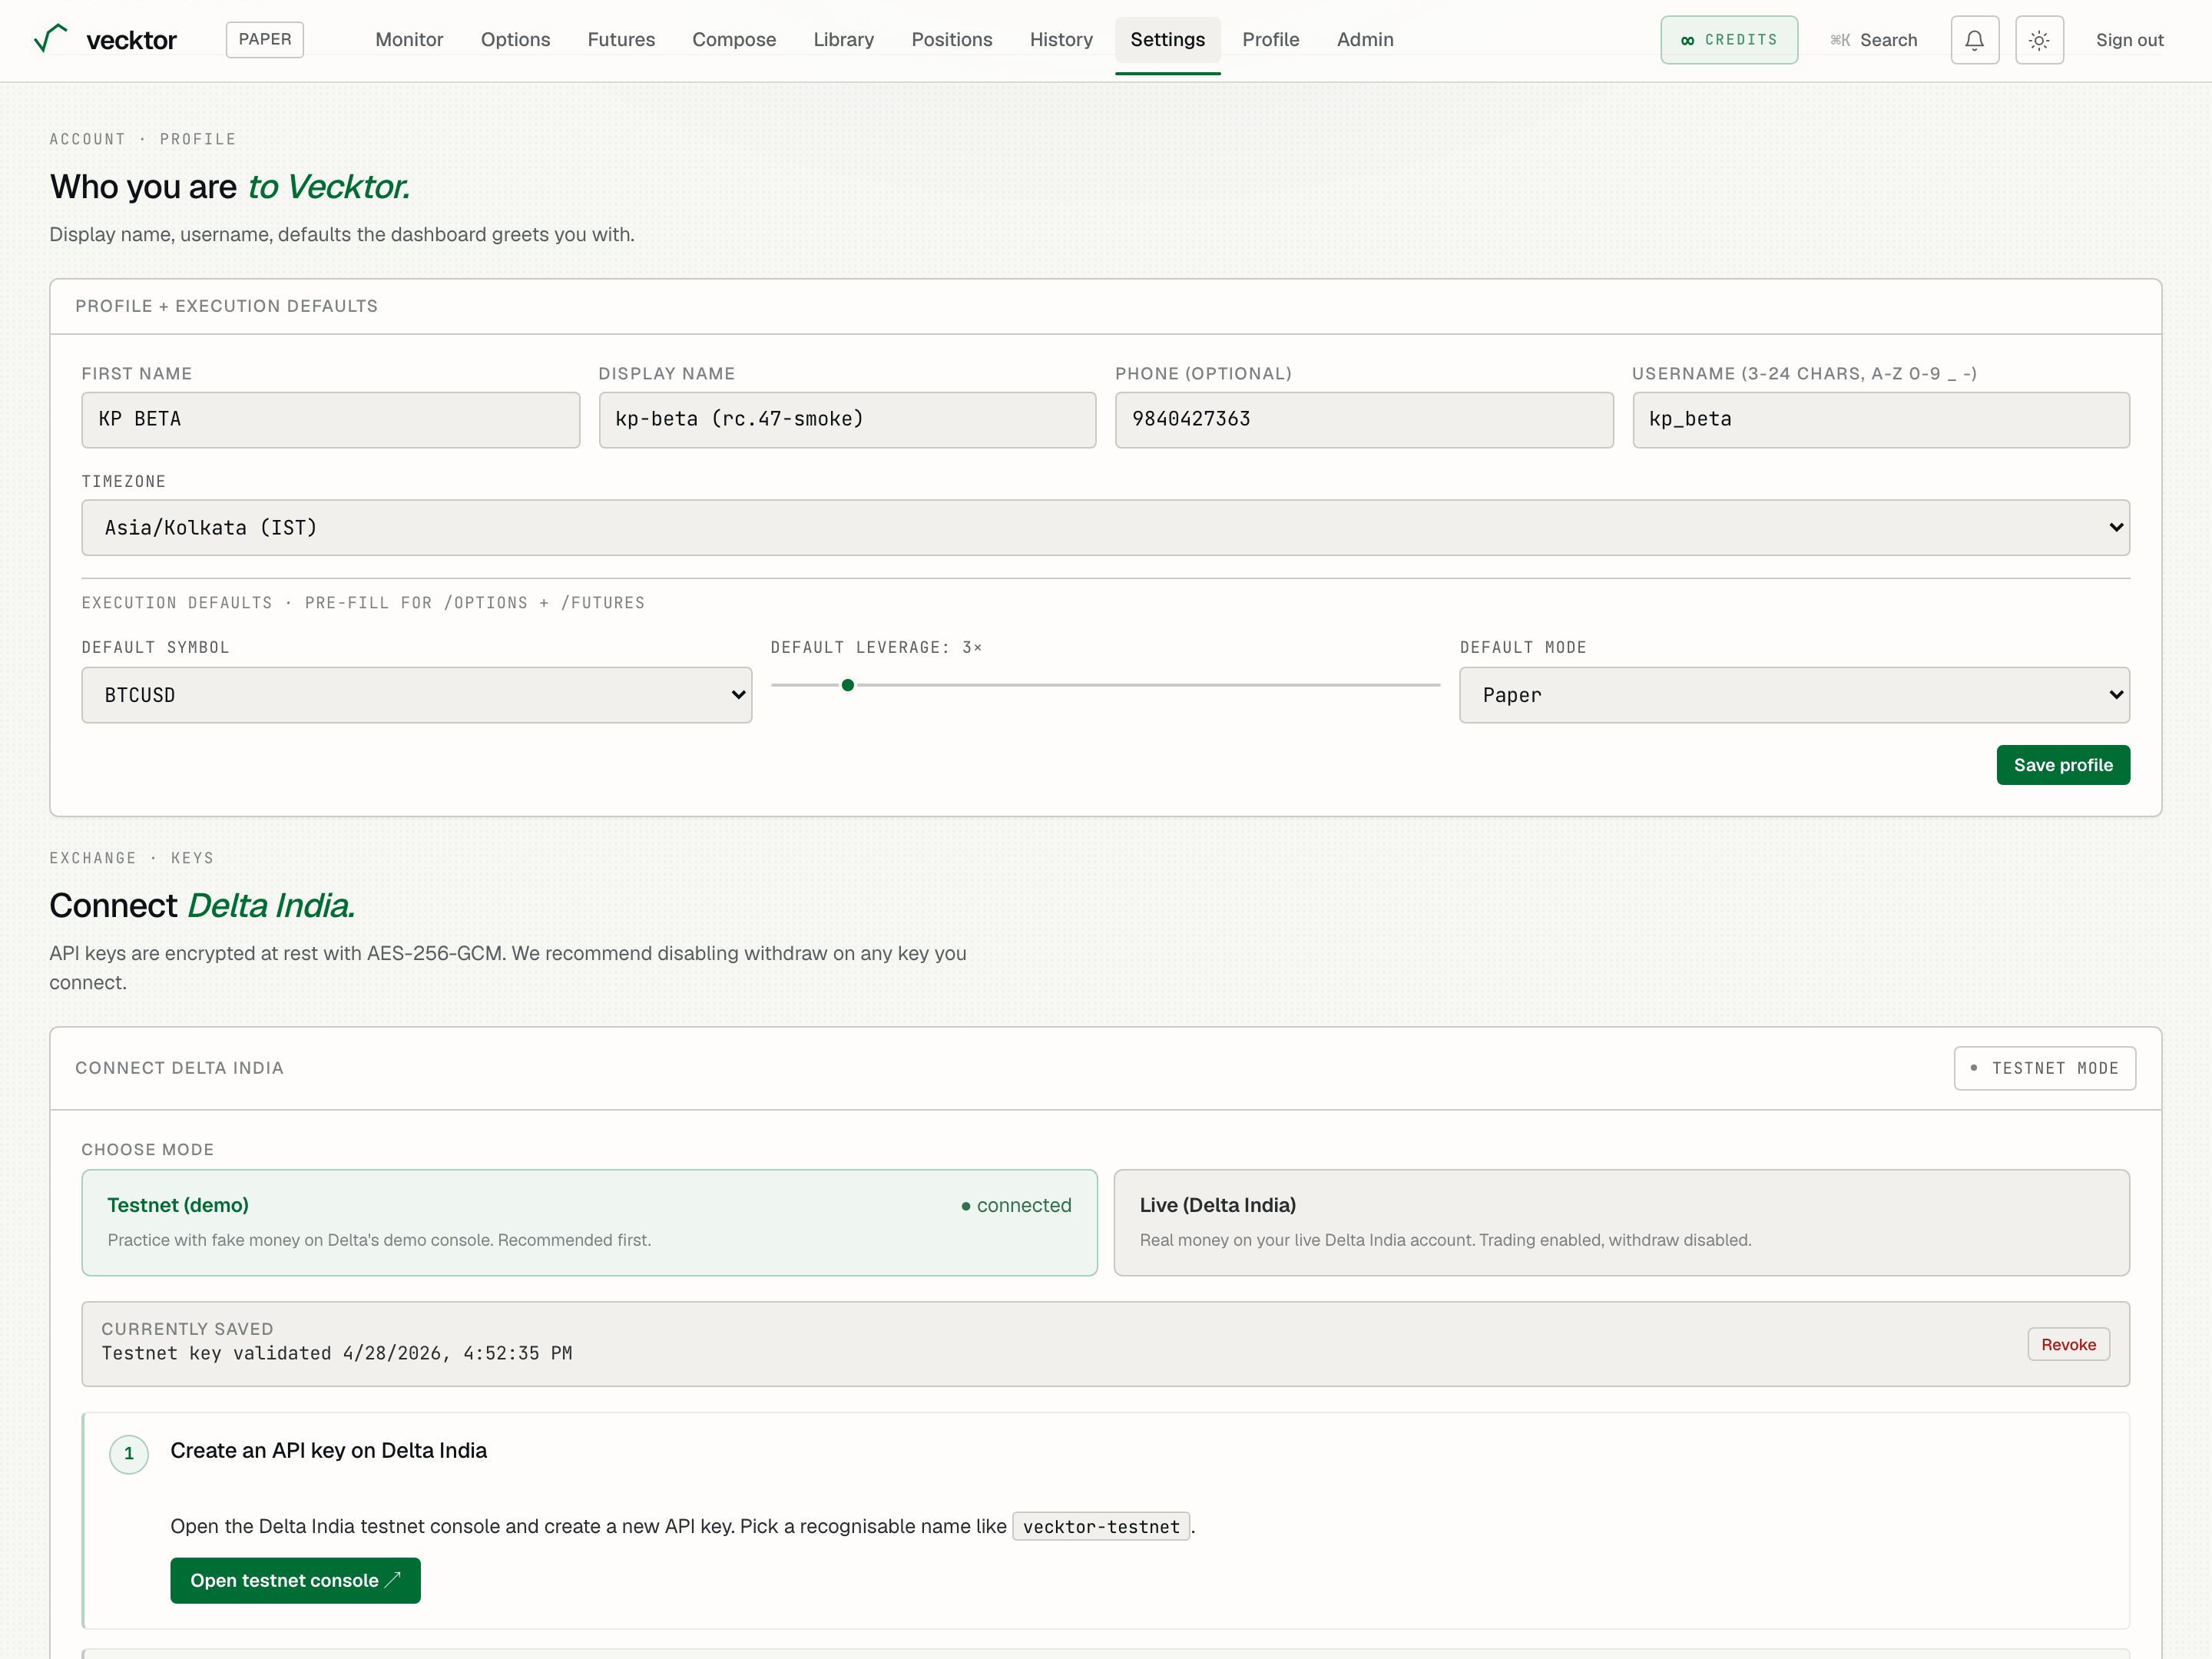
- Pick a unique username (3-24 chars, a-z 0-9 _ -)
- Set a default symbol (pre-fills /options + /futures)
- Set default leverage (slider 1 to 20)
- Click Save profile
Connect Delta India
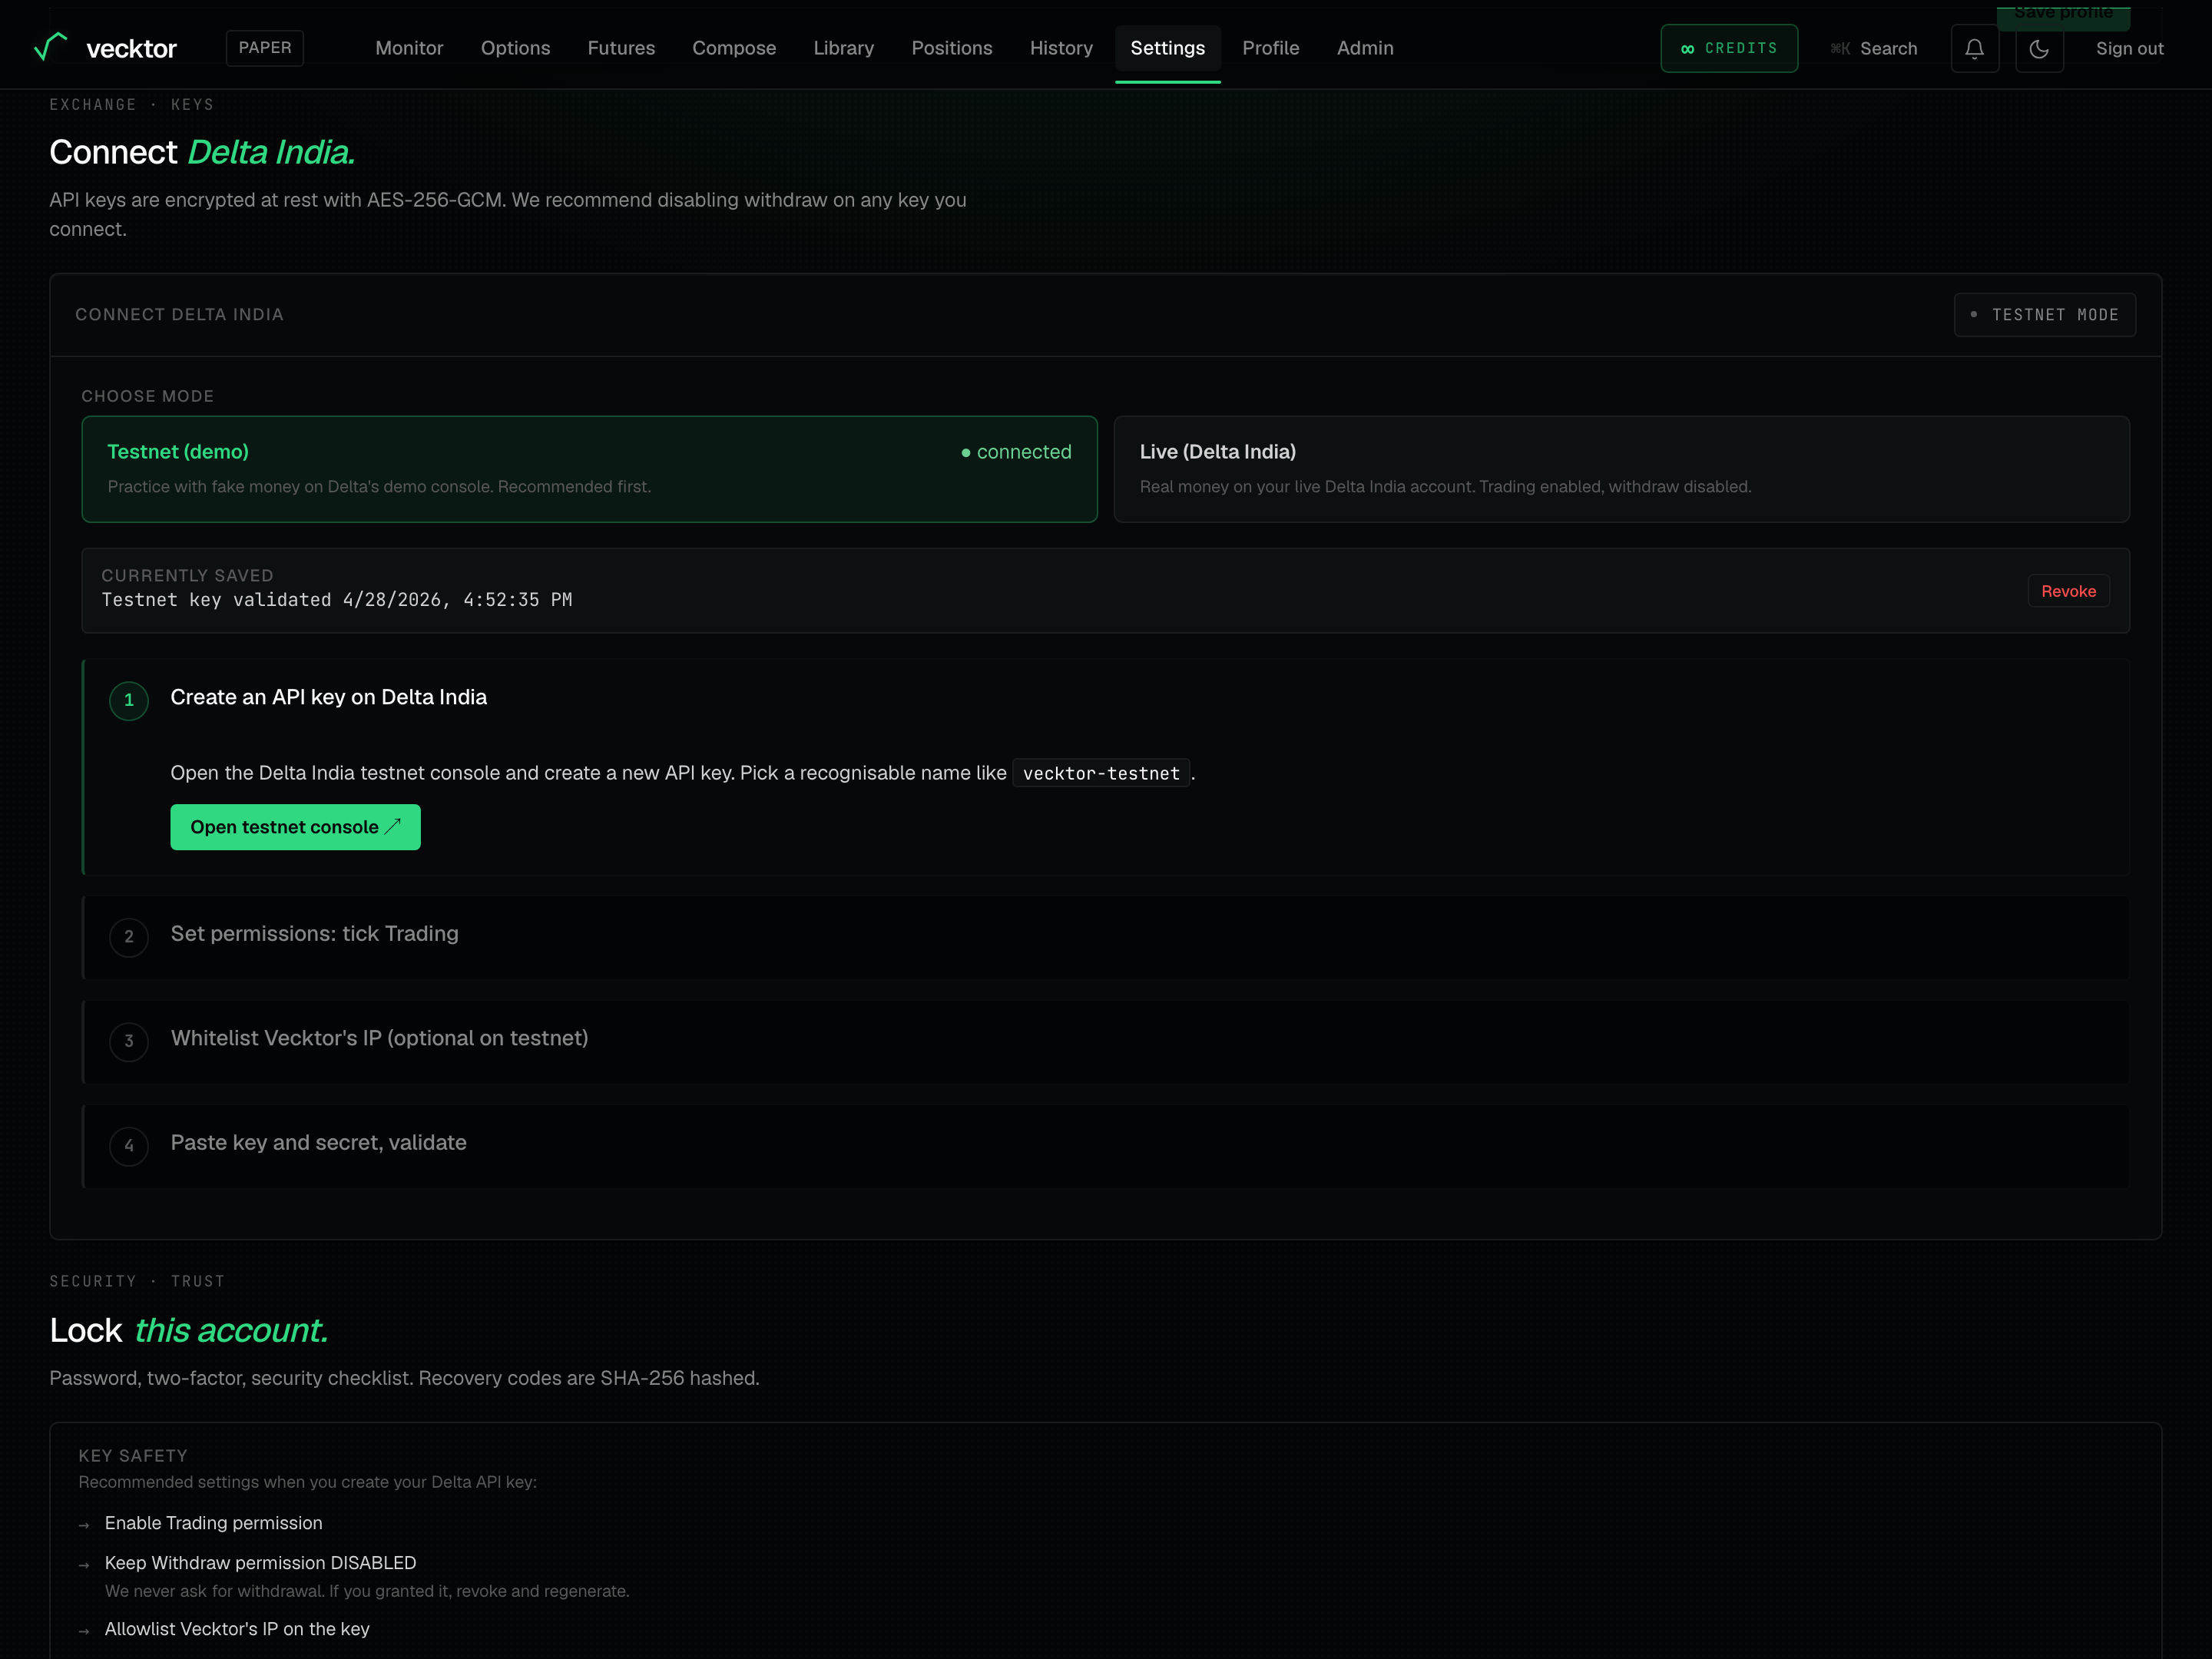
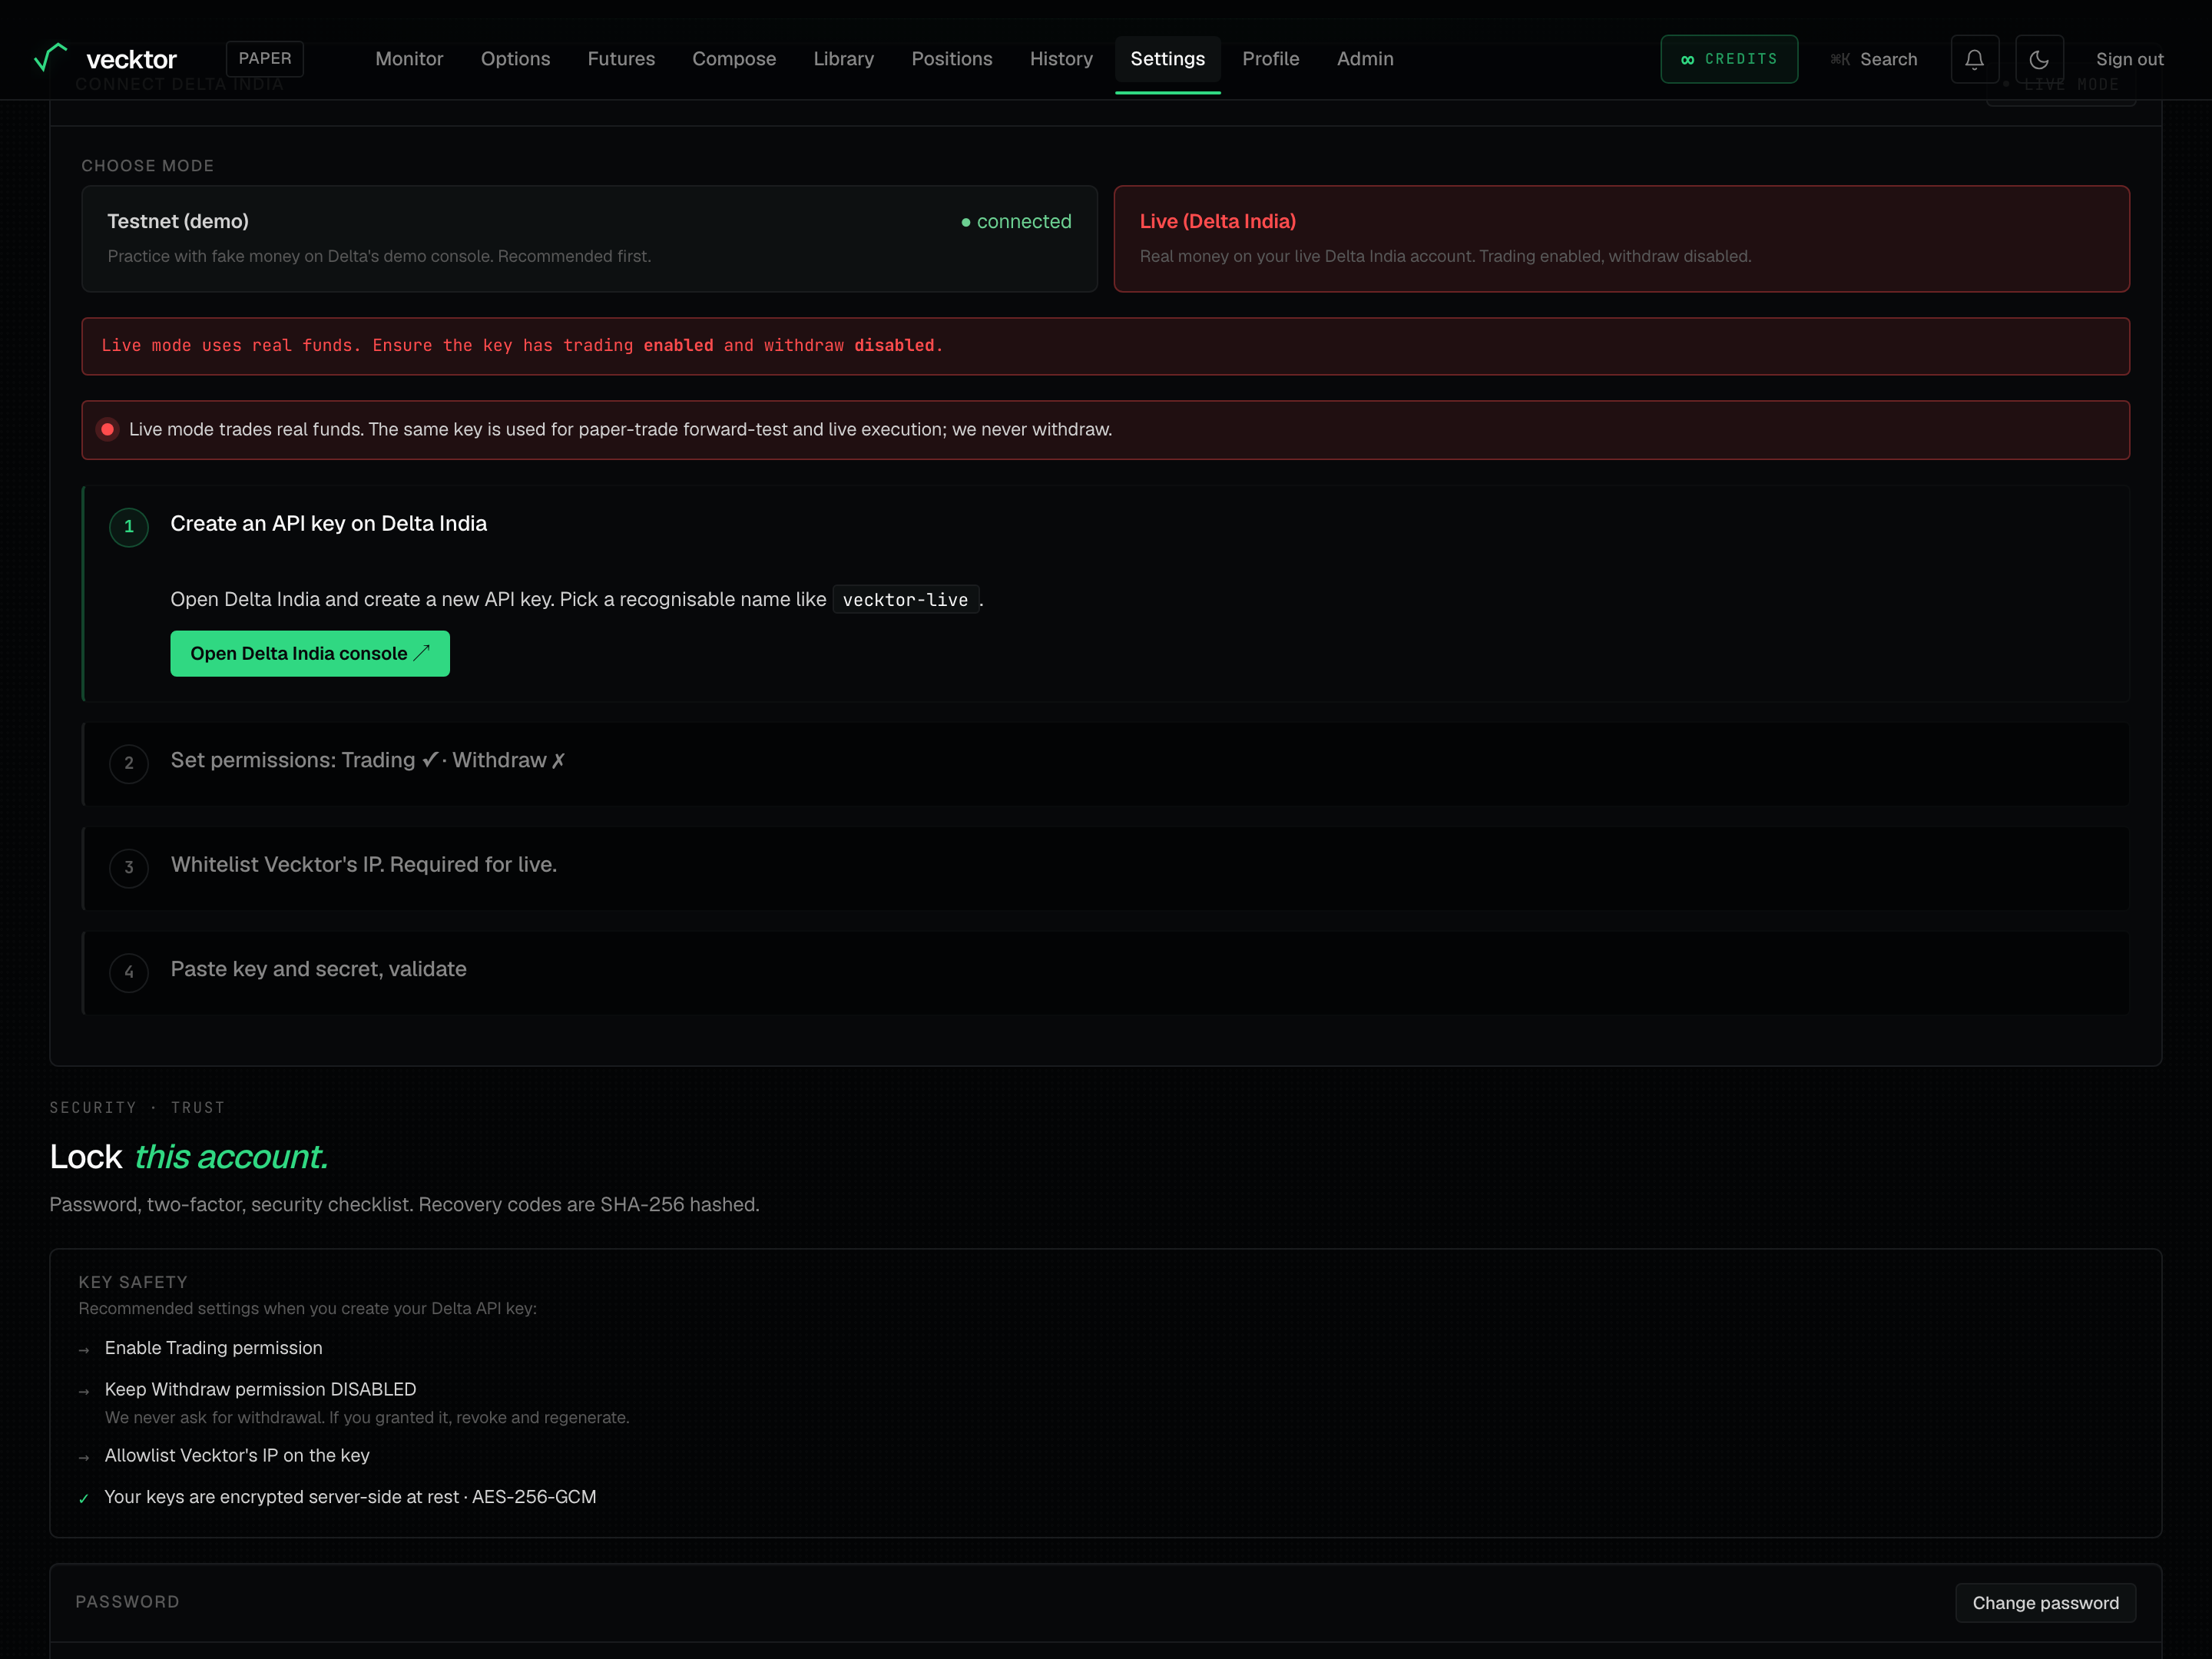
The Connect Delta India card is where you paste your API keys (the credentials that let Vecktor place orders on your behalf). Prove your strategy in backtest first, then start live with a small size. Vecktor never holds your money; the keys only place orders.
- Step 1 (Create an API key on Delta India): click Open Delta India console to create a new API key on Delta. Name it something clear like vecktor-live.
- Step 2 (Set permissions): Tick Trading and keep Withdraw disabled. Vecktor never withdraws. Click Done. Next.
- Step 3 (Whitelist Vecktor's IP): copy the vecktor outbound ip with the Copy button and add it to the key's whitelist on Delta. On live this is required, or Delta rejects every order with IP_NOT_WHITELISTED. Click Whitelisted. Next.
- Step 4 (Paste key and secret, validate): paste the API key and API secret, then click Save & validate. Vecktor tests the connection before saving, so a broken key is never stored.
 1Connect your Delta India keys2Step 1: create the key on Delta
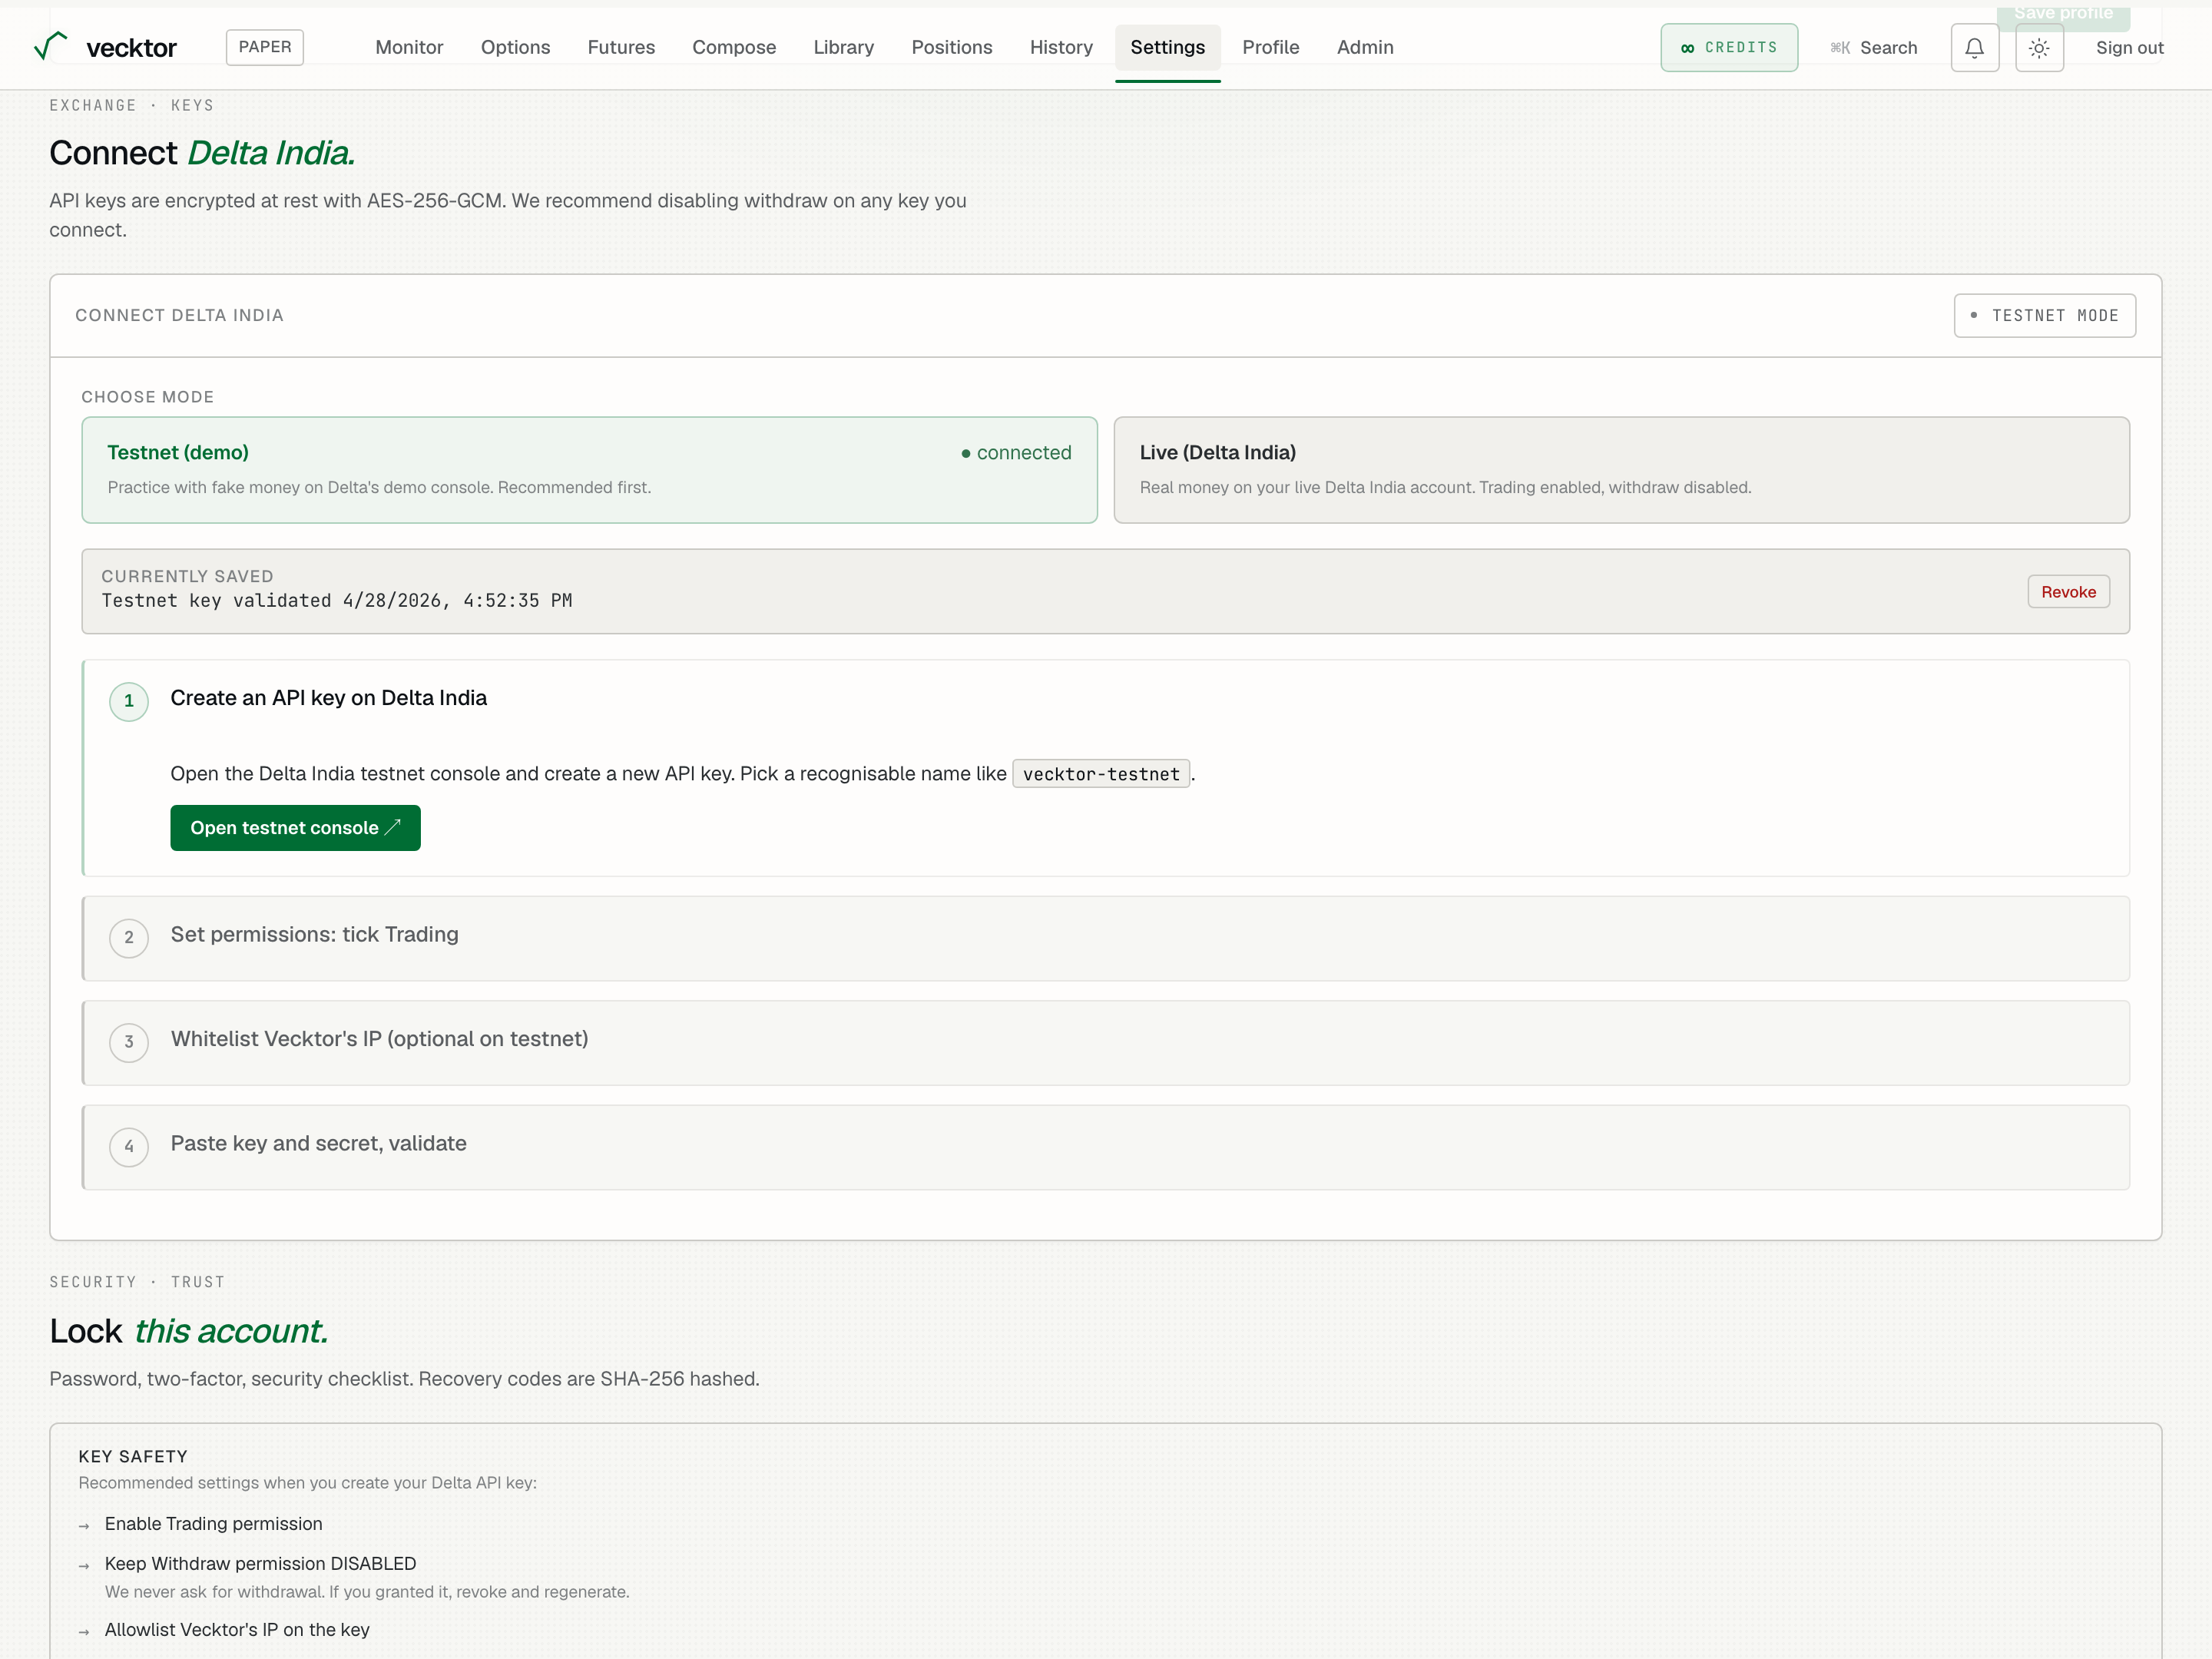
- Connect live keys (start with a small size)
- Create an API key on Delta (opens Delta in a new tab)
- Tick Trading, keep Withdraw disabled (Vecktor never withdraws)
- Copy and whitelist the IP (required for live orders)
- Paste key and secret
- Click Save & validate (tested before it is saved)
Acknowledge the live-trading risk
Before your live key can be saved, you must tick a risk box acknowledging real funds are at stake.
- The Connect form is for your live Delta India keys, and a red banner reminds you that live mode uses real funds.
- Open the Risk Disclosure link and read it.
- Tick the box. It reads I have read the Risk Disclosure and accept that I am responsible for trades placed through my live Delta account. I understand I can lose more than my deposit and that backtests are not forecasts.
- The button stays disabled and reads Acknowledge risk to save until the box is ticked, then it reads Save & validate.
 1Live mode warning: real funds, trading enabled
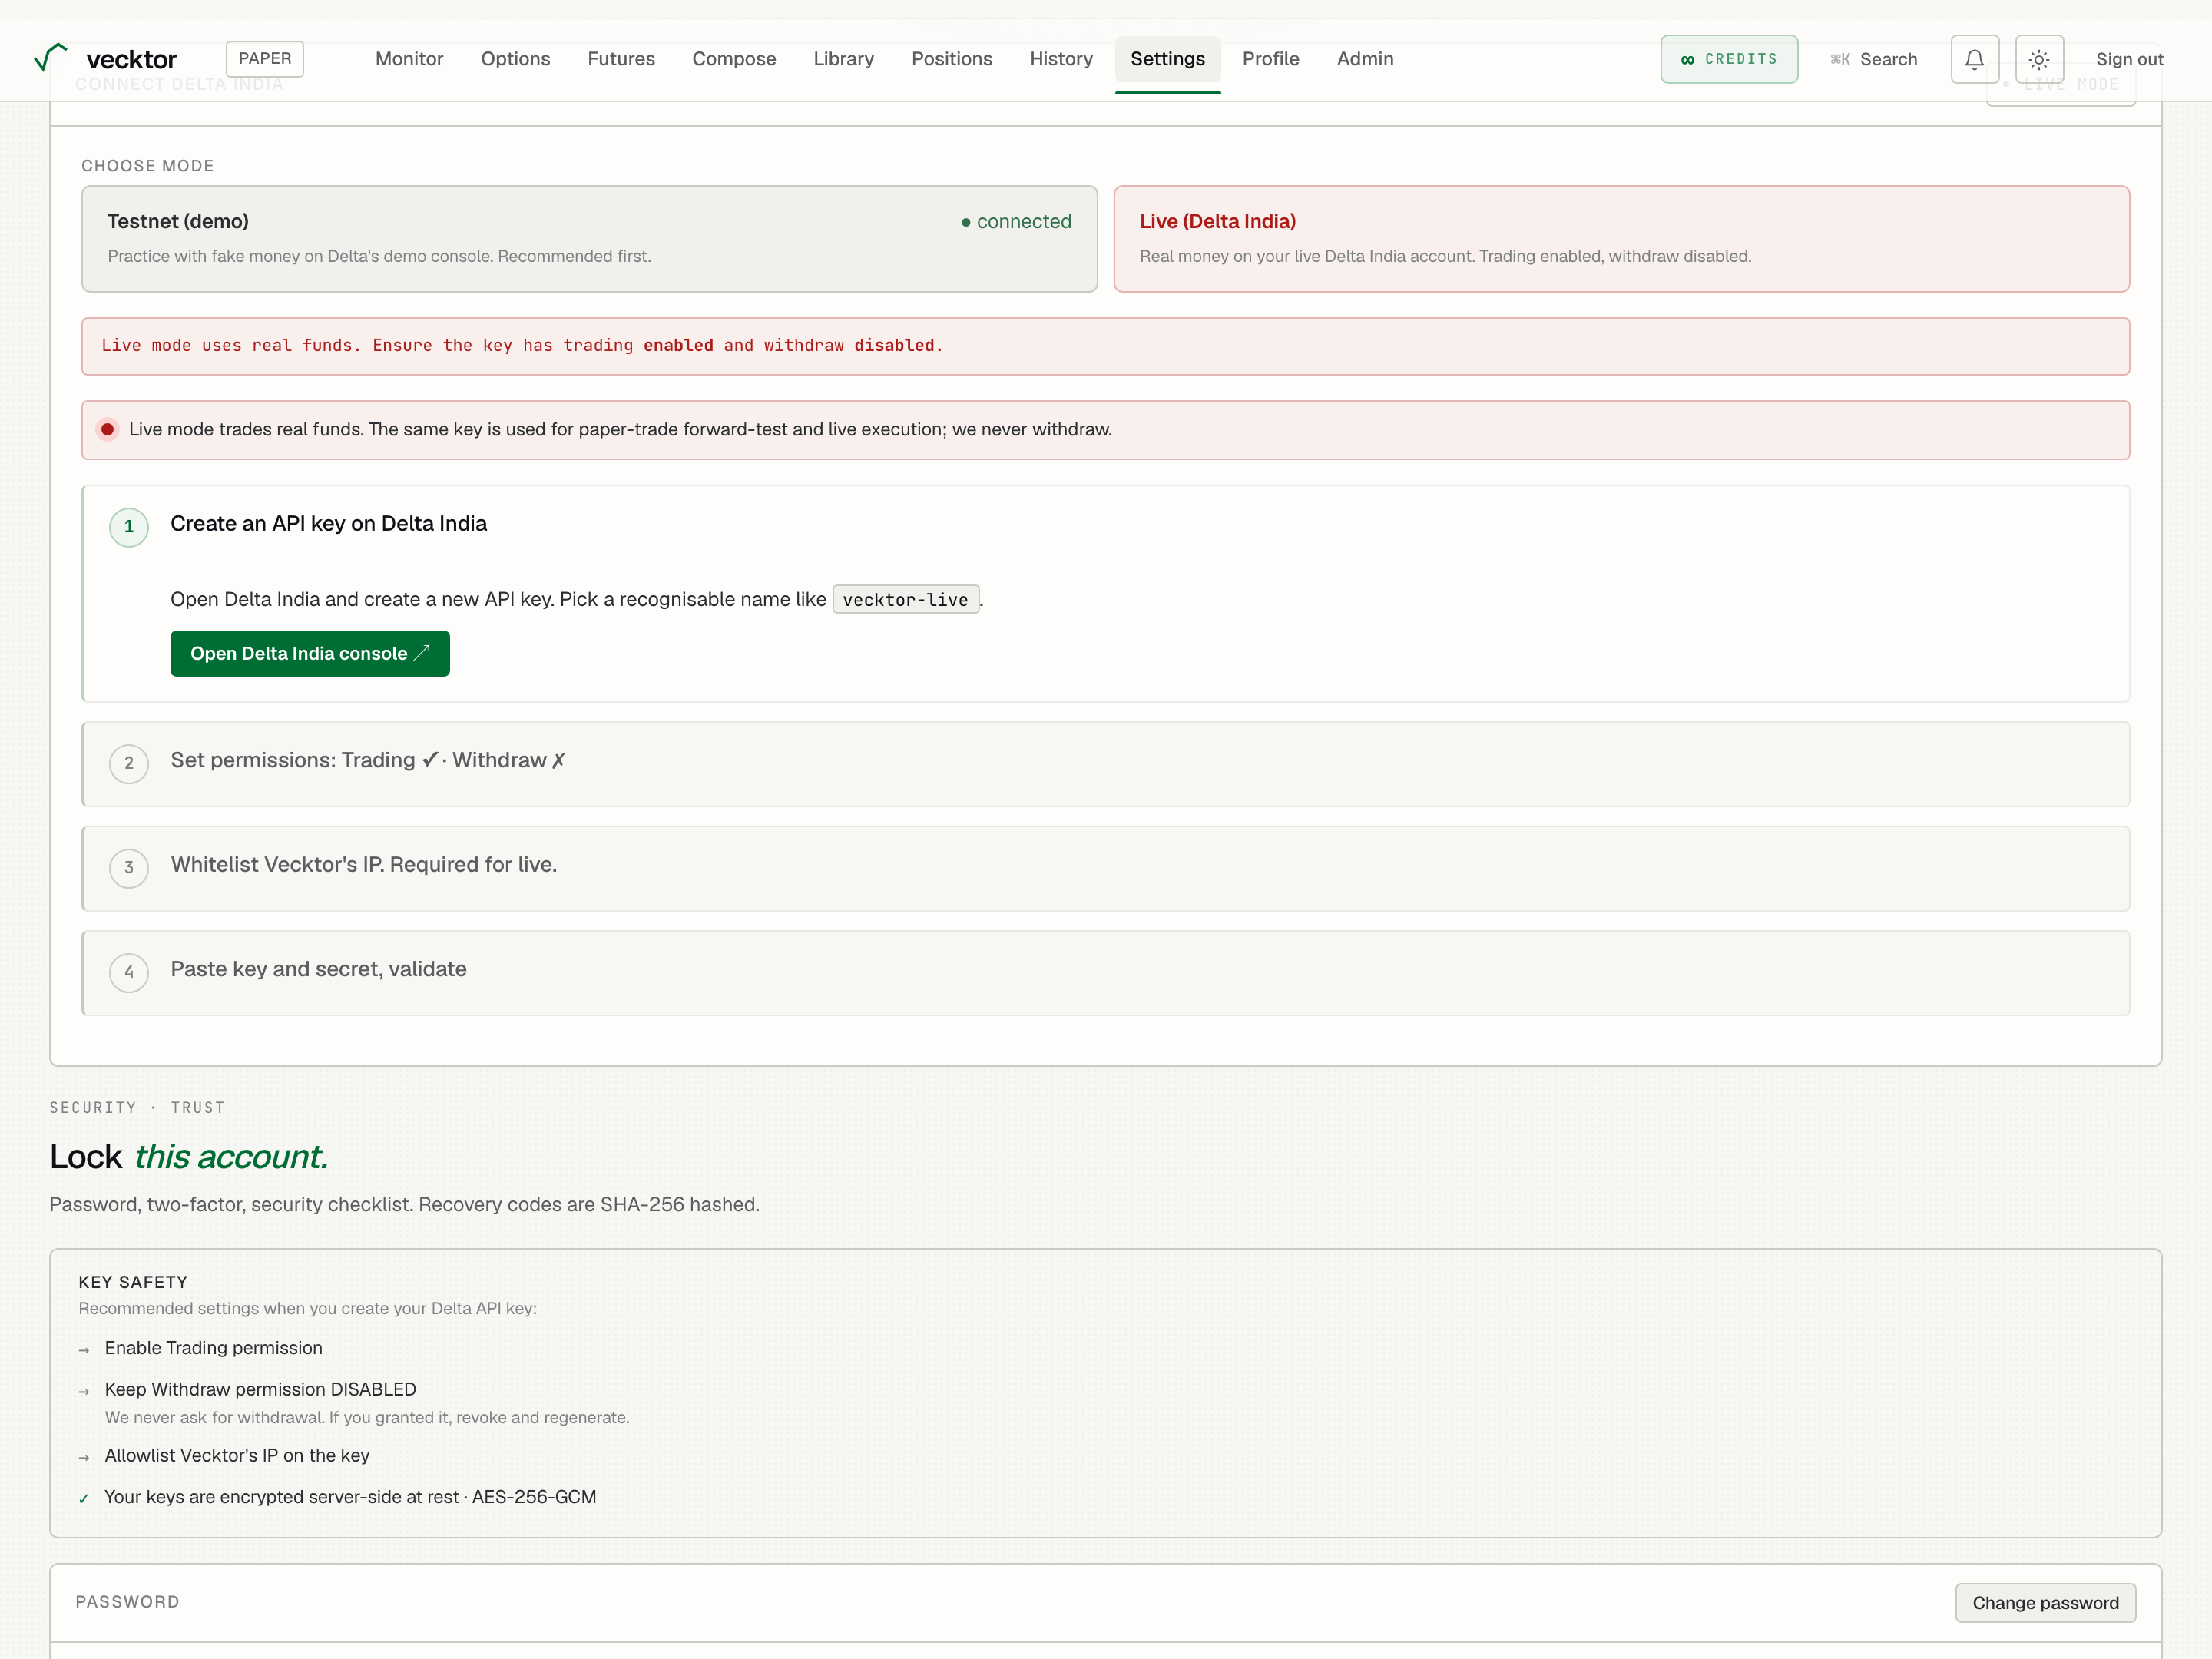
Read the key-safety checklist and change your password
The Key safety panel lists the settings we recommend on your Delta key. The Password card lets you set a new one.
- Read the Key safety rows: Enable Trading permission, Keep Withdraw permission DISABLED, Allowlist Vecktor's IP on the key. These are recommendations Vecktor cannot verify, so they show a neutral arrow, not a green tick.
- Note the one green-tick row: Your keys are encrypted server-side at rest · AES-256-GCM. That is a fact about Vecktor, so it is checked.
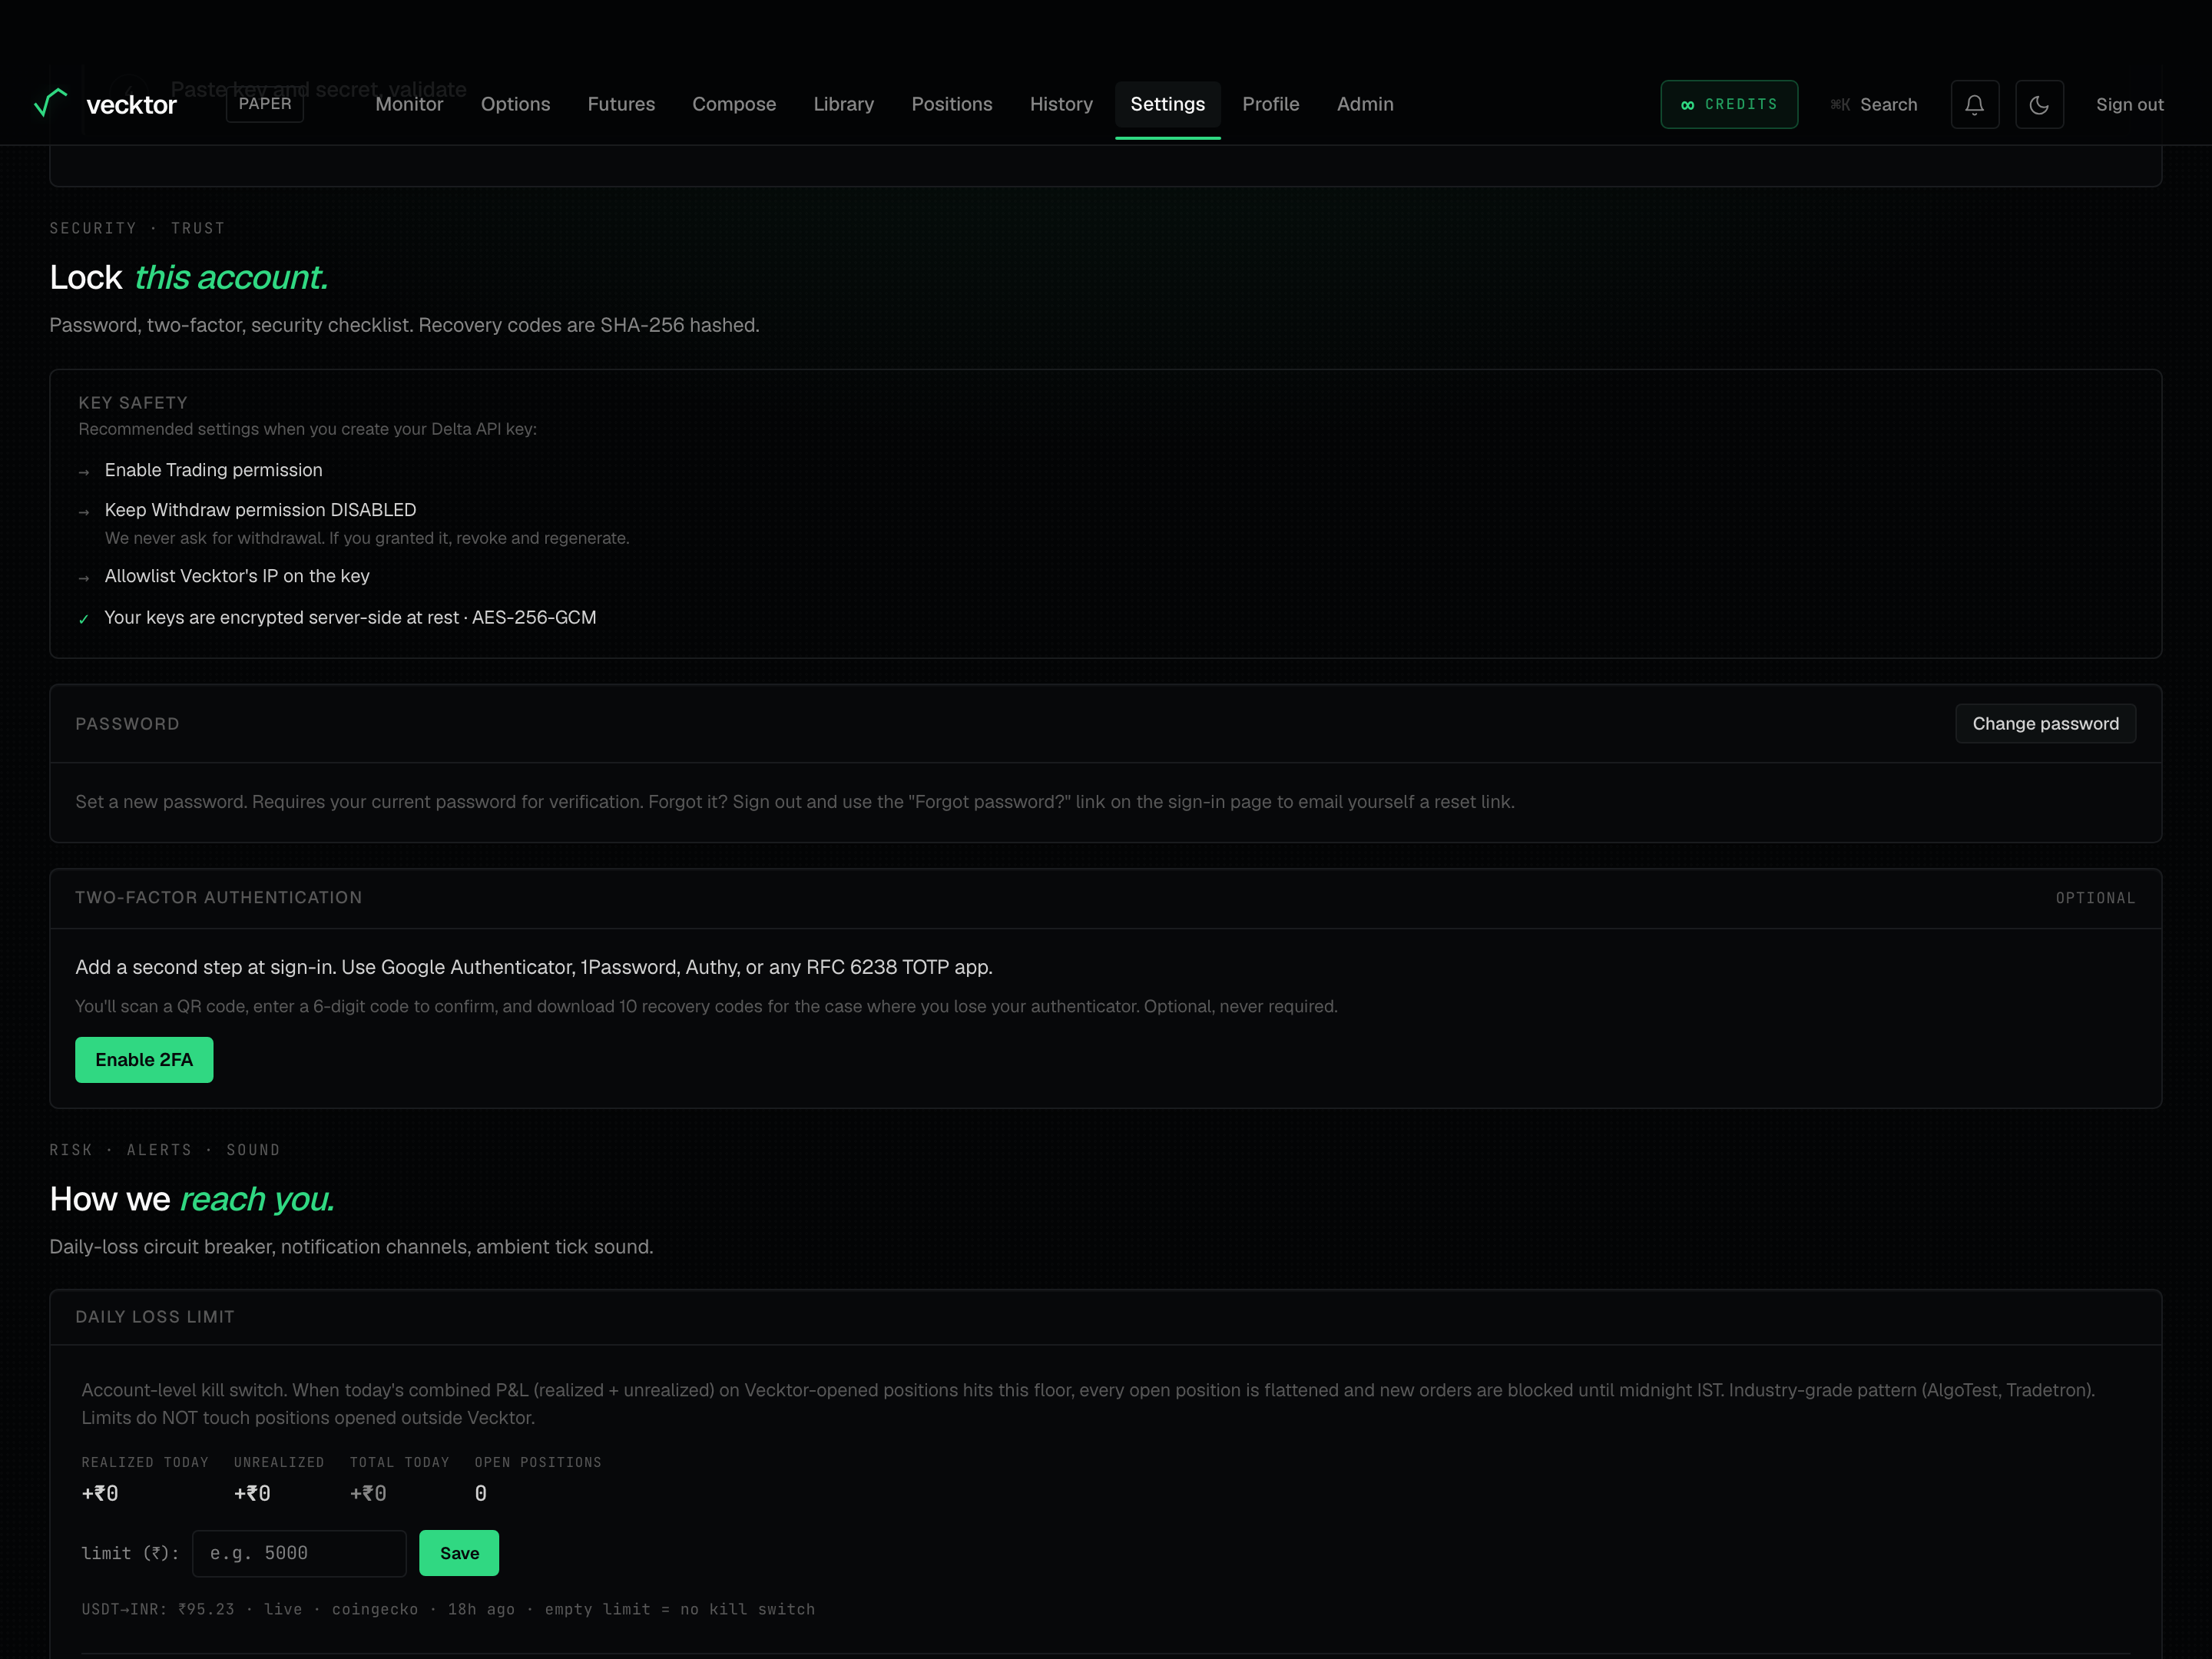
- To change your password, click Change password, fill Current password, New password (min 8 chars), and Confirm new password. Click Update password.
 1Recommended: Withdraw off2Encrypted at rest (a fact)
Turn on two-factor authentication
Two-factor authentication (a second sign-in step beyond your password) is optional but recommended. It uses any standard authenticator app.
- Click Enable 2FA.
- Step 1: scan the QR code (or paste the secret) into Google Authenticator, 1Password, Authy, or any TOTP app.
- Step 2: enter the 6-digit code your app shows, then click Verify + enable.
- Save the 10 recovery codes shown once. Use Copy all or Download .txt, store them safely, then click I've saved them.
- Later, use Regenerate recovery codes if you are running low (the old 10 stop working at once), or Disable 2FA to go back to password-only.
 1Turn on two-factor
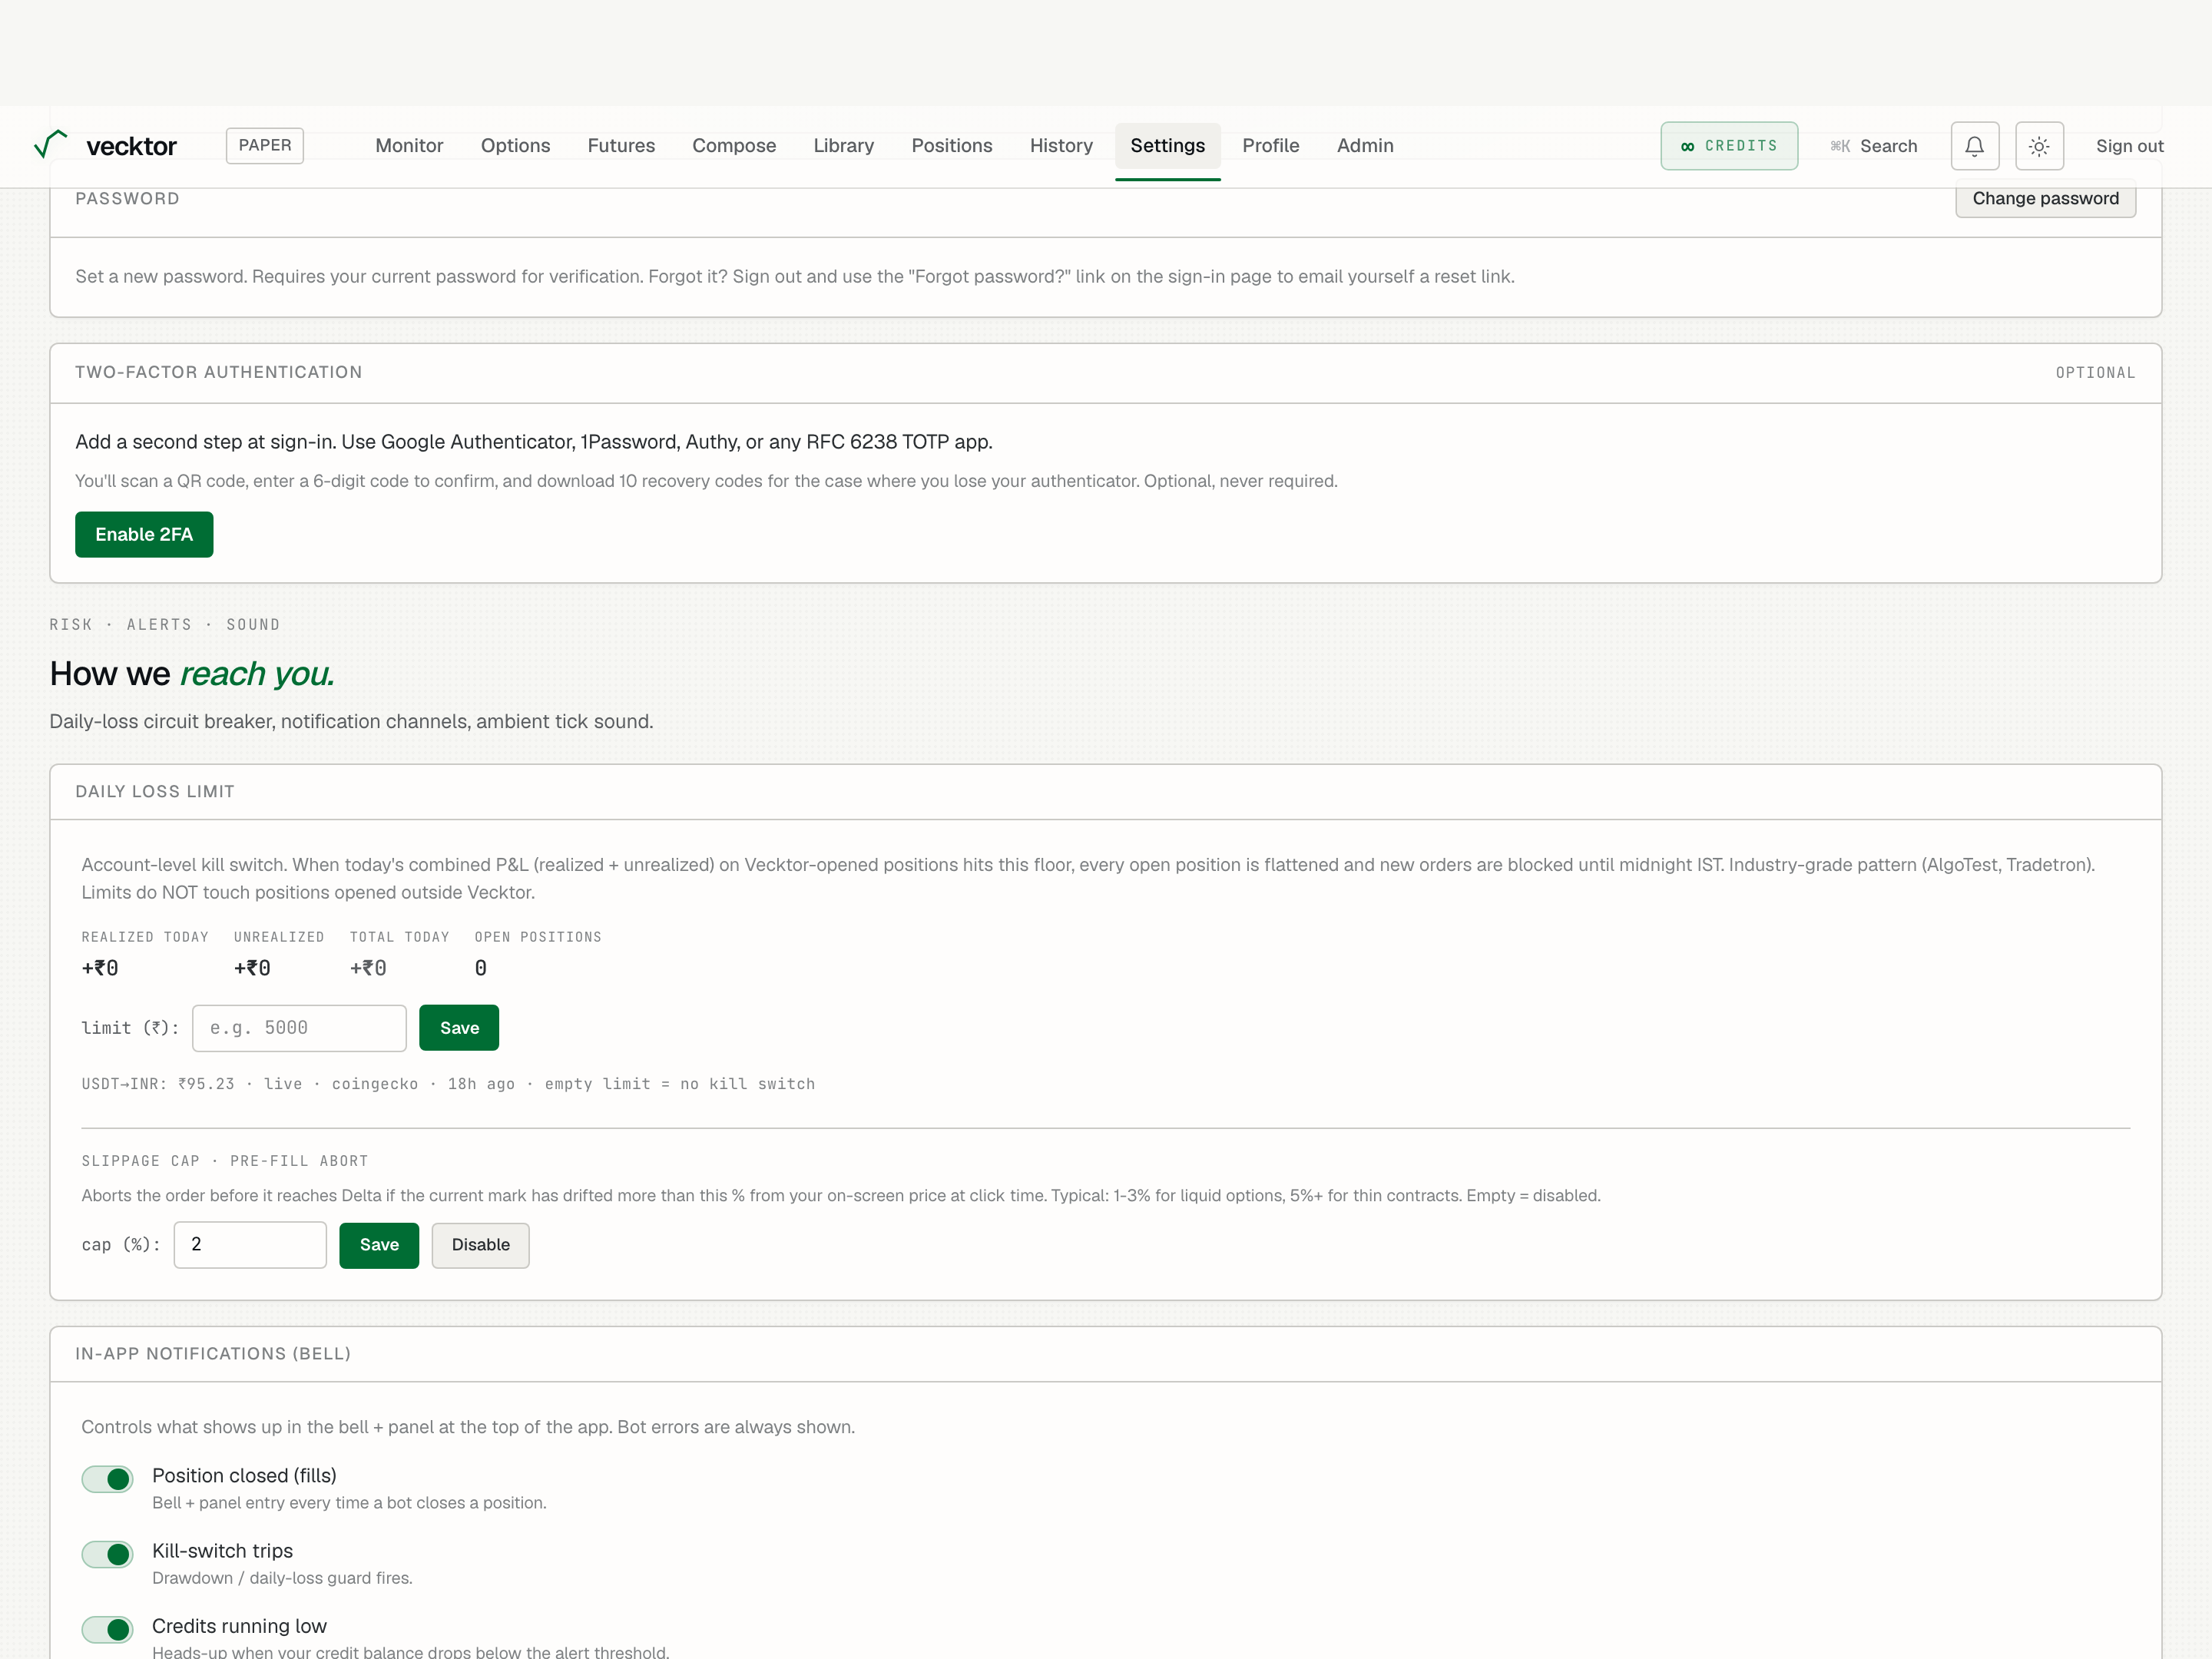
- Click Enable 2FA
- Scan the QR code (use any TOTP app)
- Enter the 6-digit code
- Click Verify + enable
- Save your recovery codes (shown only once)
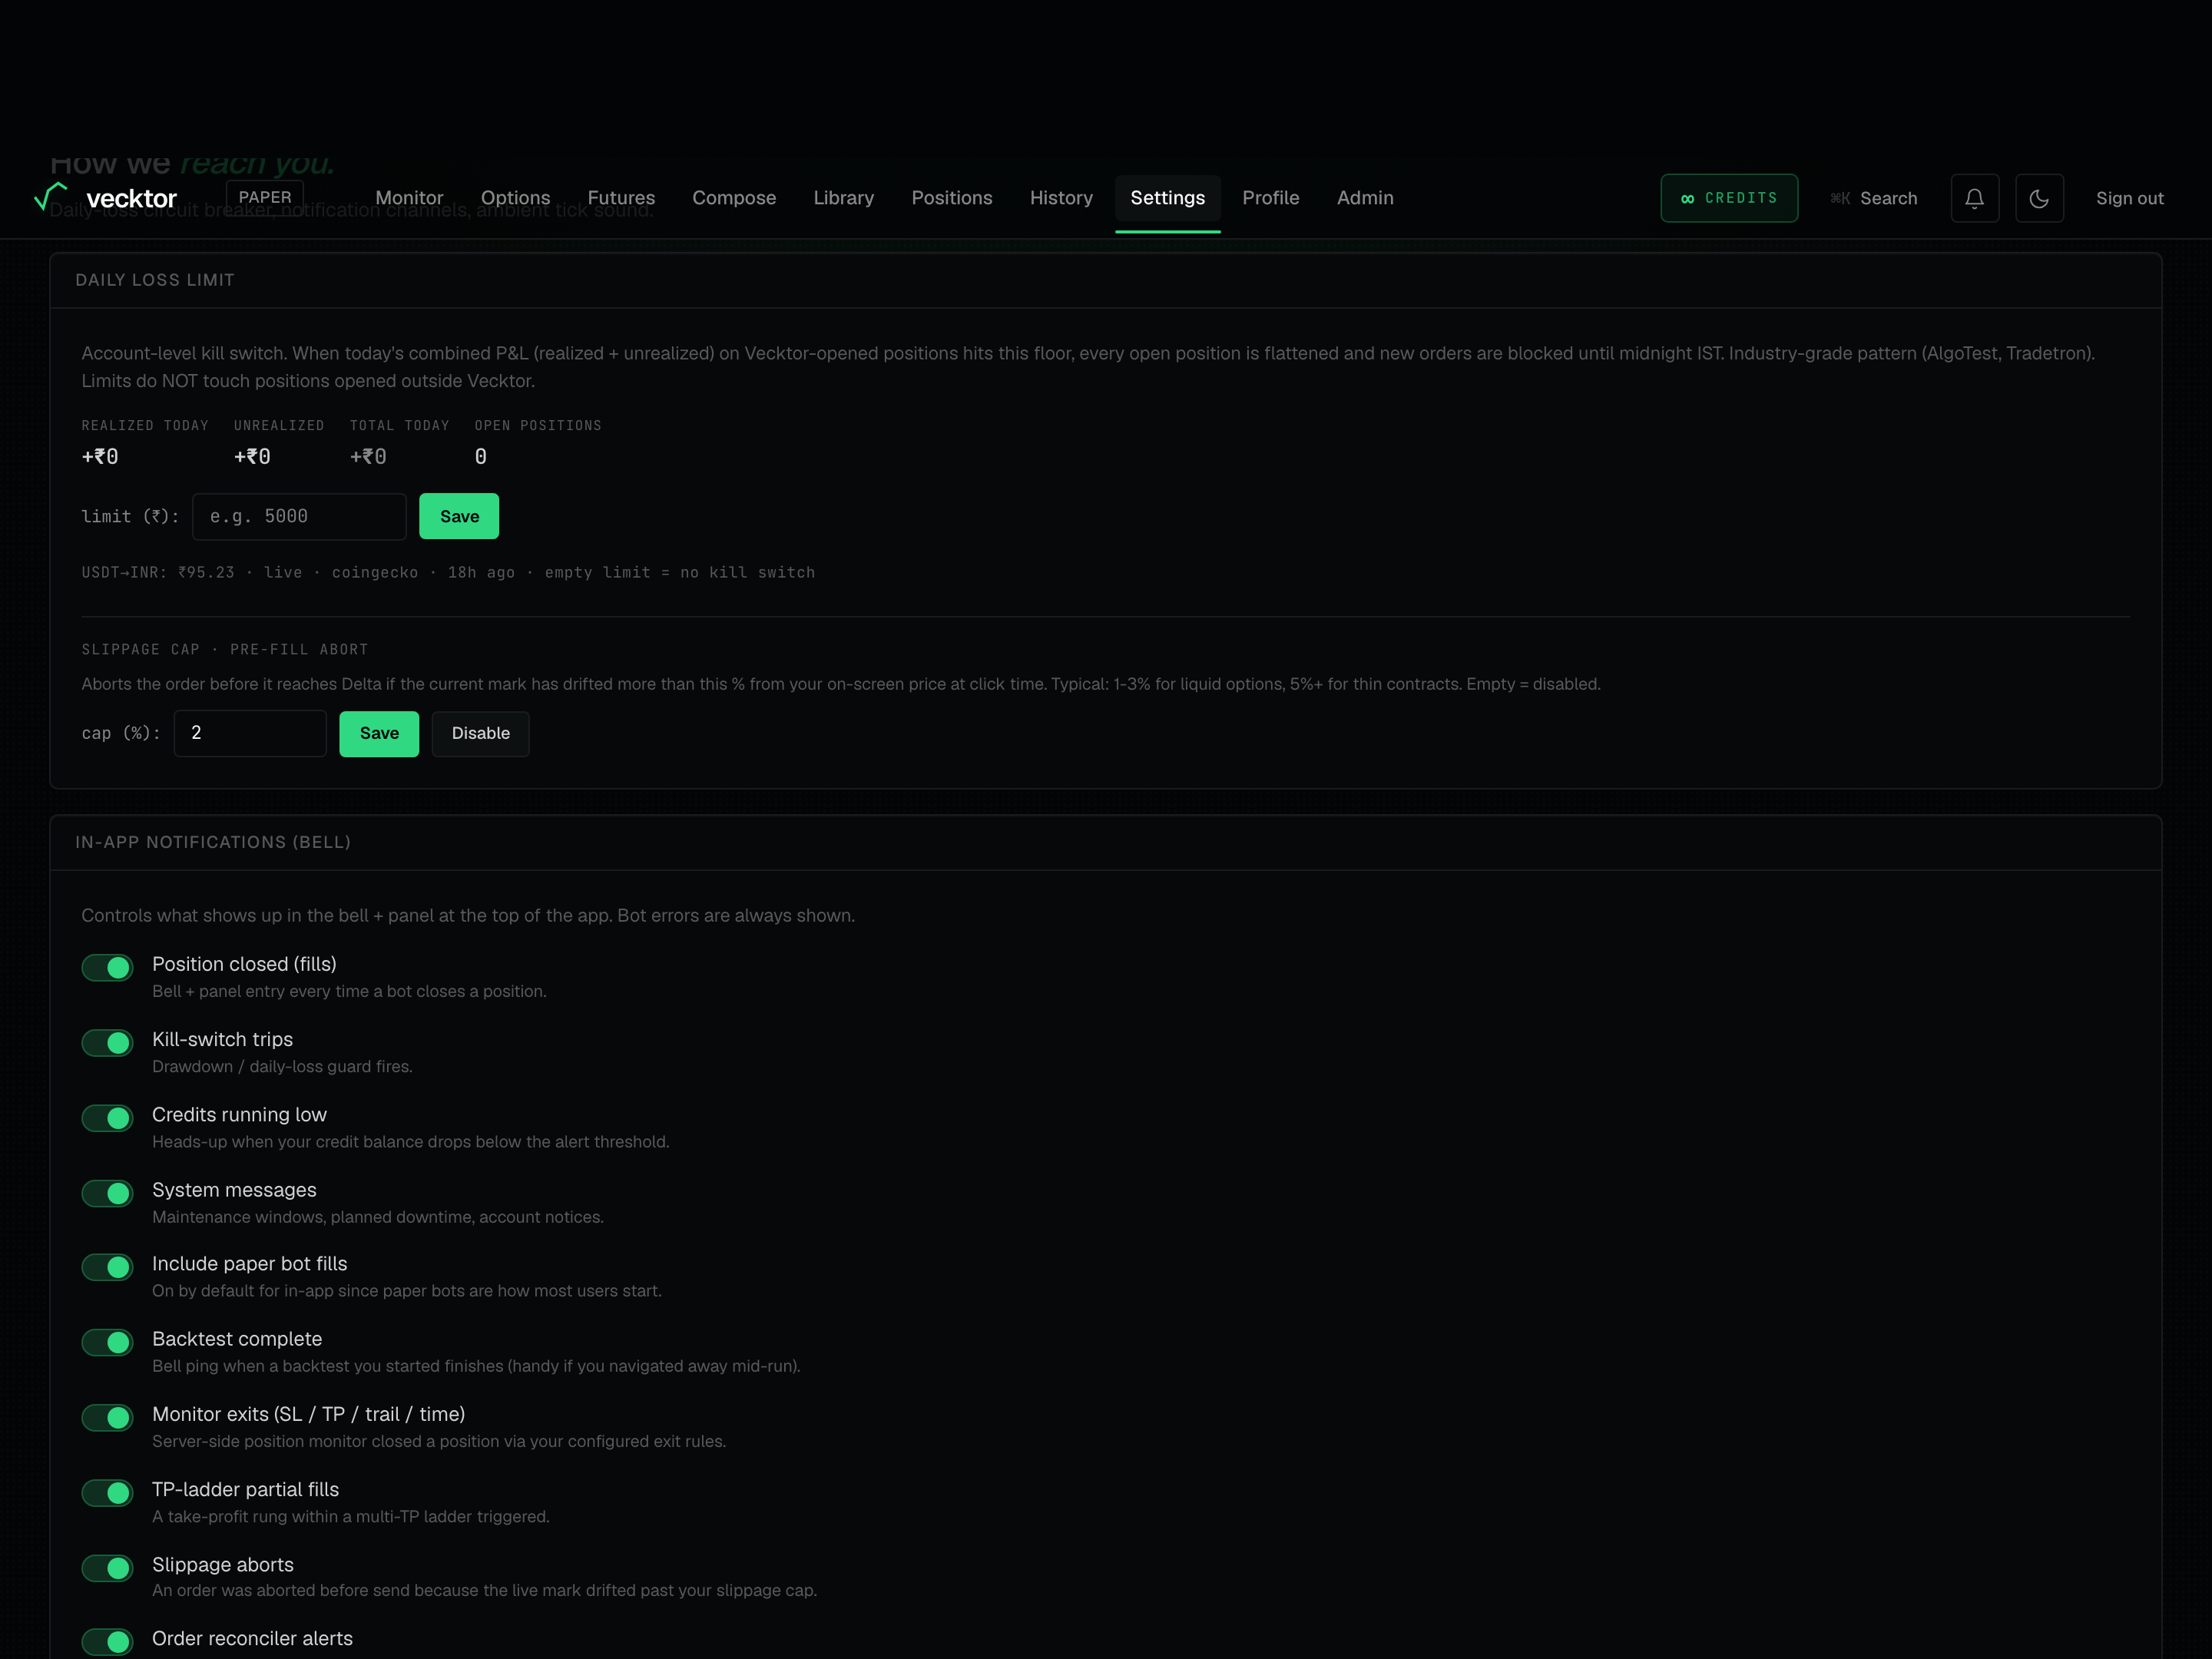
Set the daily loss limit
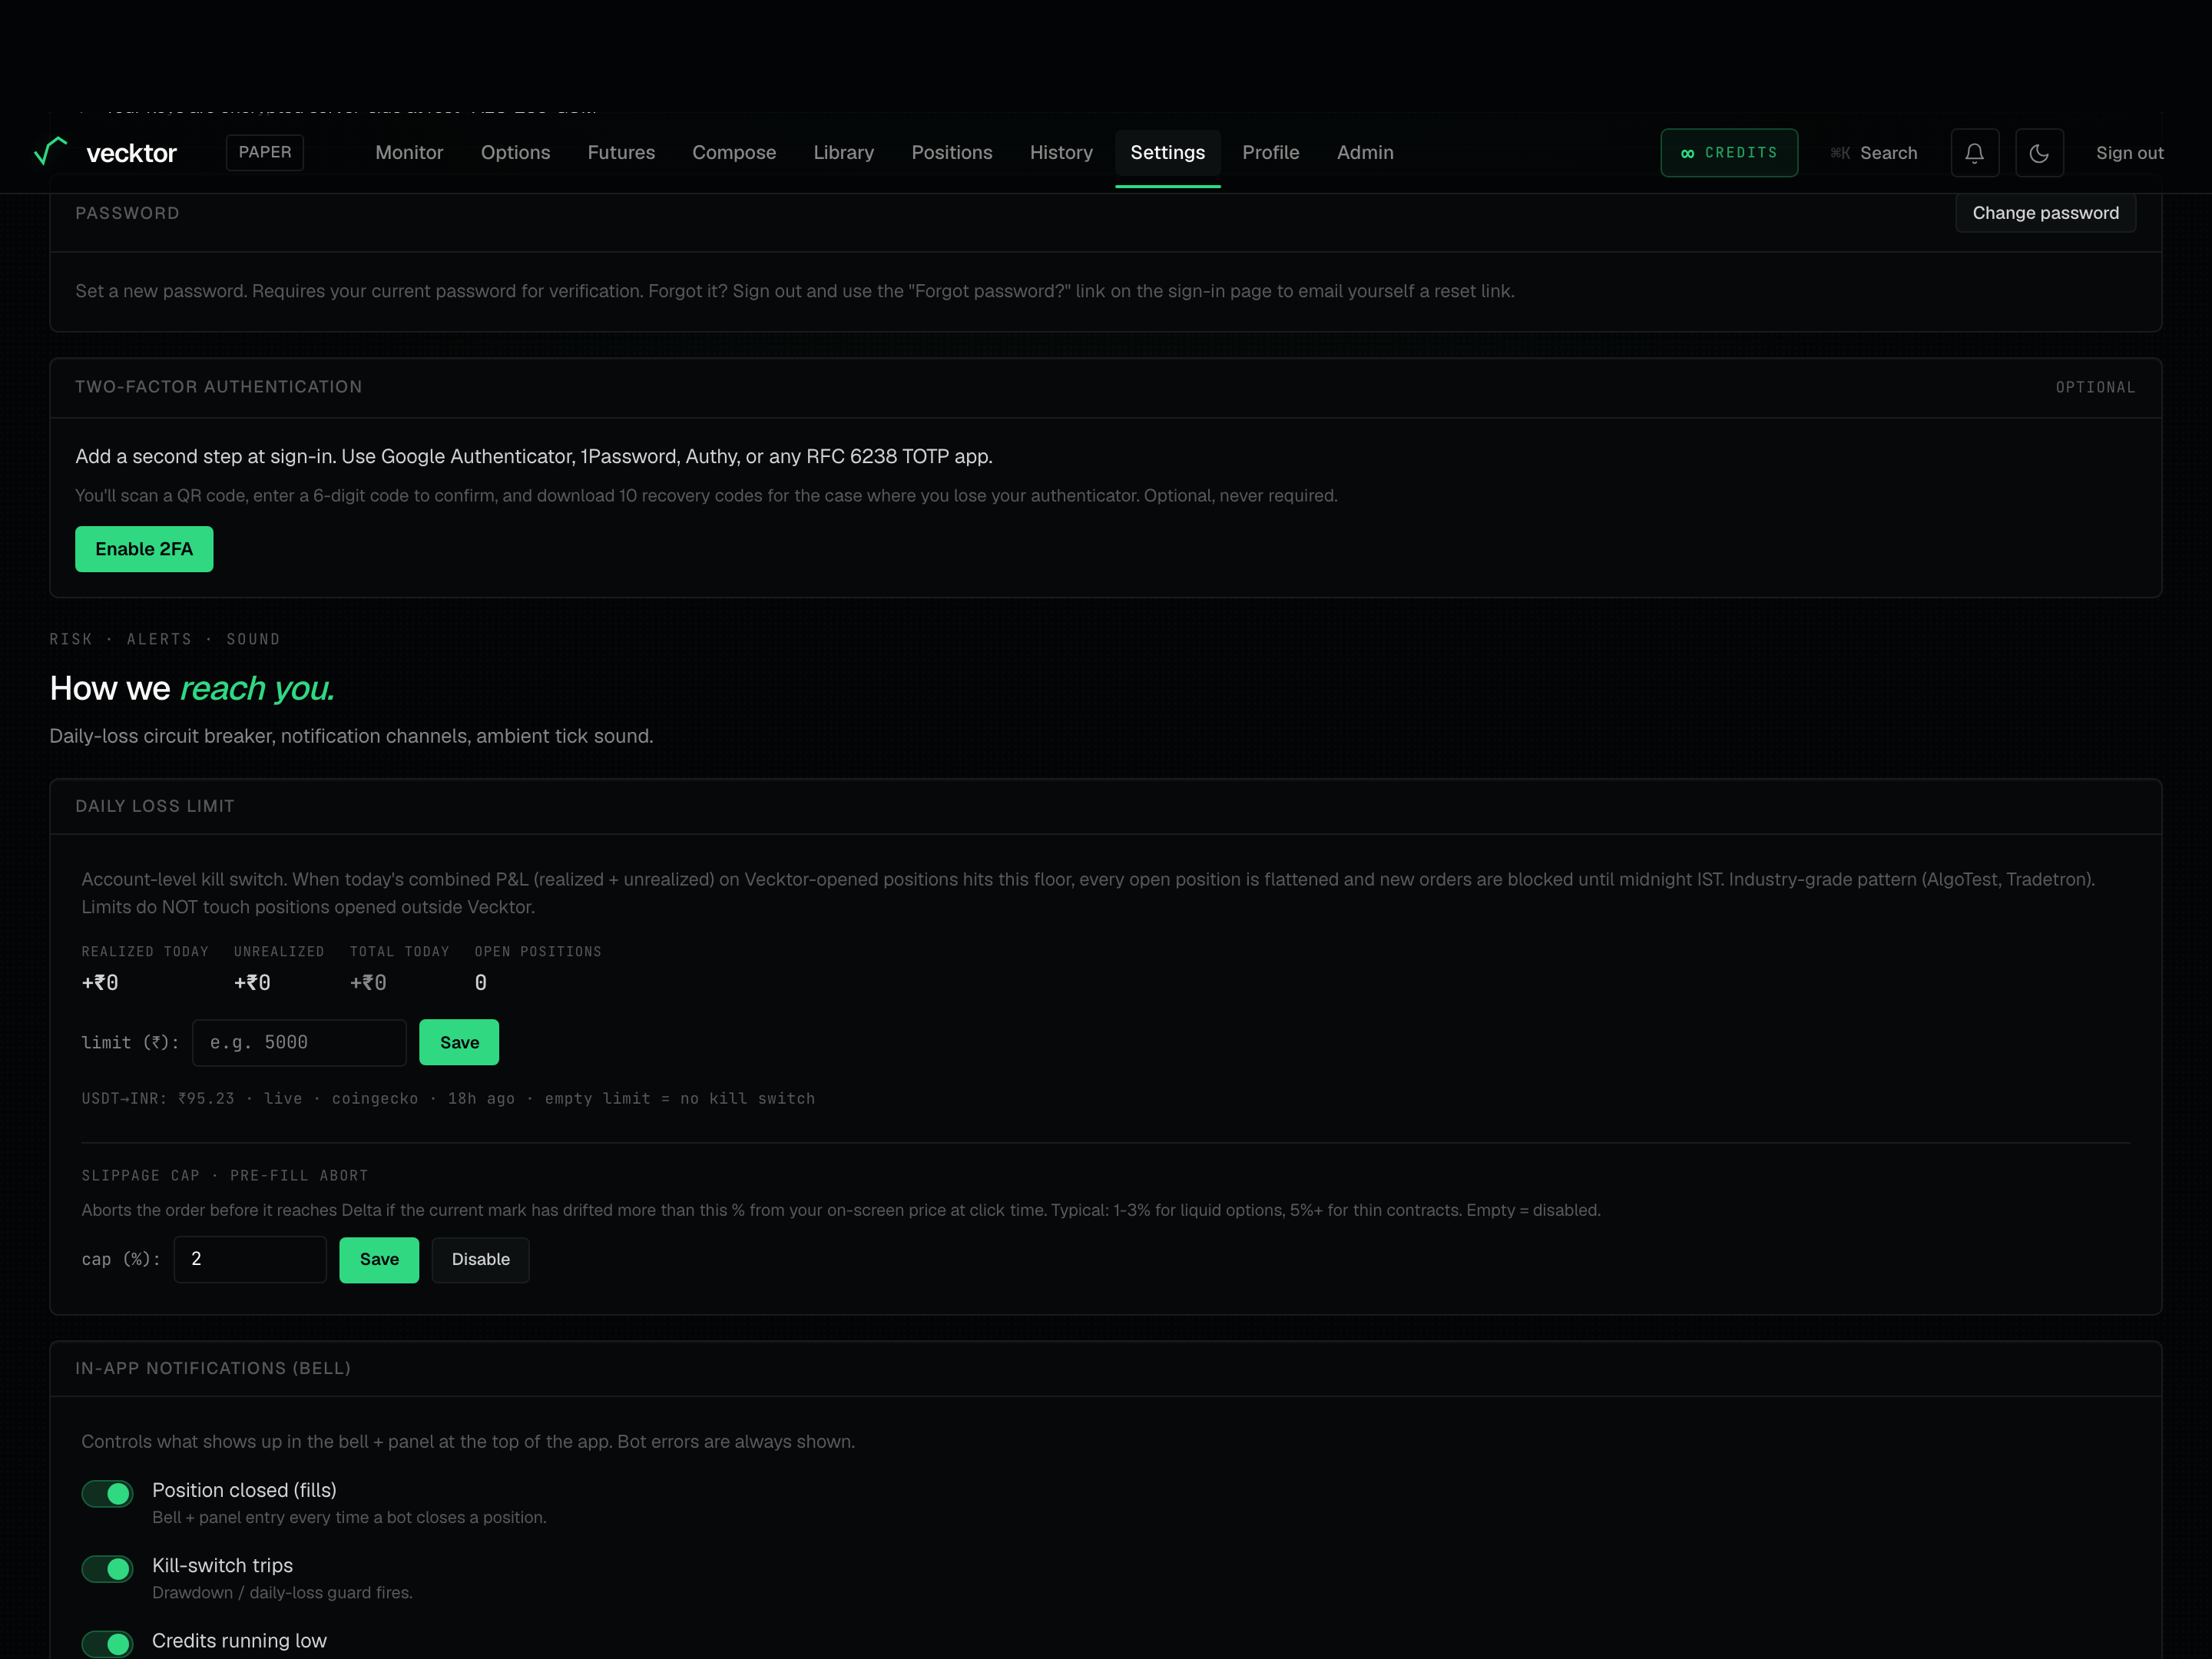
The daily loss limit is an account-level kill switch (an automatic stop). When today's combined profit and loss on Vecktor-opened positions hits the floor you set, every open position is flattened (closed) and new orders are blocked until midnight IST.
- Read the live readout: Realized today, Unrealized, Total today, and Open positions.
- Type a rupee amount in the limit field (for example 5000) and click Save.
- Leave the field empty (or click Clear) to switch the kill switch off.
- If the limit trips, a banner appears and new orders are blocked. Click Override cooldown only if you accept the risk; the cooldown auto-resets at midnight IST regardless.
 1Live combined P&L today2Type a rupee floor, then Save
- Read today's total P&L (realized plus unrealized)
- Type a rupee floor (e.g. 5000)
- Click Save (arms the kill switch)
- Empty it to turn off (or click Clear)
Set the slippage cap
The slippage cap (slippage is the gap between your expected price and the real fill) sits just under the daily loss limit. It aborts an order before it reaches Delta if the price has moved too far since you clicked.
- Type a percent in the cap field (for example 2).
- Click Save.
- Use about 1 to 3 percent for liquid options and 5 percent or more for thin (lightly traded) contracts.
- Leave it empty (or click Disable) to turn the abort off.
 1Abort cap (0 to 50%)
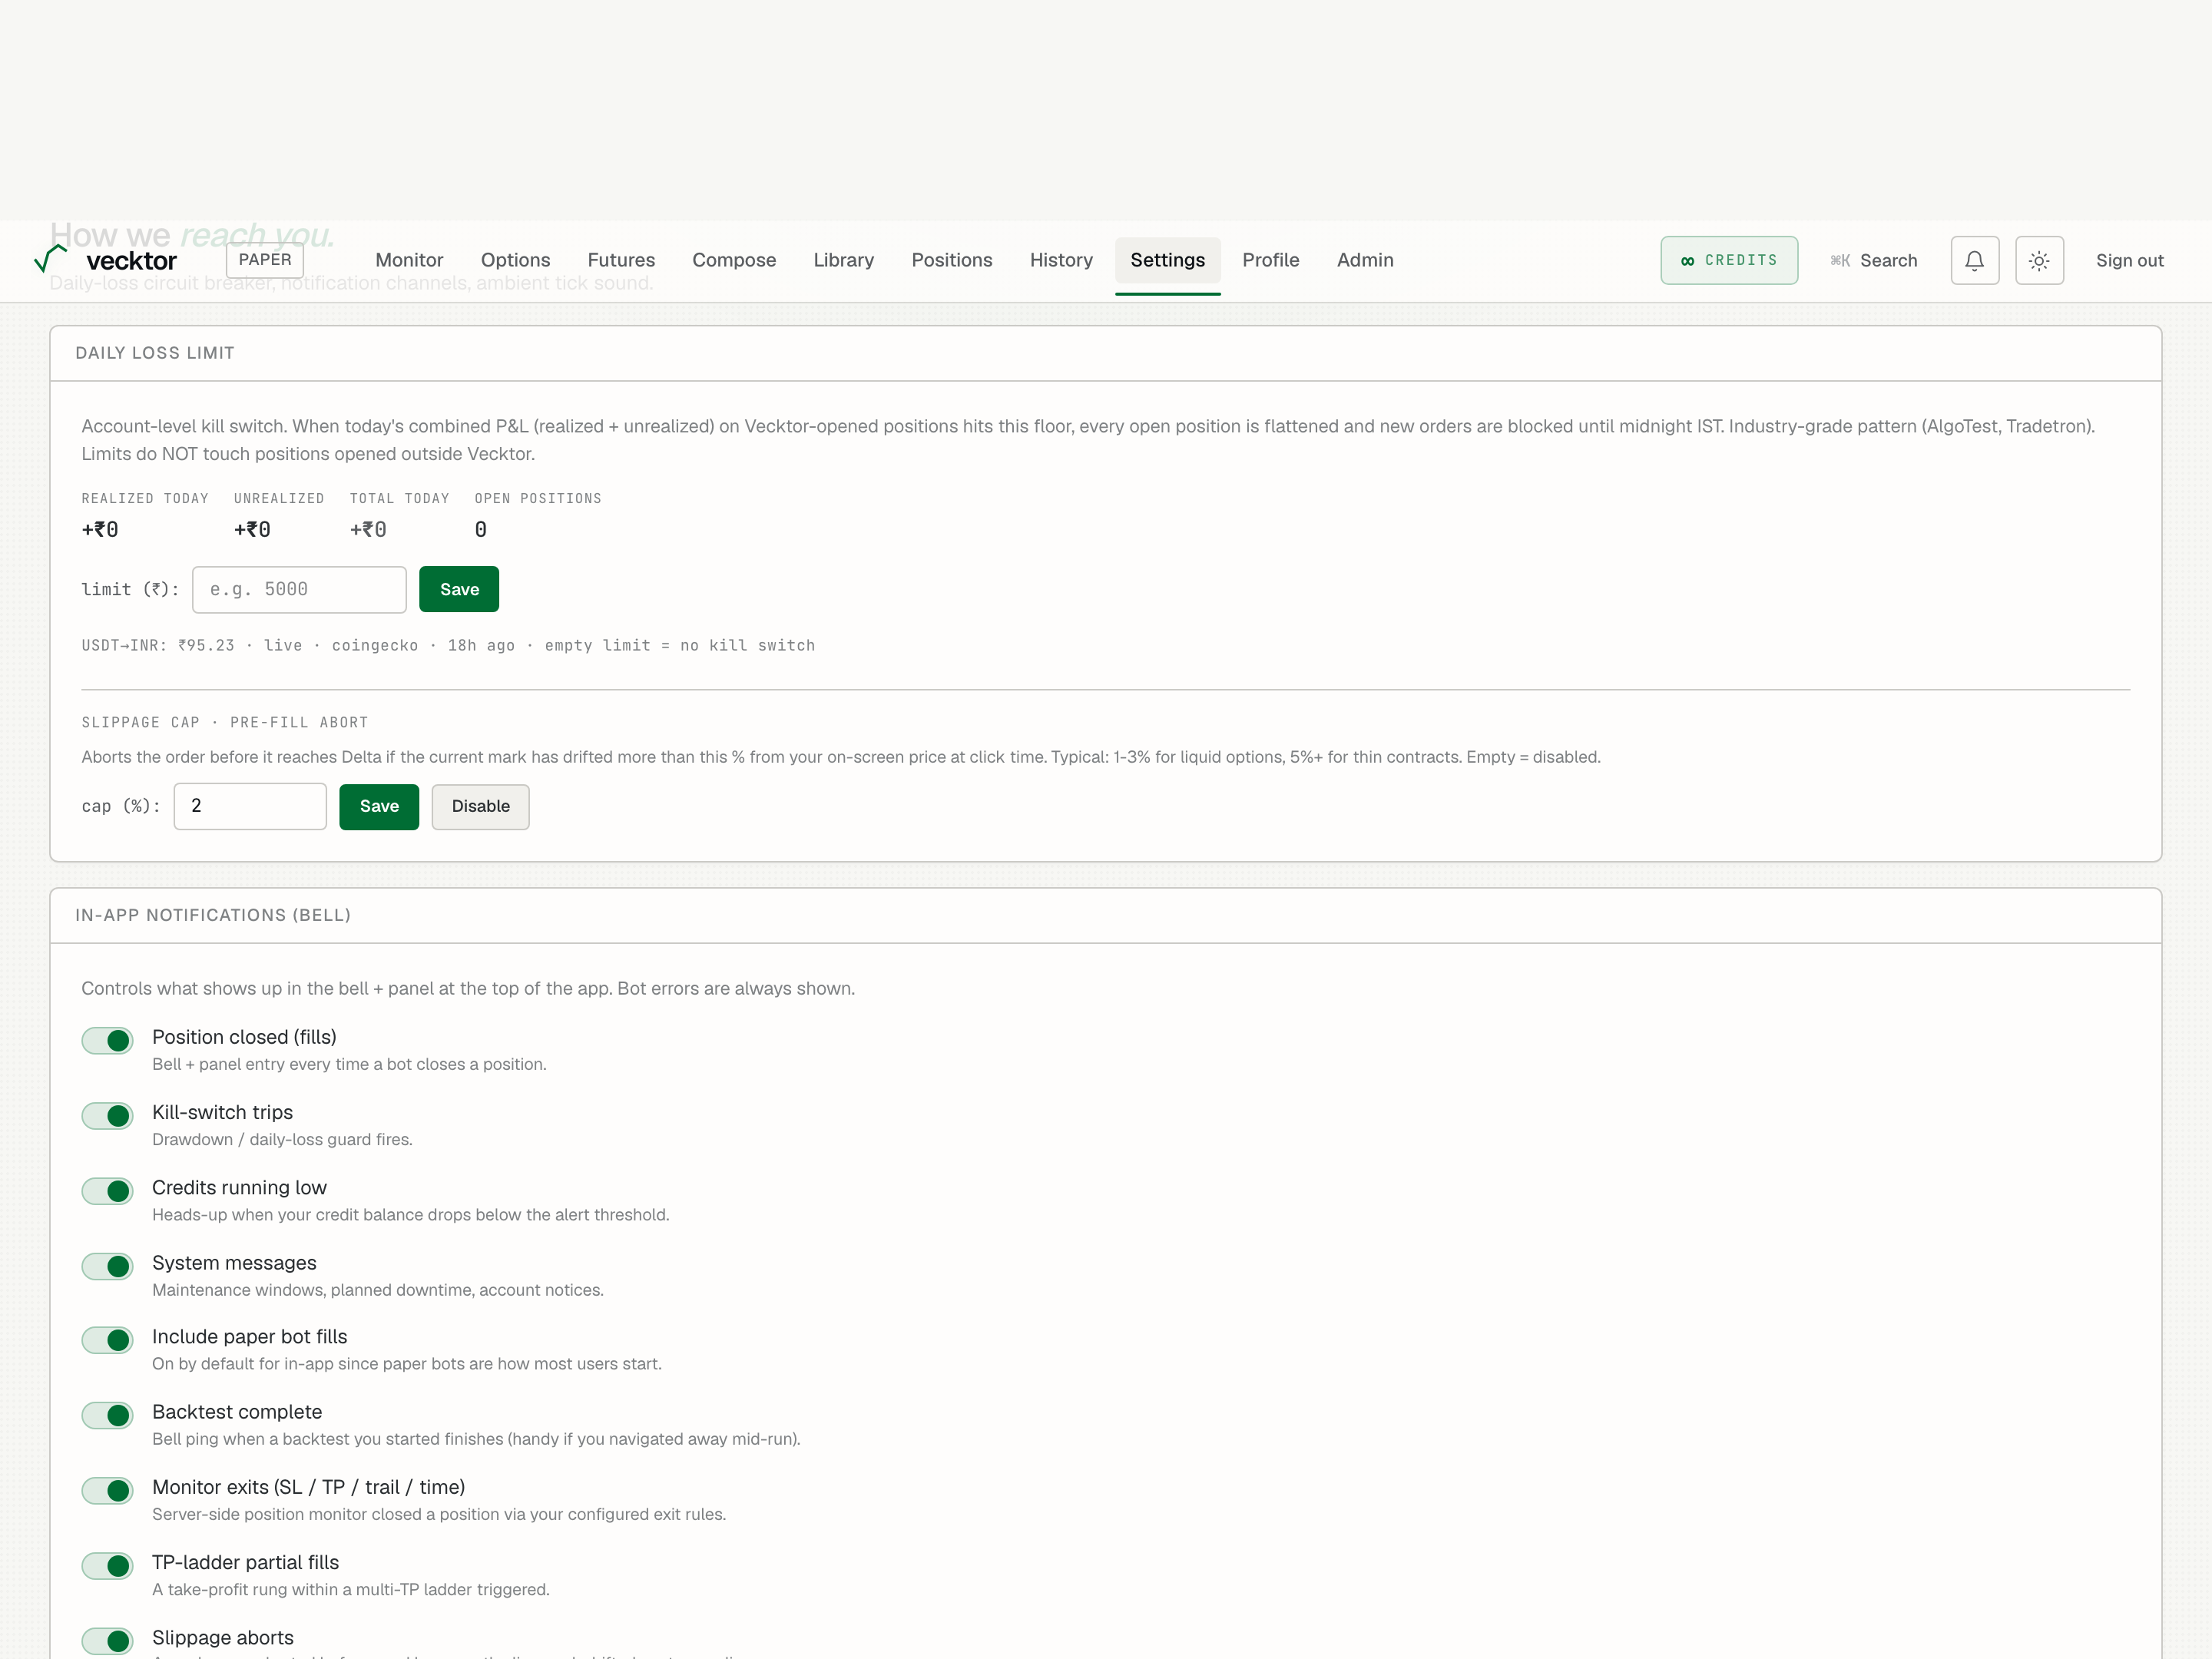
Choose your in-app and email alerts
Two cards control where you hear about events: In-app notifications (bell) and Email notifications.
- In the In-app notifications (bell) card, toggle the kinds you want: Position closed (fills), Kill-switch trips, Credits running low, System messages, Backtest complete, Monitor exits (SL / TP / trail / time), TP-ladder partial fills, Slippage aborts, Order reconciler alerts, and Daily loss limit breach.
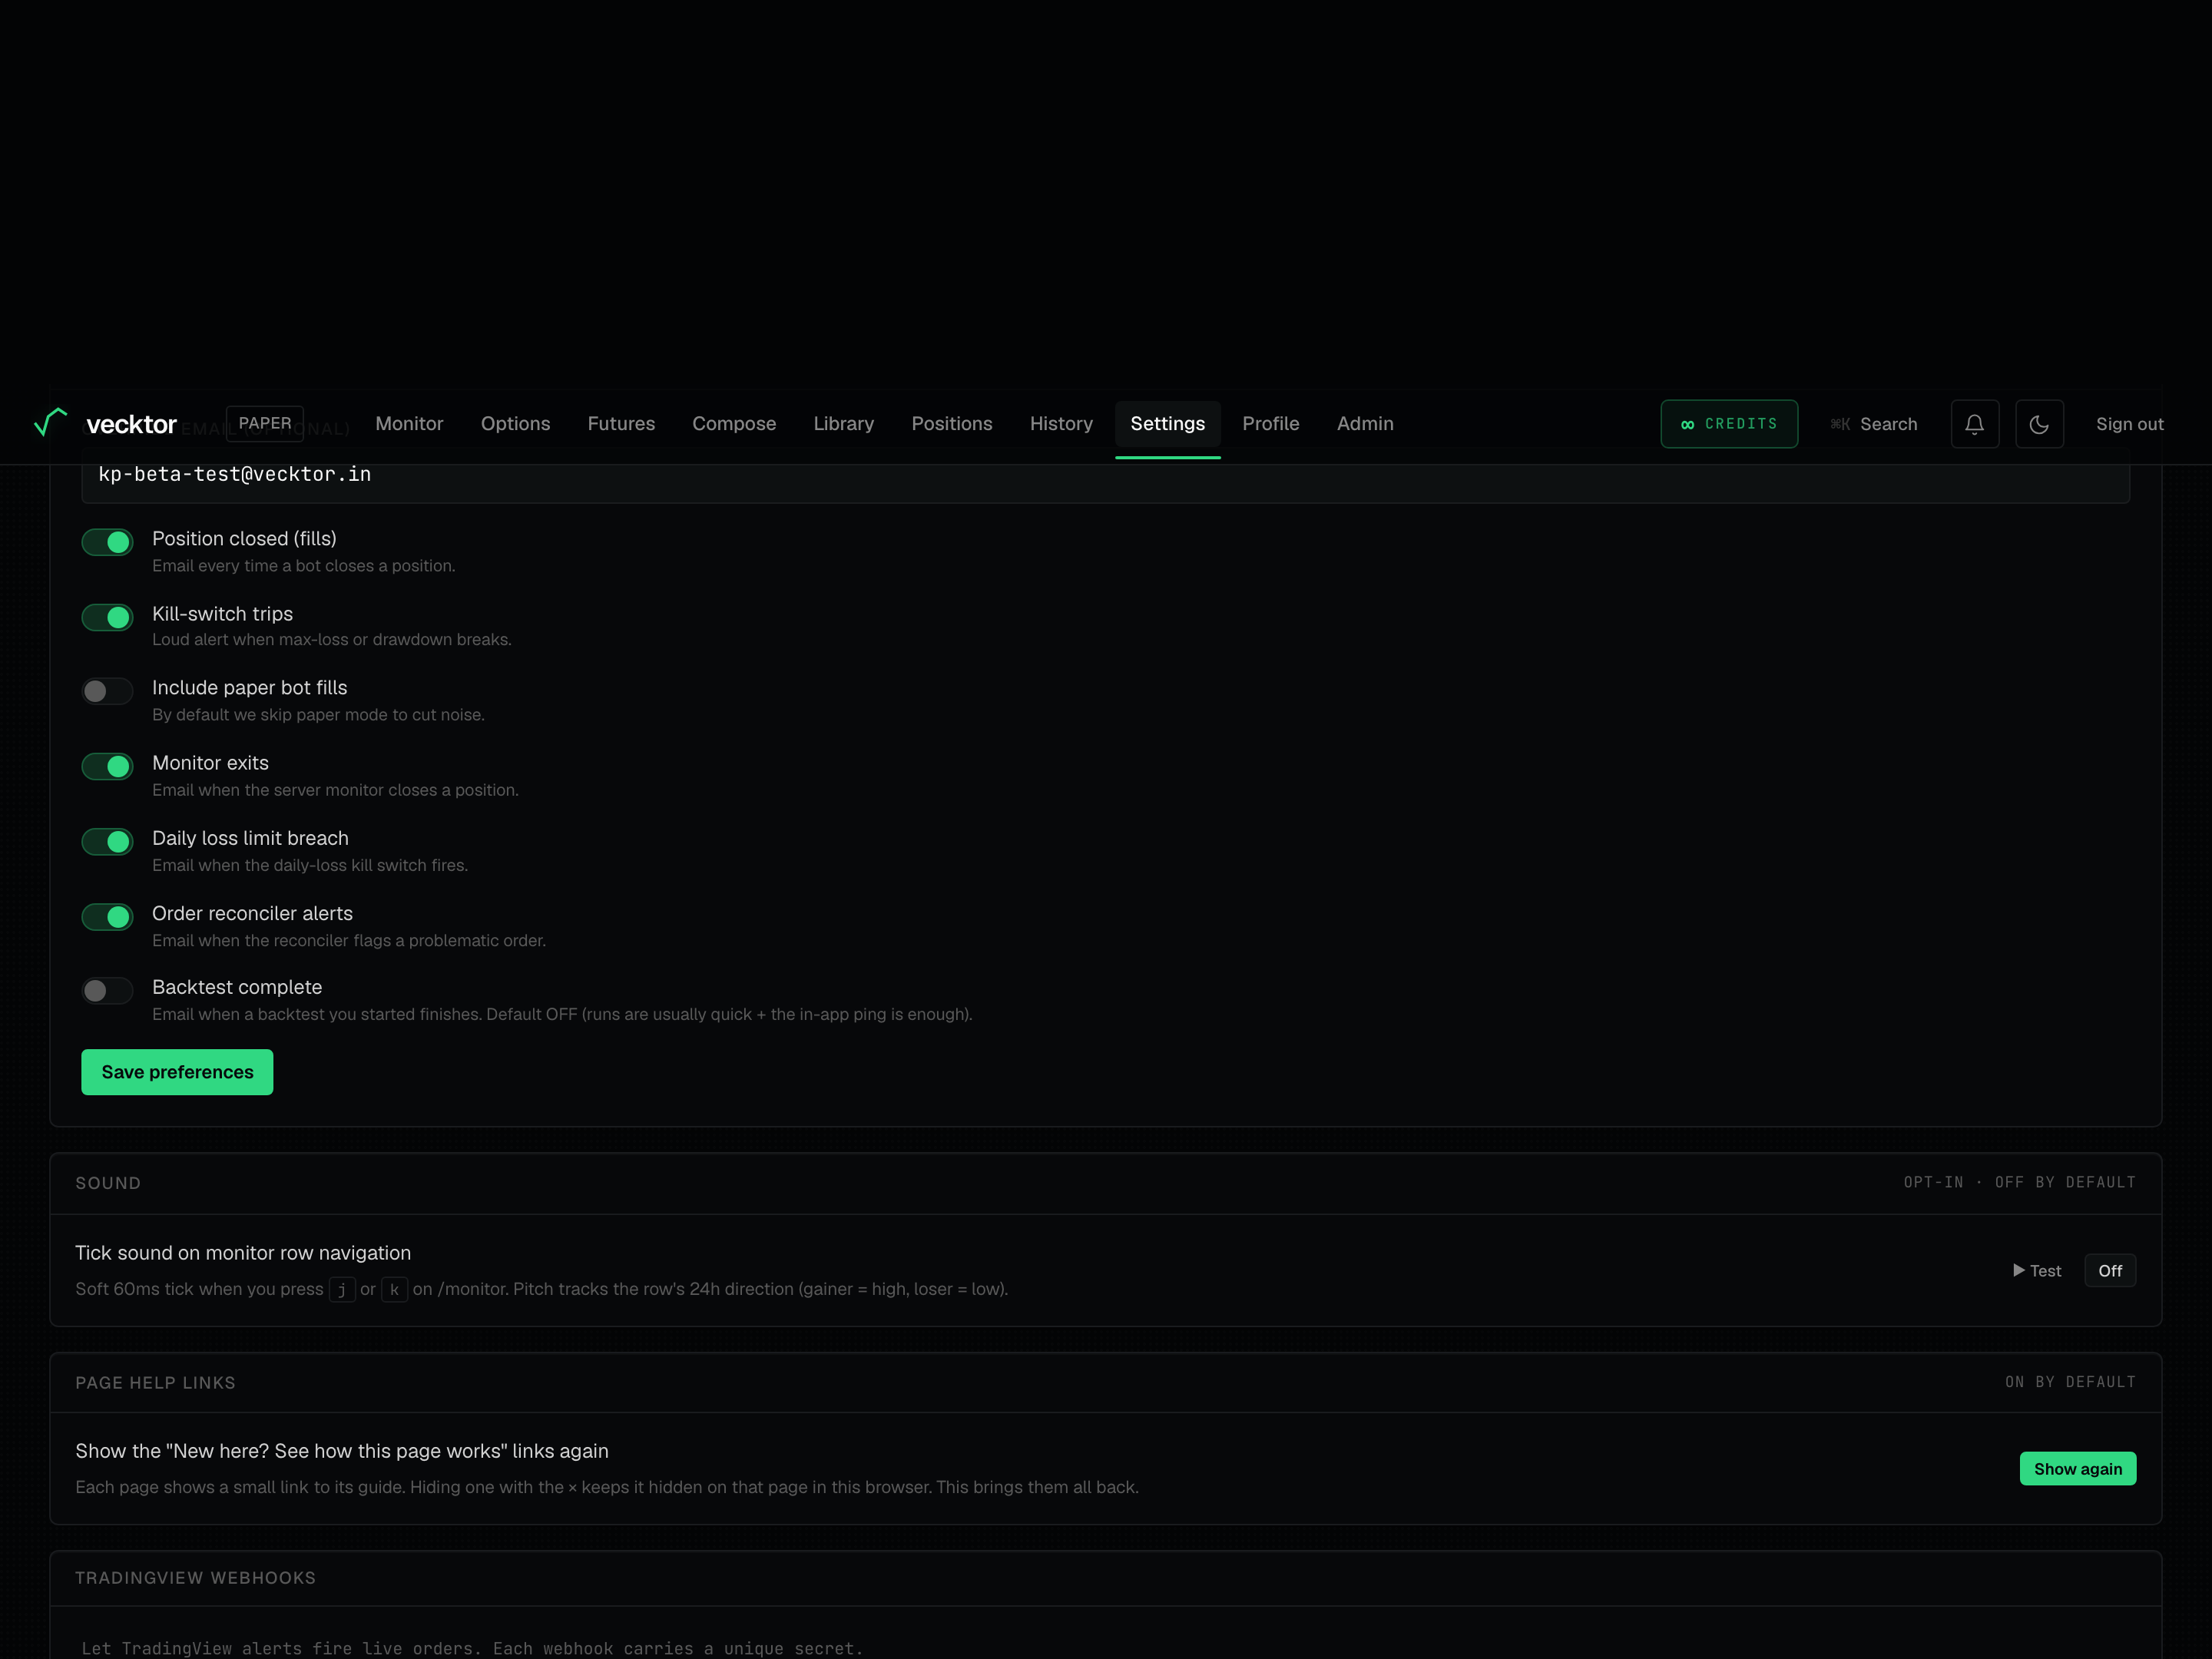
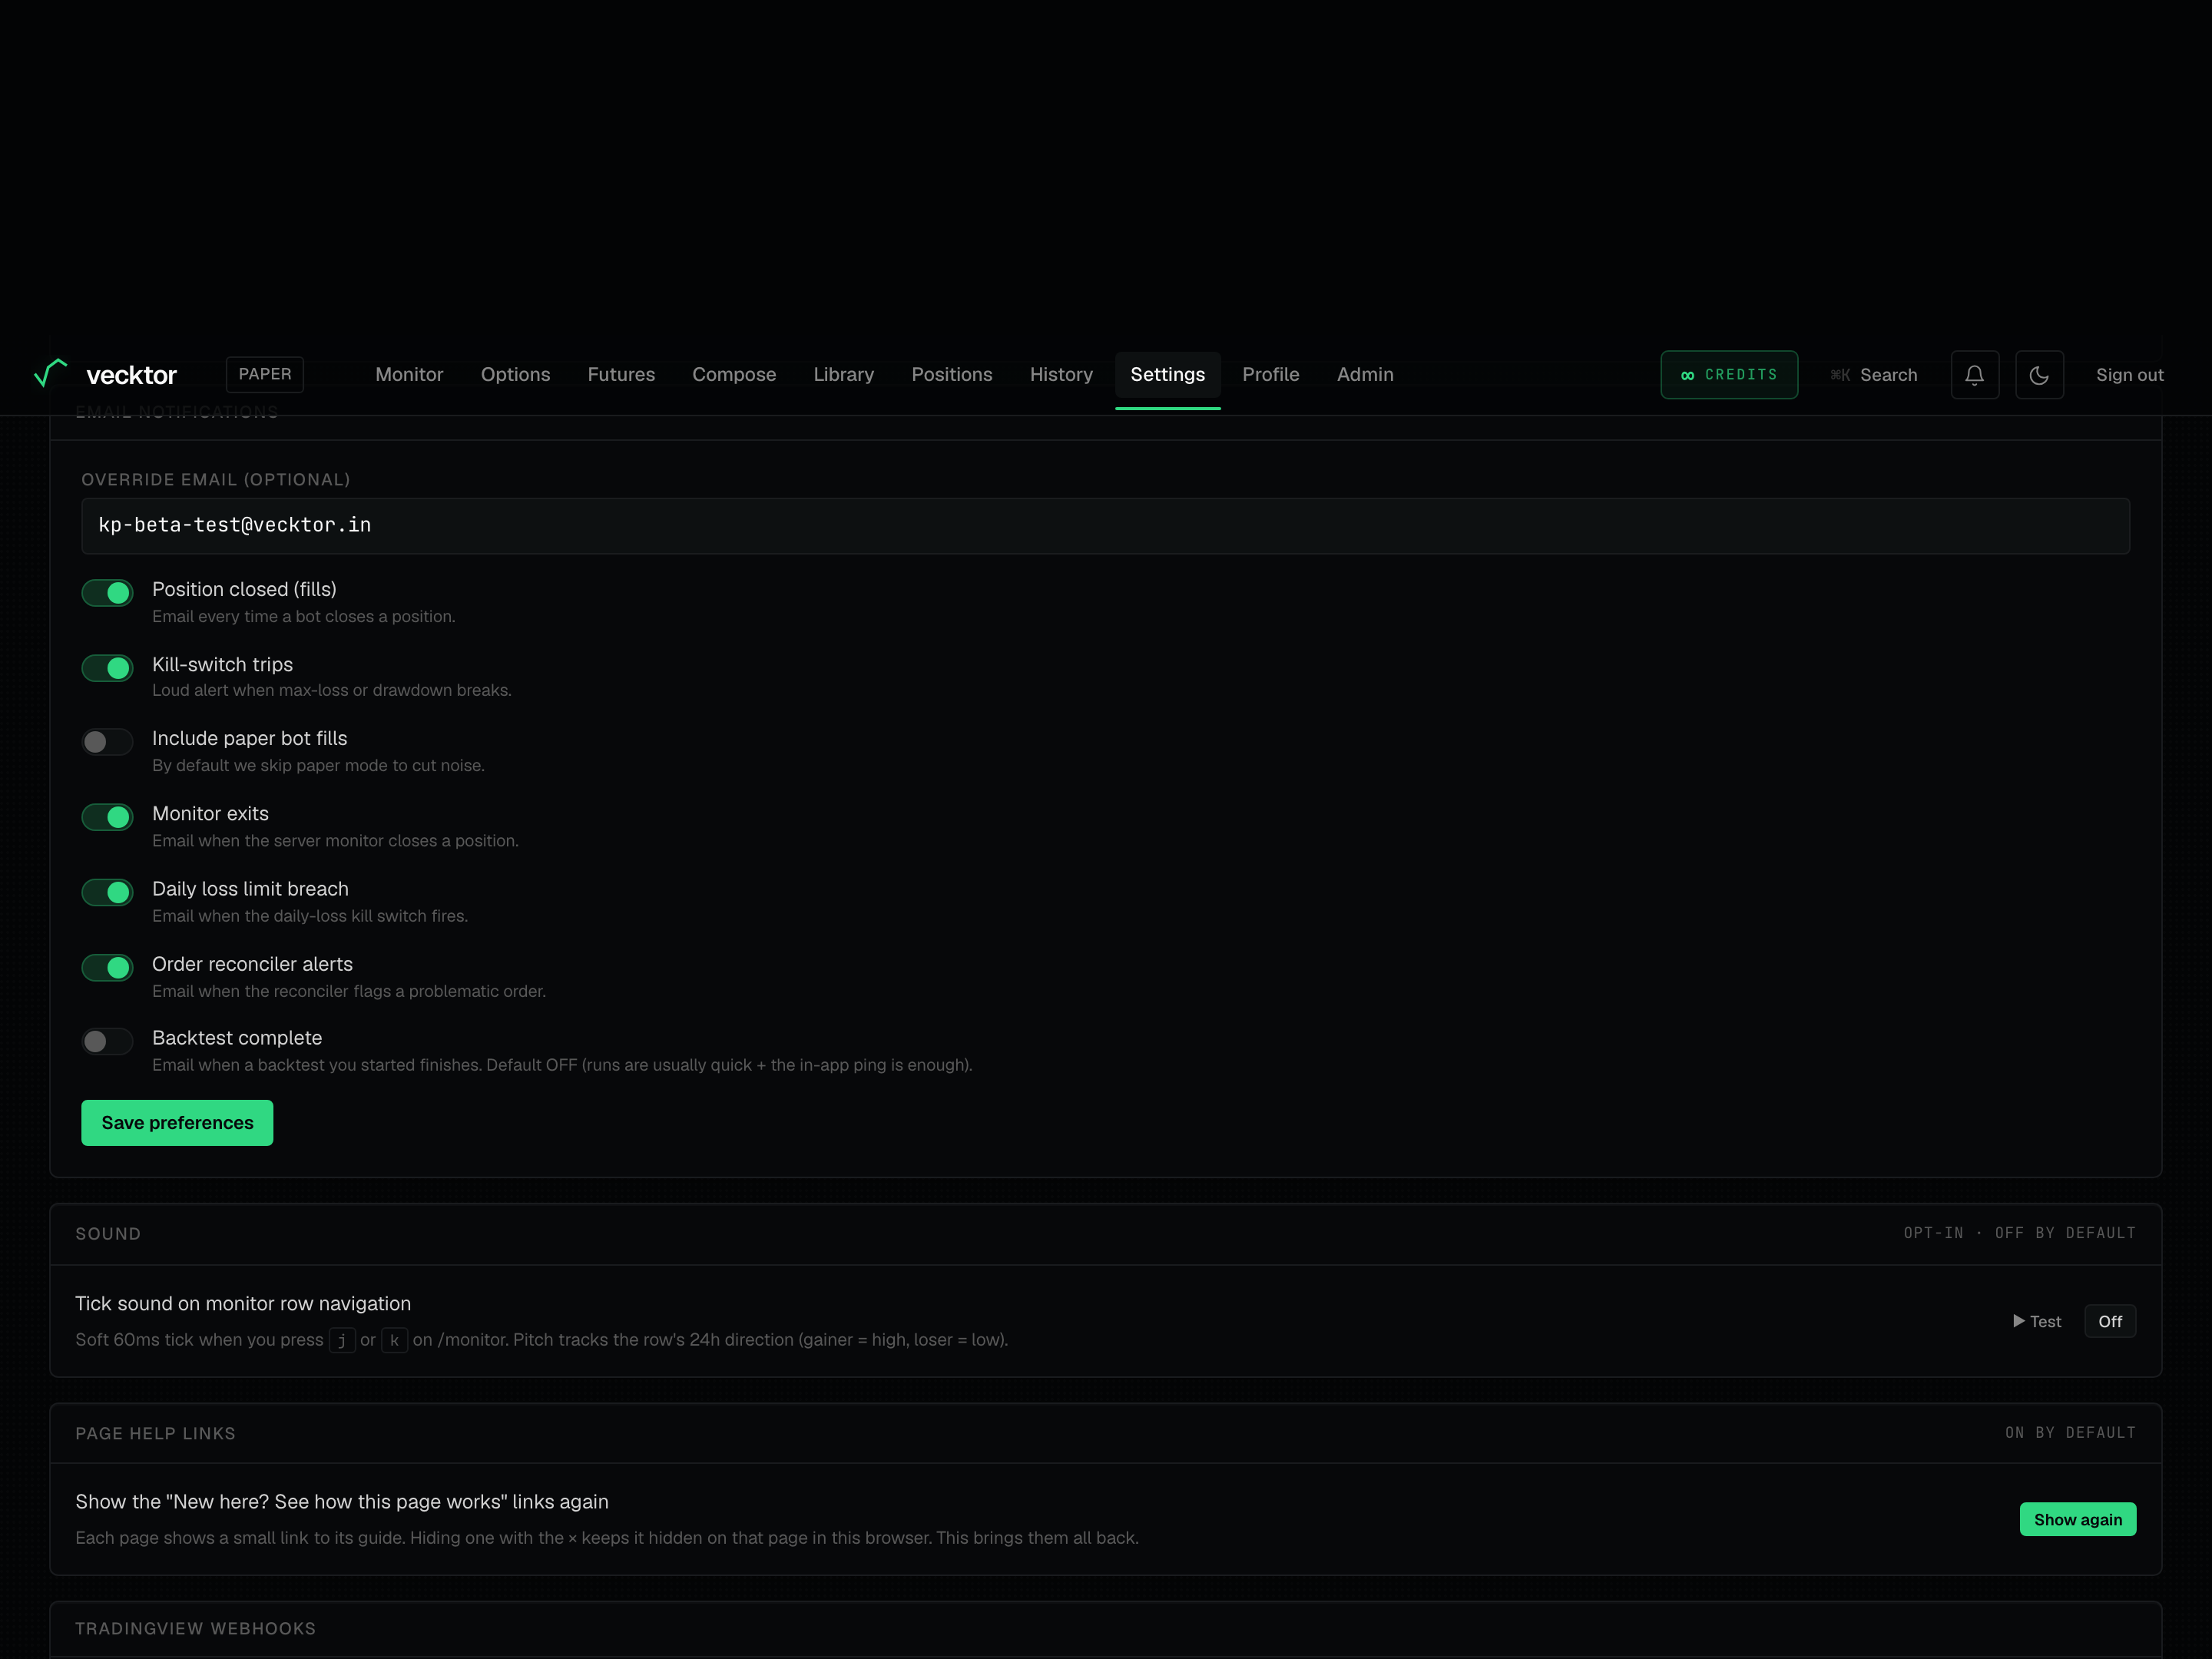
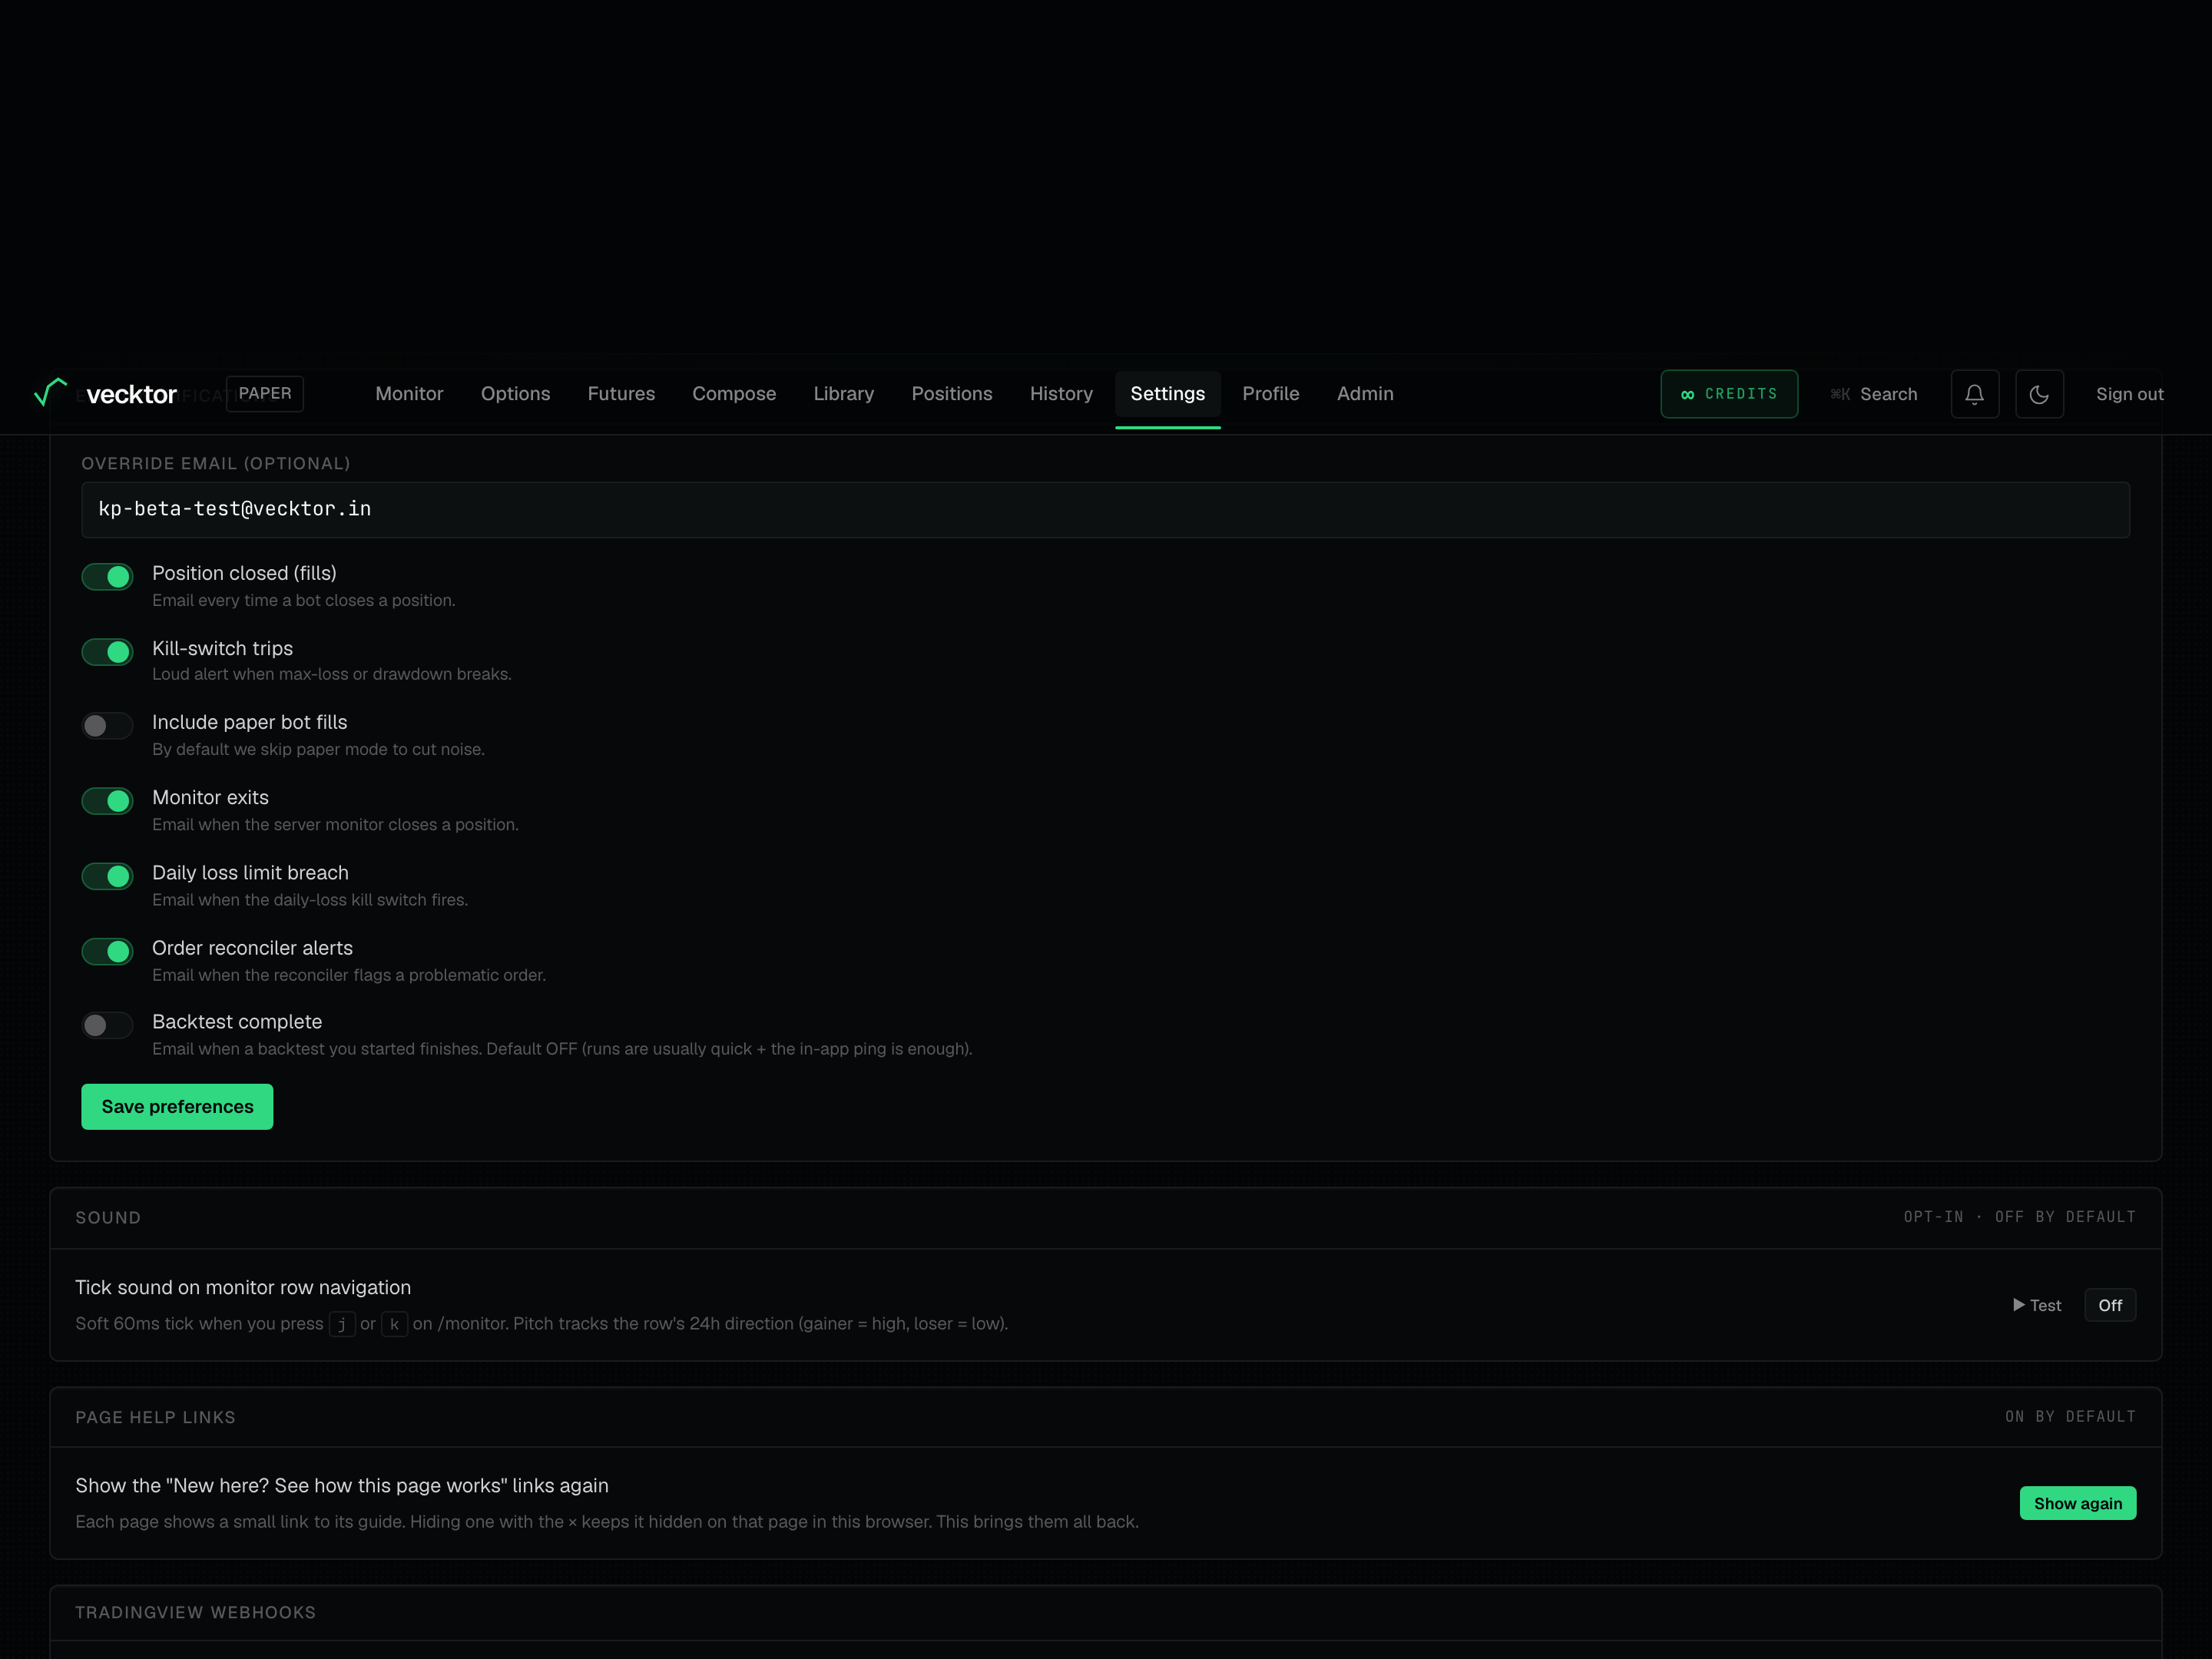
- In the Email notifications card, set an Override email (optional) if you want alerts sent somewhere other than your account email.
- Toggle the email kinds: Position closed (fills), Kill-switch trips, Monitor exits, Daily loss limit breach, Order reconciler alerts, and Backtest complete.
- Click Save preferences.
 1Bell alerts, per kind
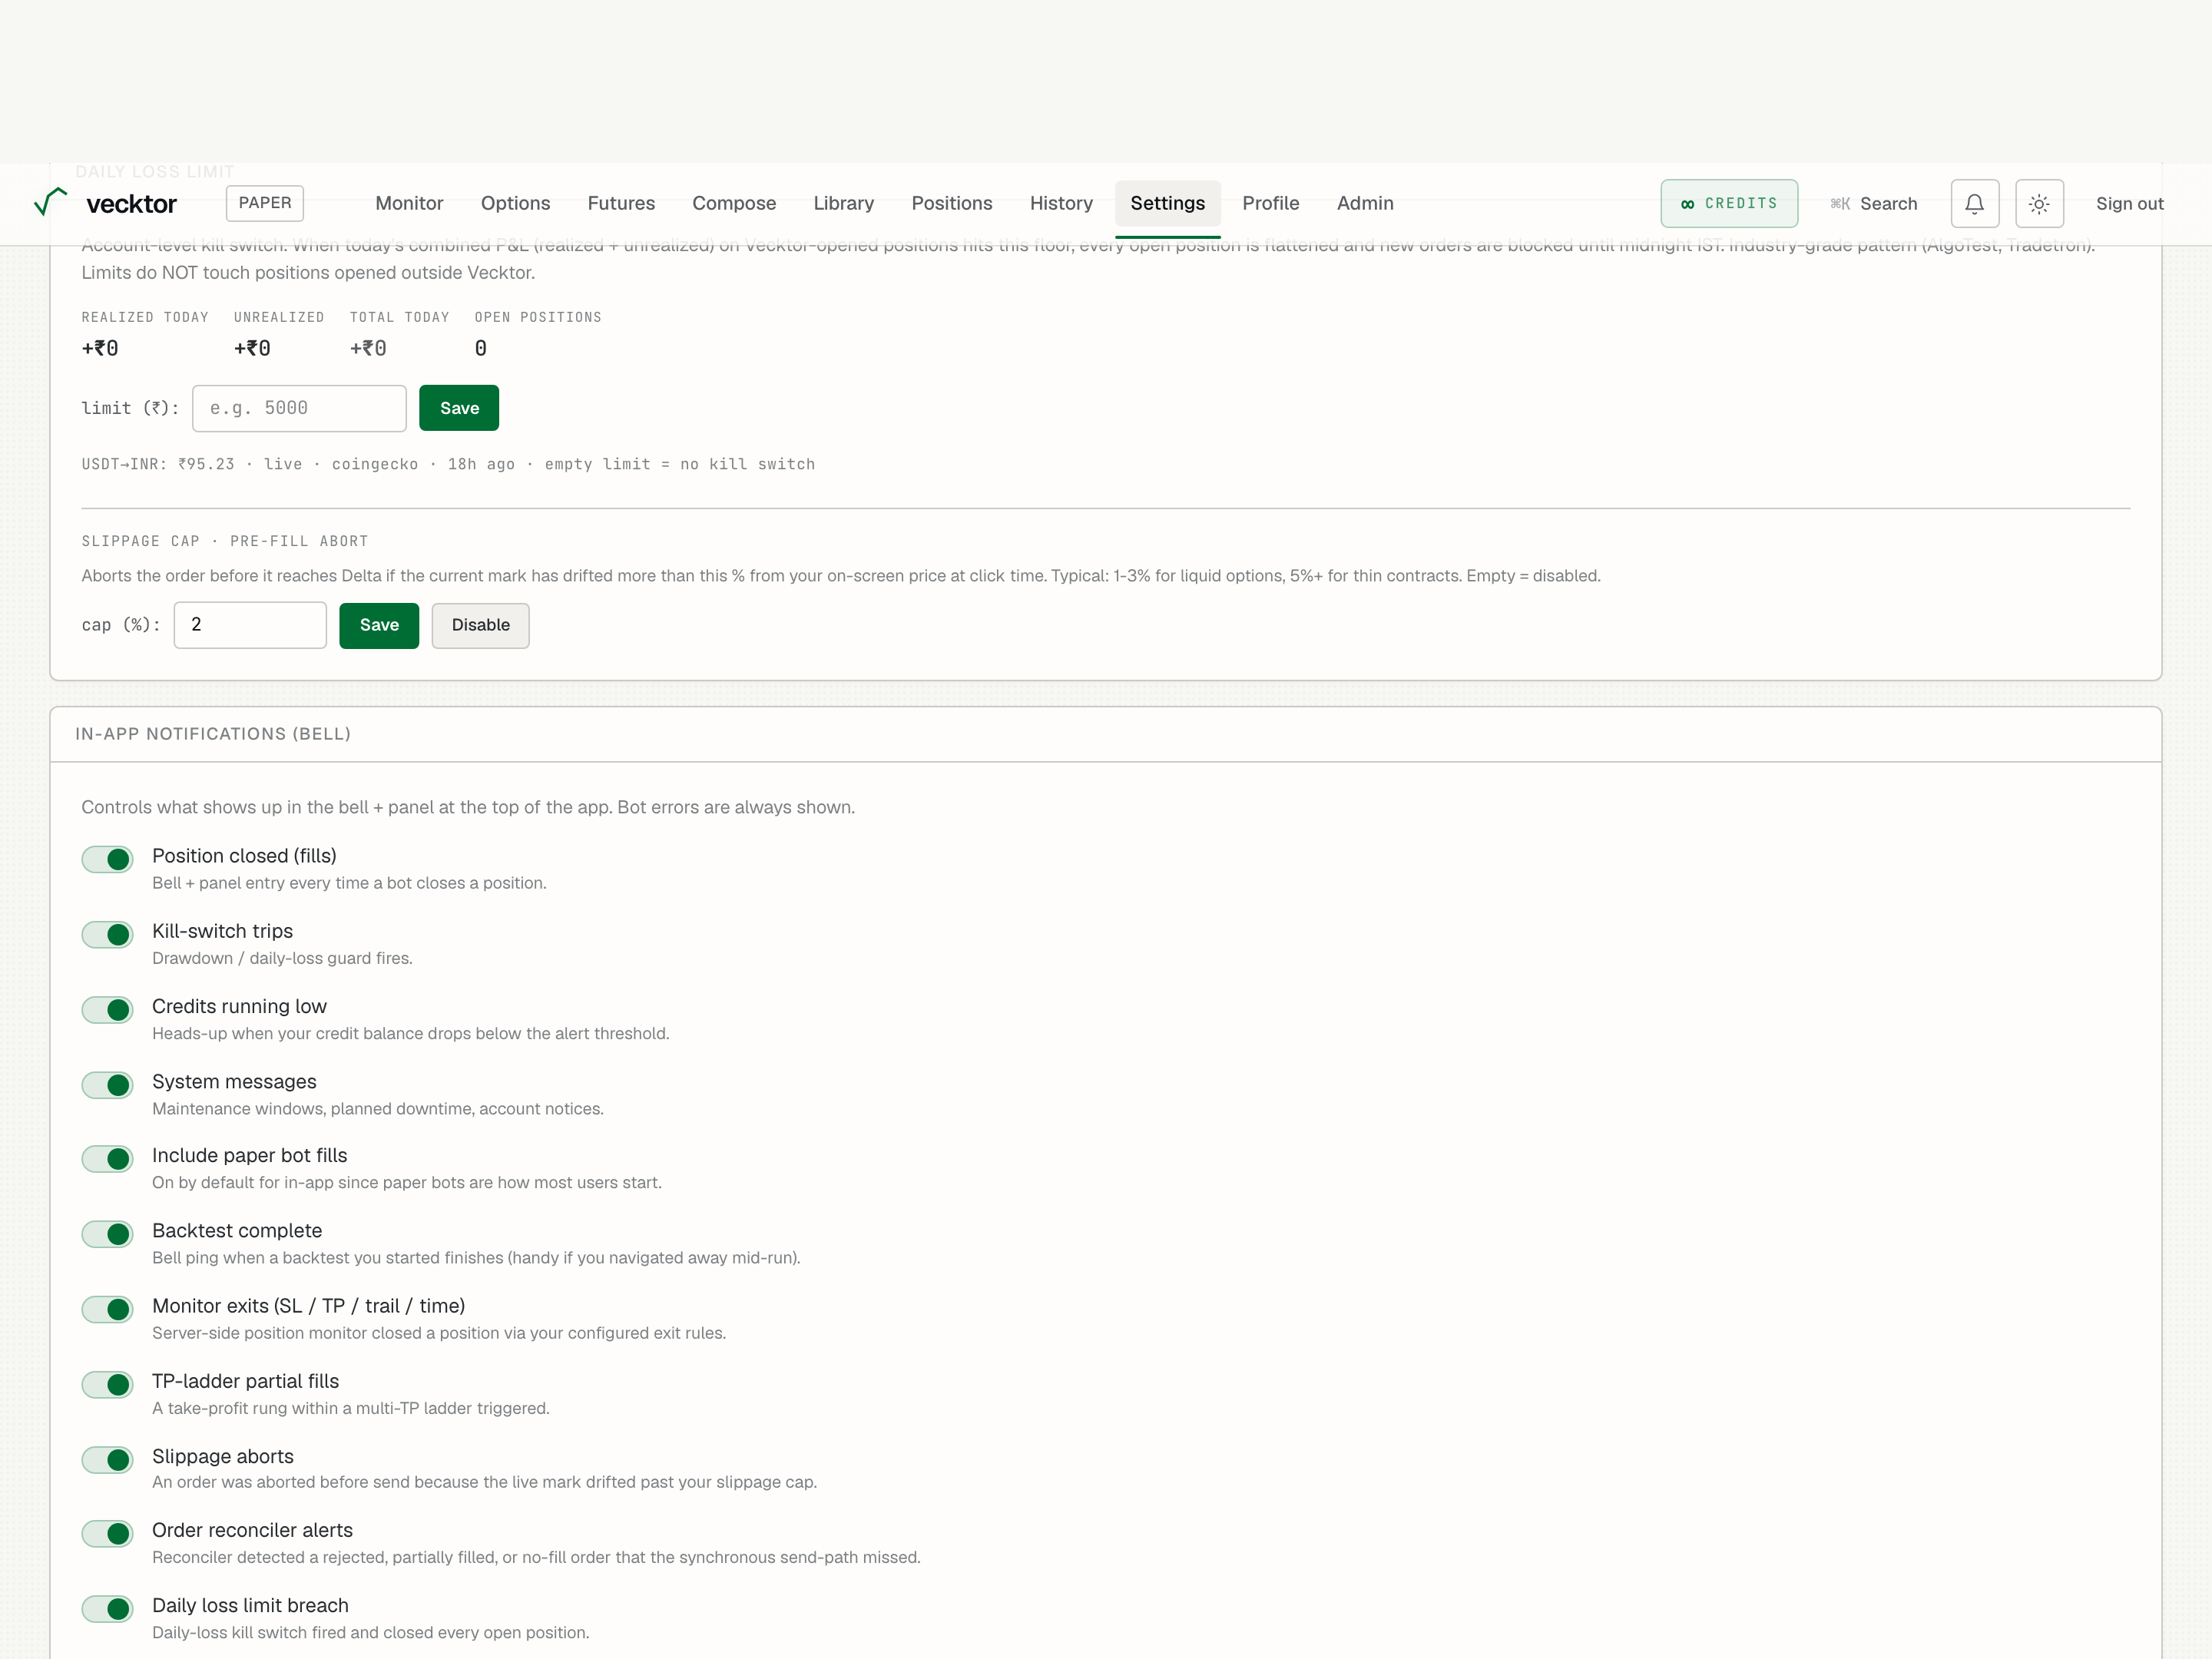
- Toggle Position closed (fills) (ping when a position closes)
- Toggle Kill-switch trips
- Bot errors stay on (no toggle, critical)
- Set an Override email (optional)
- Click Save preferences
Turn on the tick sound and restore page-help links
Two small cards: Sound adds an audio tick on the monitor, and Page help links brings back the in-app guide links you have hidden.
- In the Sound card, click Test to hear it once, then click the Off button to flip it to On. This enables the tick when you press j or k to move between rows on /monitor.
- Note the tick's pitch tracks the row's 24h direction (gainer = high, loser = low). It is off by default.
- In the Page help links card, click Show again to bring back every dismissed New here? See how this page works link across the app.
 1Restore dismissed page-help links
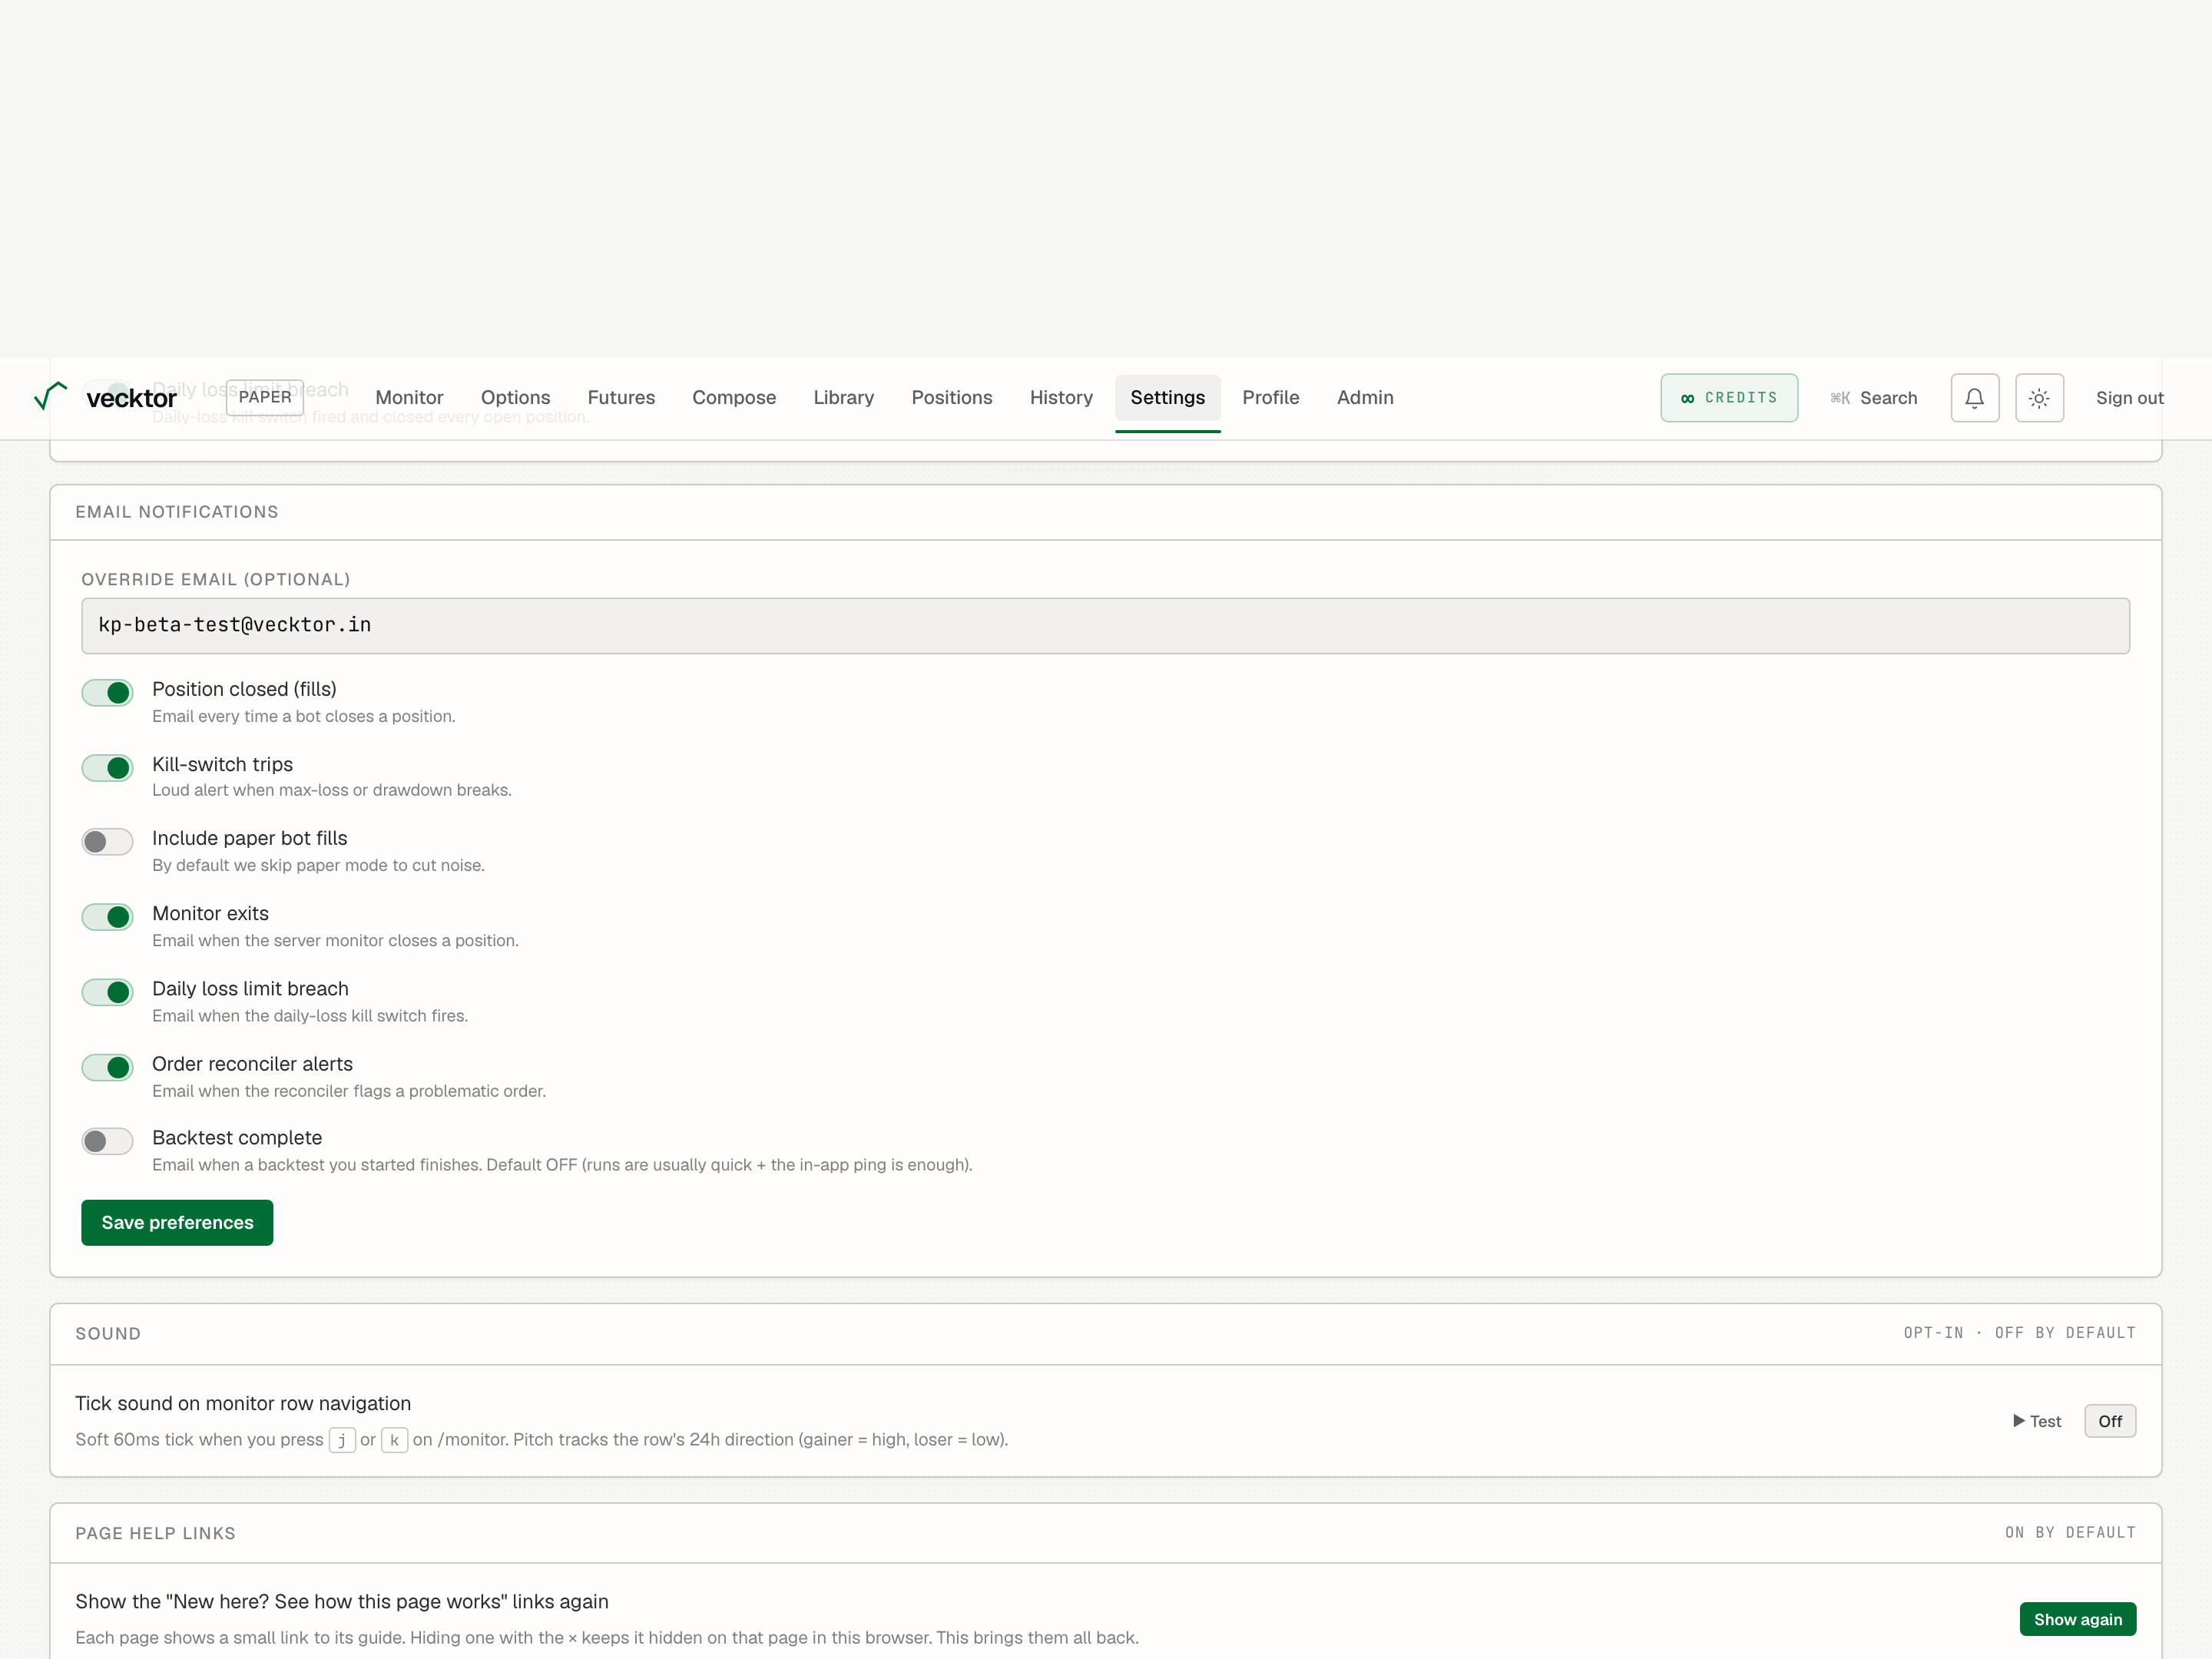
Connect TradingView webhooks
A webhook (a URL a chart alert calls) lets TradingView alerts fire orders. Each webhook carries its own secret.
- Type a Webhook name (optional) and click Create webhook.
- In the New webhook ready box, copy the Webhook URL and the Alert message body (JSON) right away. The secret shows only once.
- Paste the URL and JSON into your TradingView alert.
- Each webhook's row shows triggered N× and last fired time. Click Revoke to disable one; any alert using it stops firing.
 1Create a webhook (secret shown once)
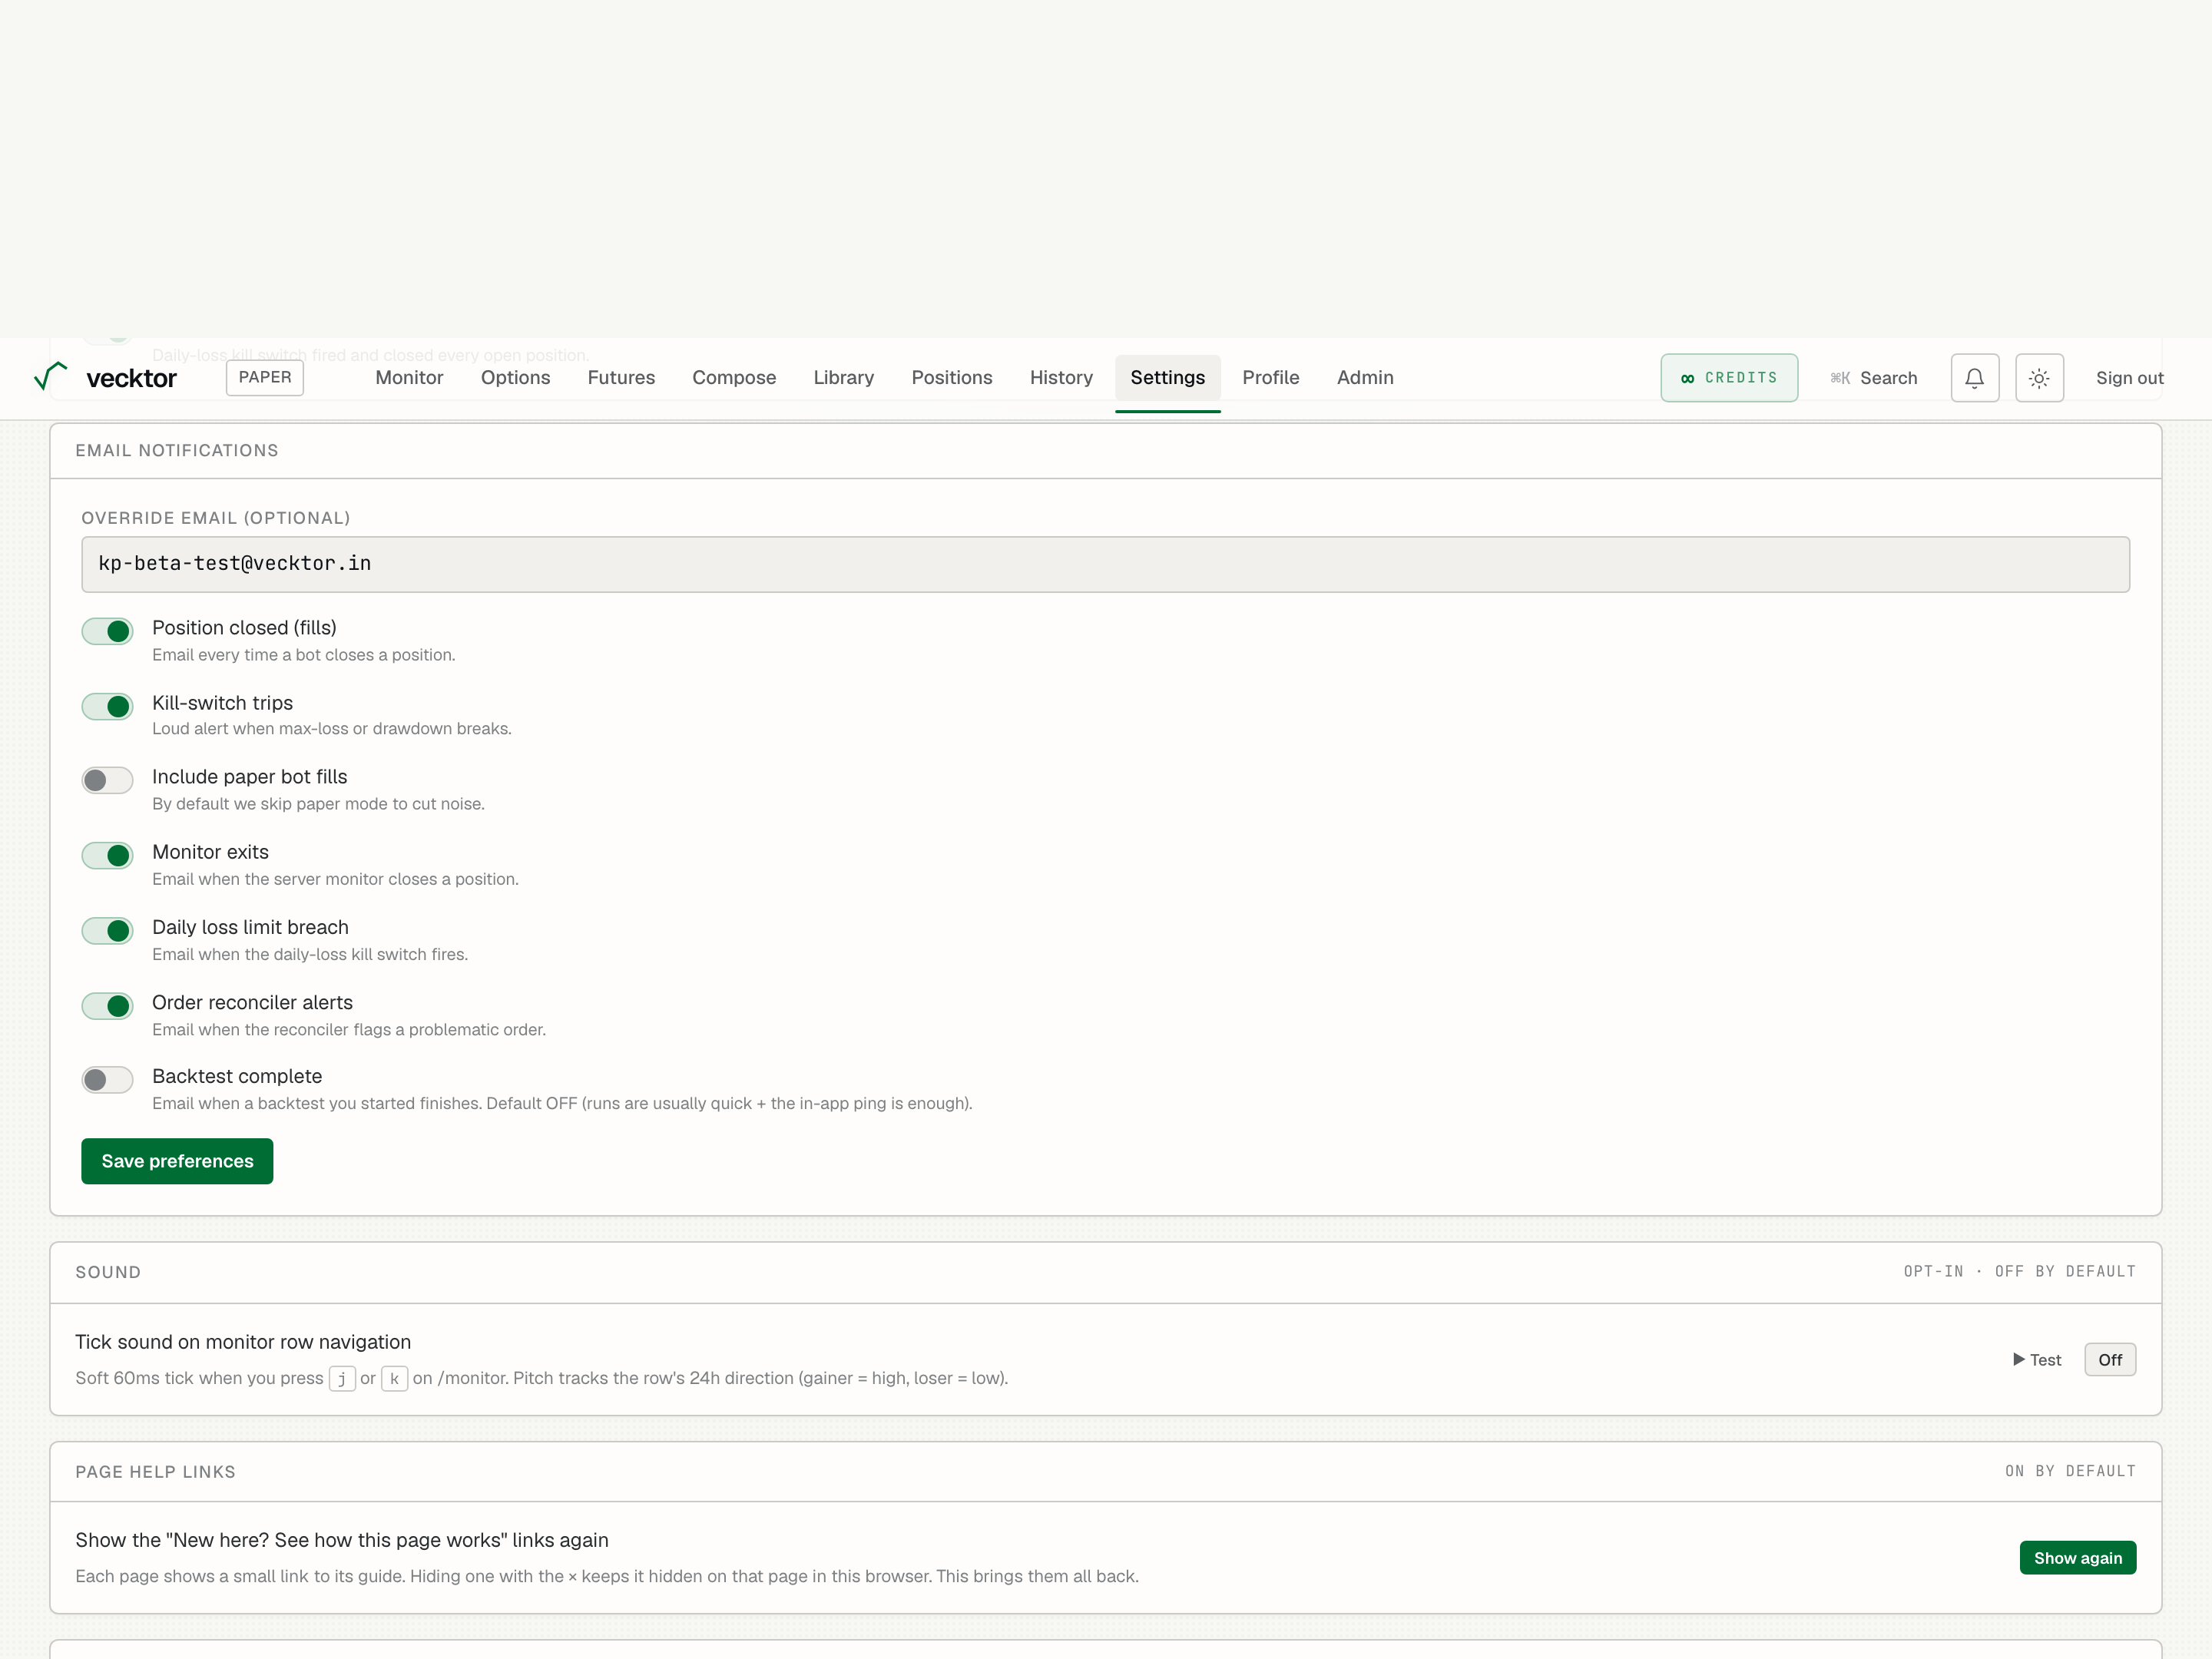
Export or delete your data
The Account card at the bottom covers your data rights under the DPDP Act 2023.
- Under Export your data, click Export JSON to download everything Vecktor holds about you (bots, trades, events, webhooks, notification prefs) as a file. API key secrets are redacted; metadata only.
- Under Delete account, click Delete my data to permanently remove every row tied to your account.
- In the Delete all your data? dialog, click Yes, delete everything. You are signed out right after.
 1Export everything (secrets redacted)
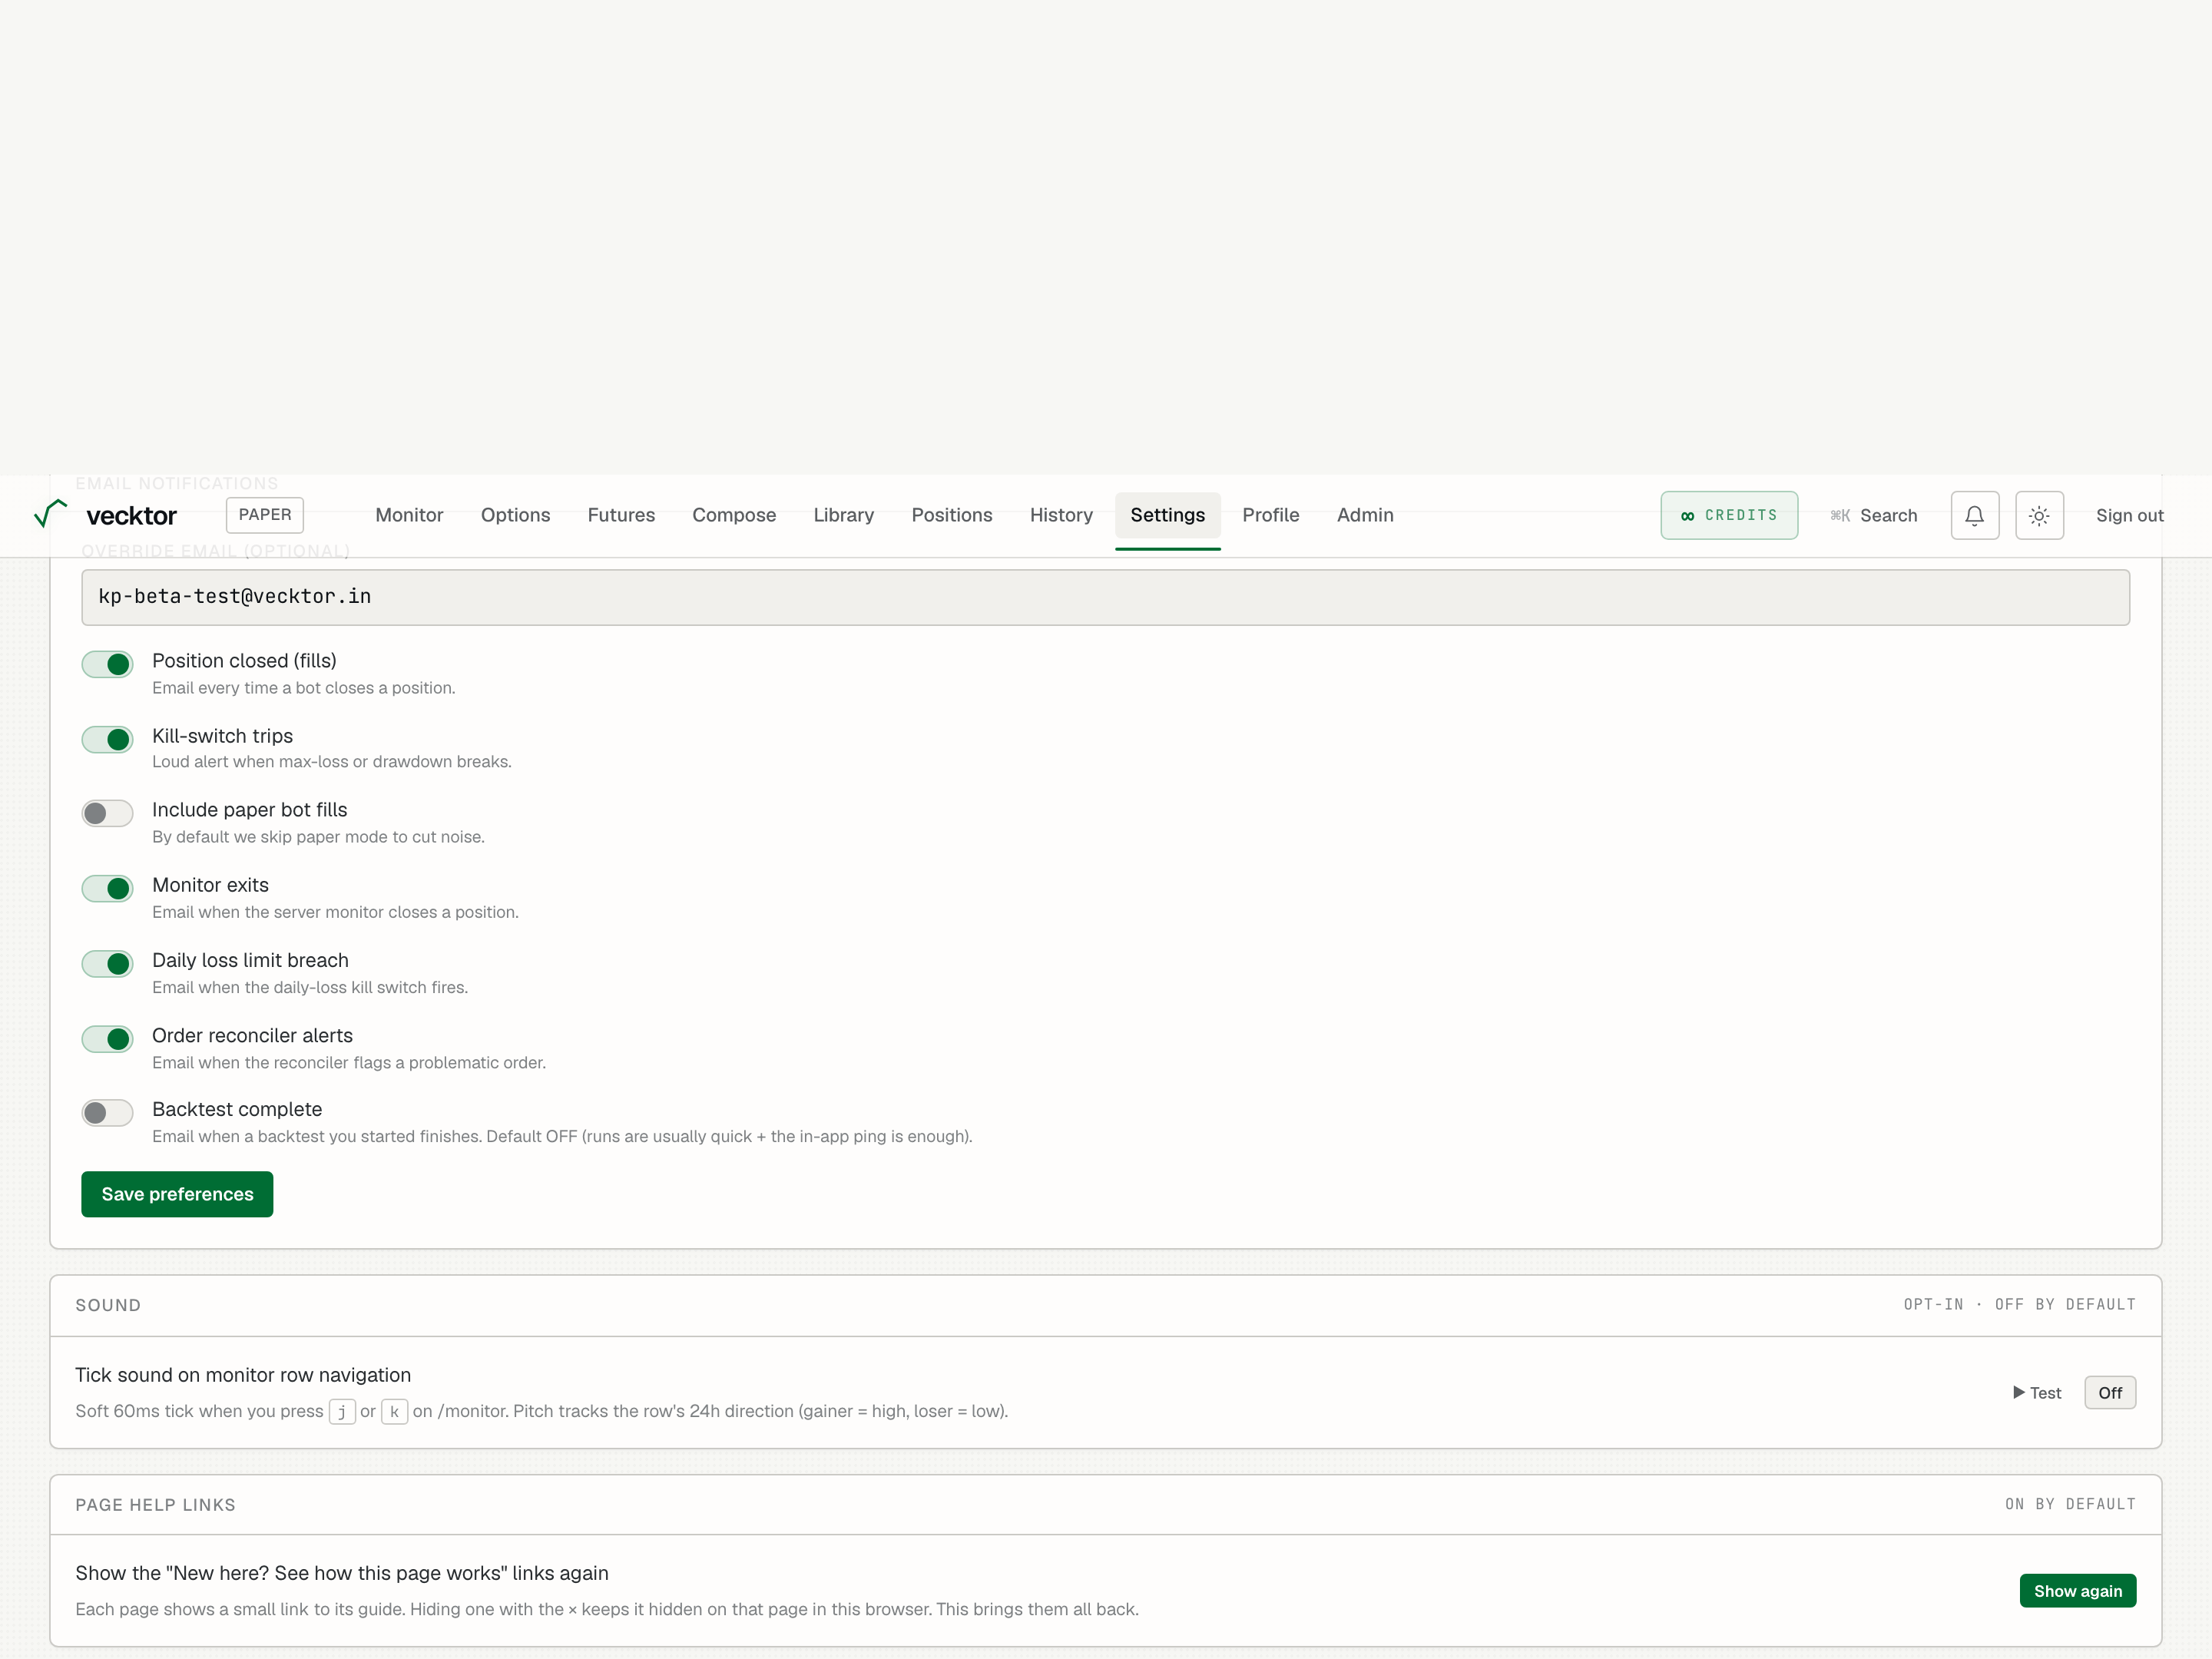
- Click Export JSON (secrets are redacted)
- Click Delete my data (removes every row)
- Read the warning (this cannot be reversed)