Deploy and trade options
Below the backtest on the options page sits the trade ticket panel, labelled Payoff graph. This is where you take a strategy live: edit the legs against the live price, read the position stats and Greeks, then schedule it or send a real order. This guide covers deploying and trading, not backtesting (that is the build and backtest guide).
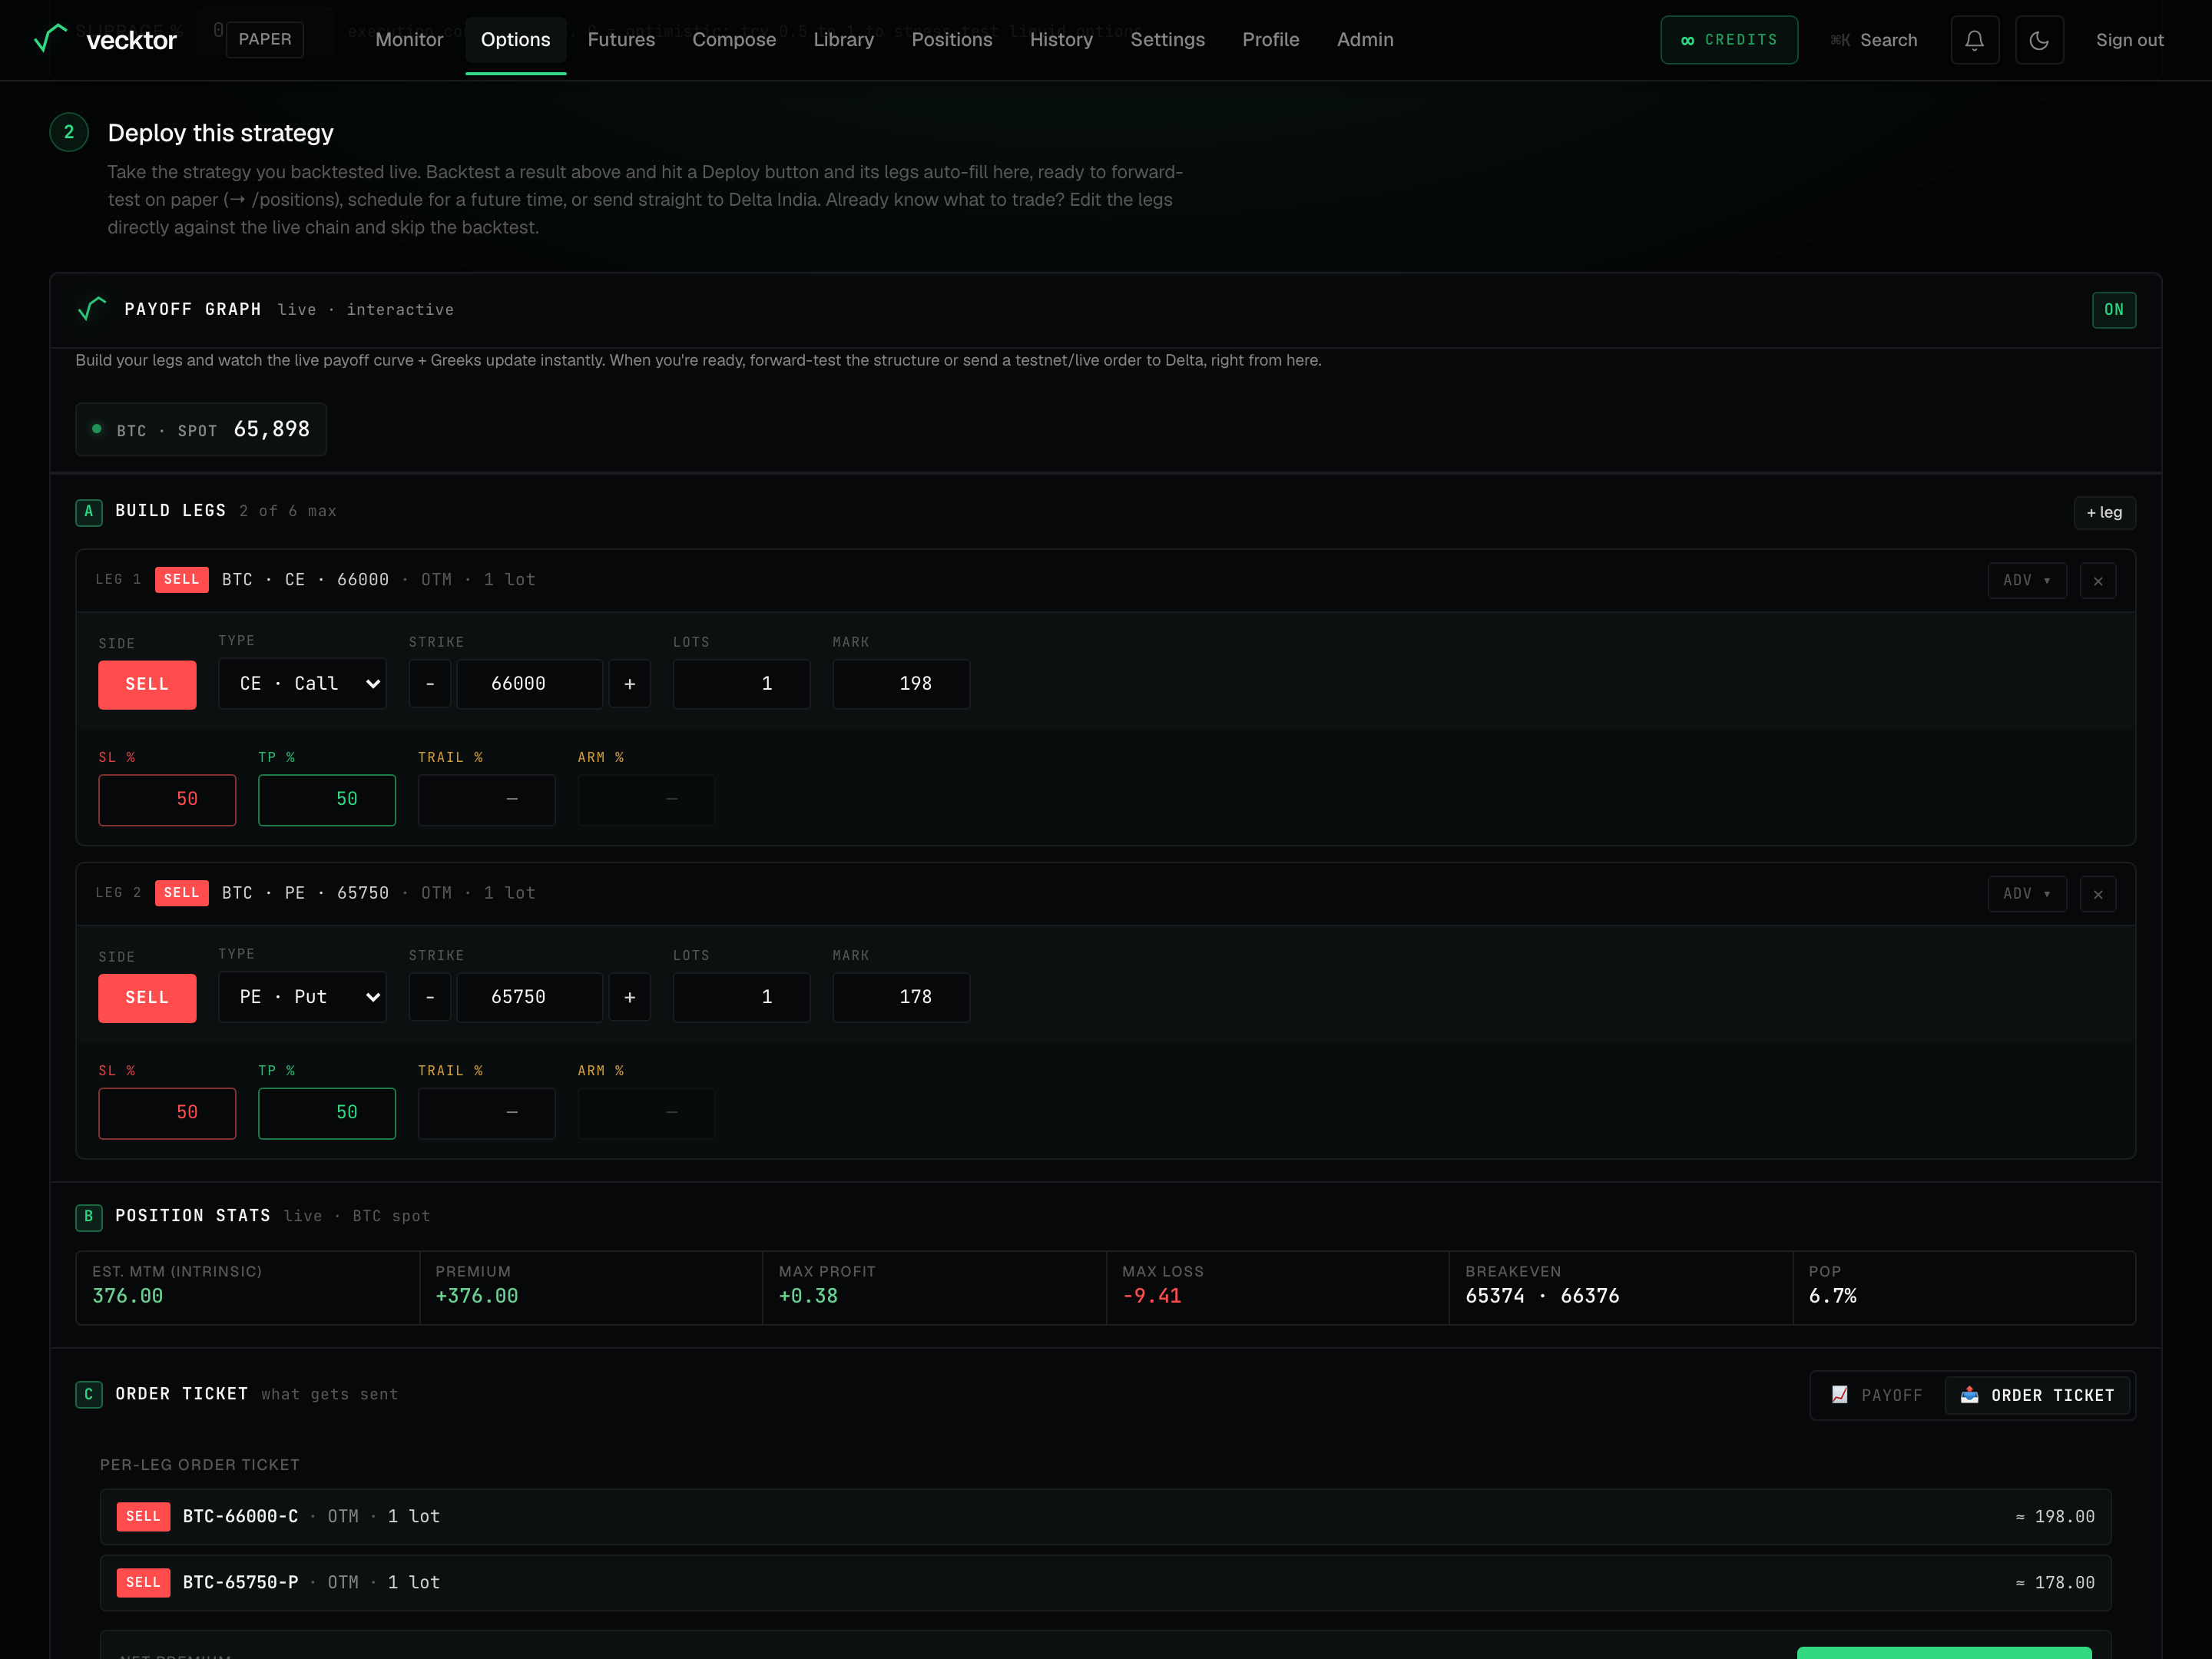
Open the trade ticket and turn it on
The panel is titled Payoff graph but it is also your order ticket. It carries the legs from a backtest, or you can edit them by hand against the live price.
- Scroll to the Payoff graph panel below the backtest, or hit a Deploy button on a backtest result to auto-fill its legs here.
- Read the live price (spot, the current index price) in the ticker at the top.
- Use the ON / OFF chip at the top right to show or hide the payoff diagram and stats. OFF just collapses the chart, it does not stop anything.
- Pick BTC or ETH at the top of the page. The trade ticket follows the underlying you are working on.
 1Trade ticket panel2ON / OFF: show or hide the chart
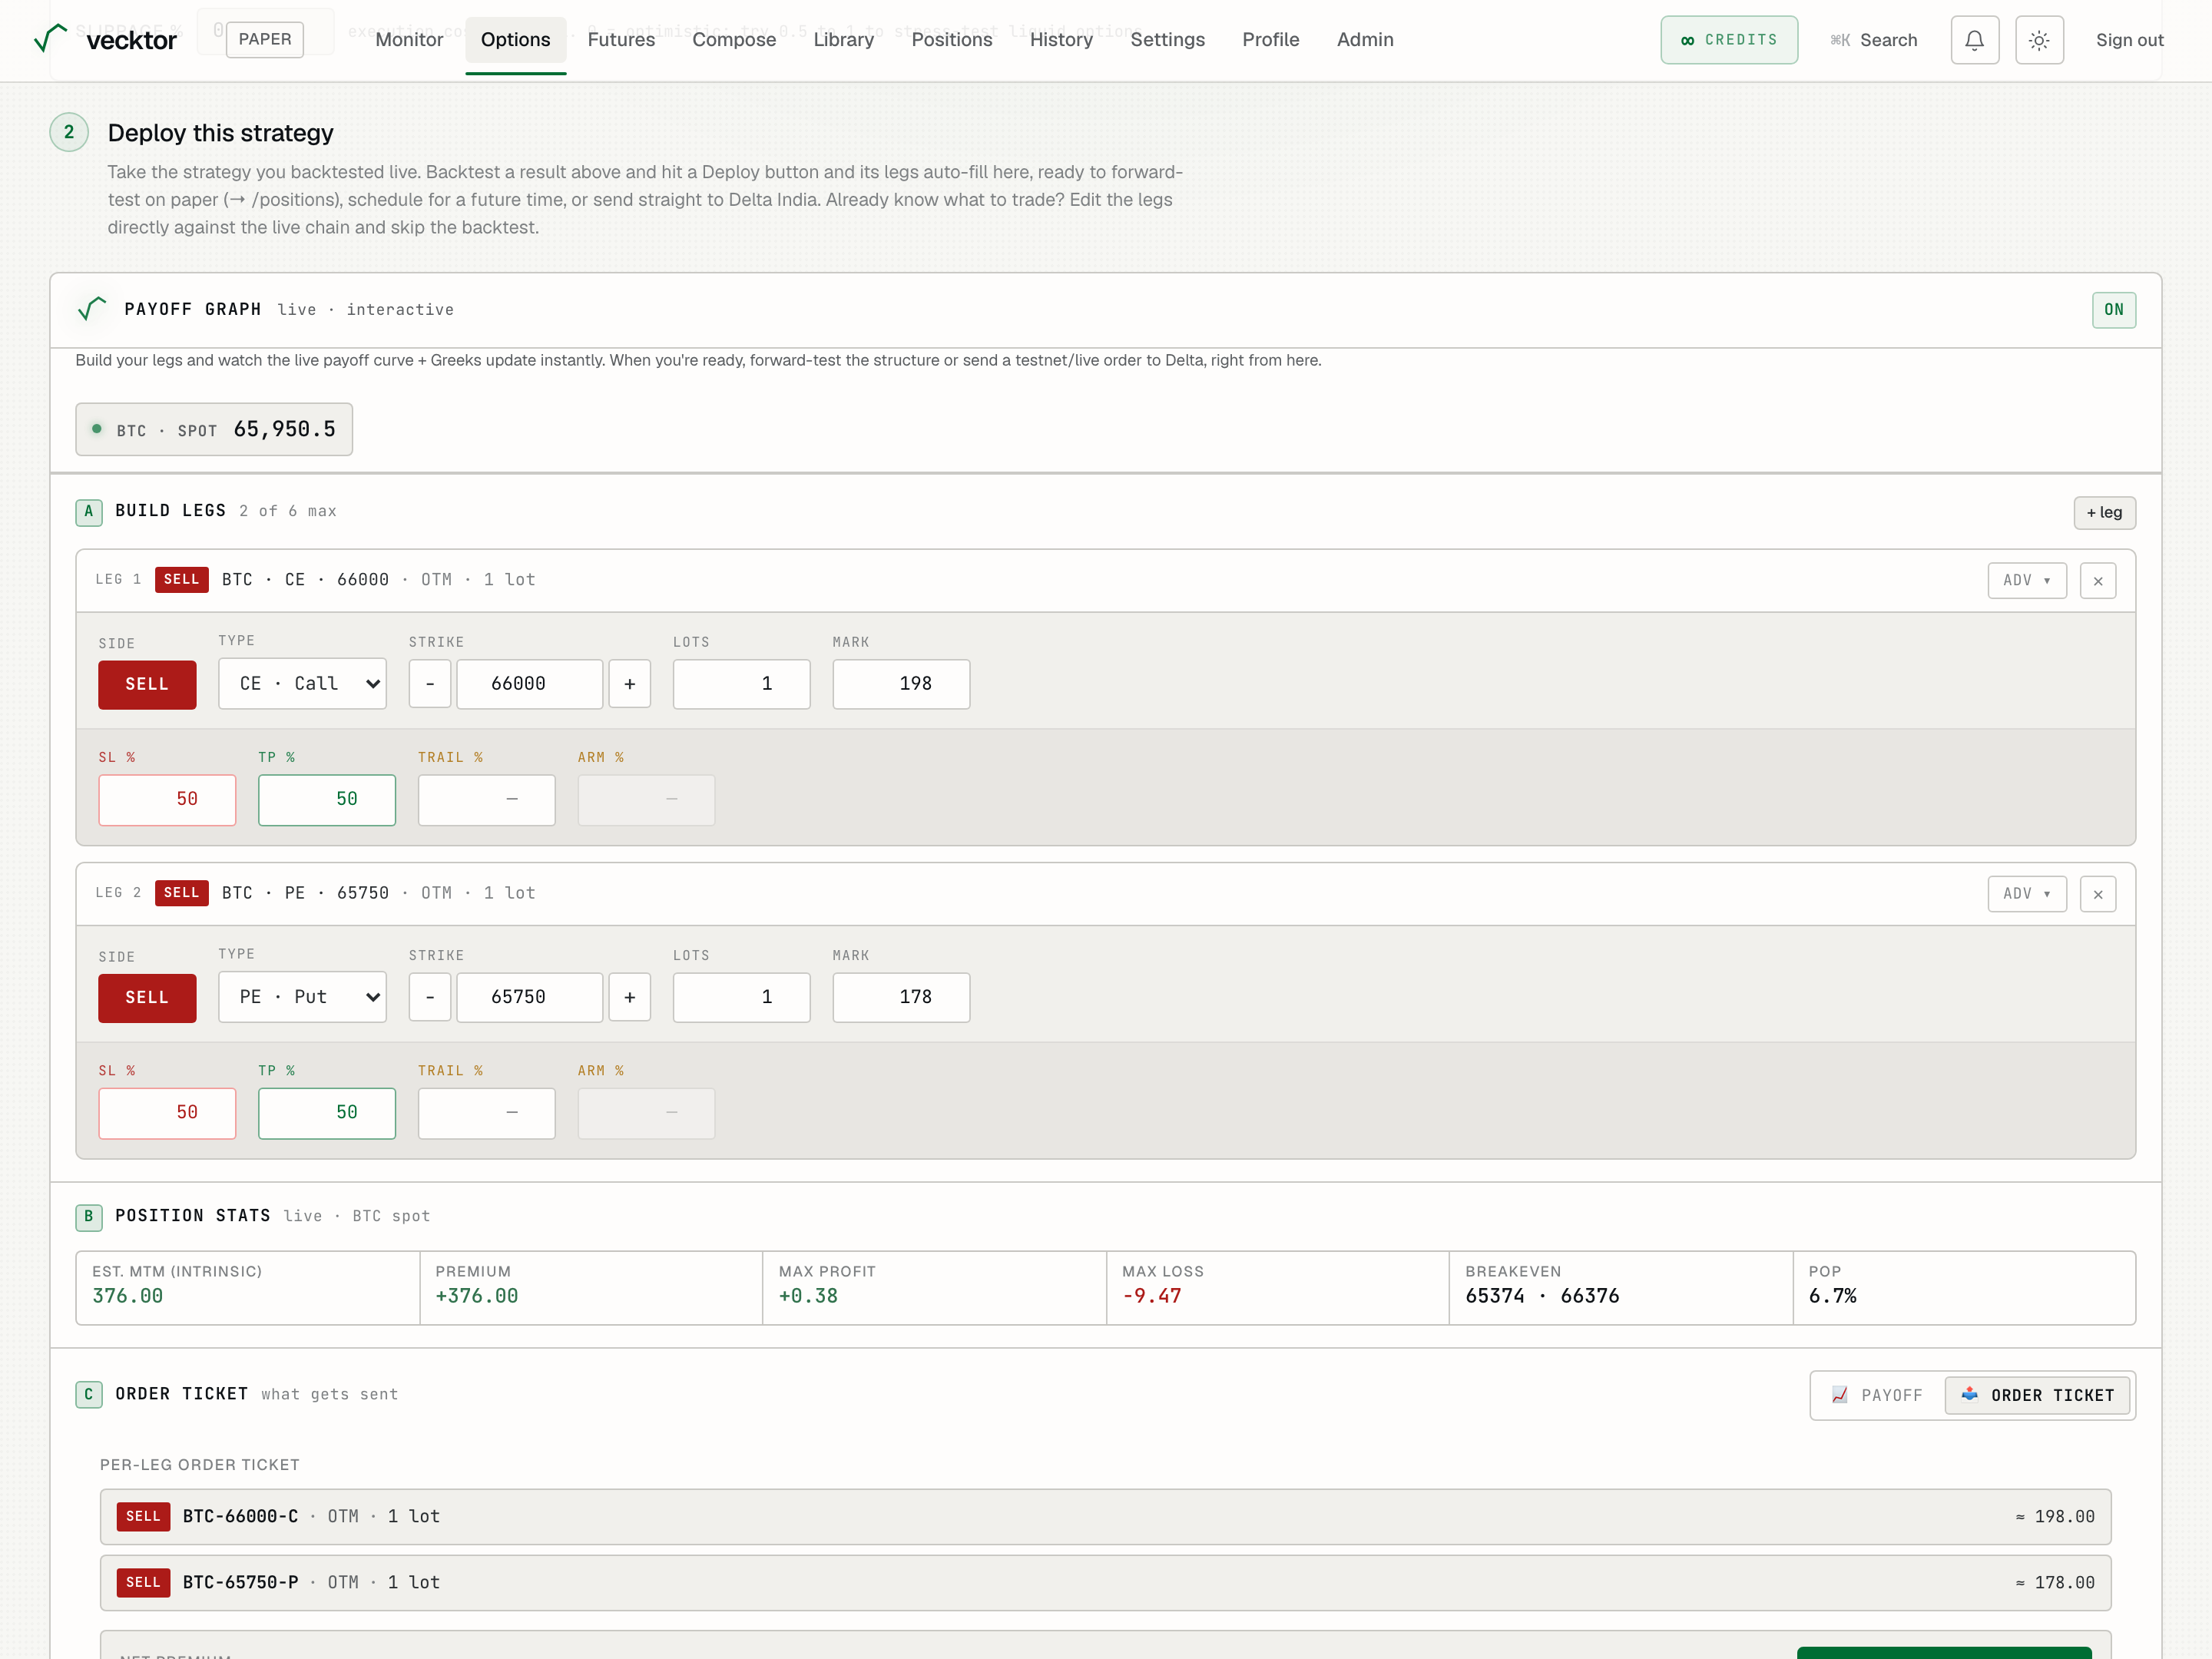
- Find the Payoff graph panel (it is the trade ticket)
- Use the ON / OFF chip (shows or hides the chart only)
- Read the live price (your legs price against this)
- Read what the panel does (build, then deploy)
Build or edit the legs
Each leg is one option you buy or sell. Build legs is section A of the panel. You can carry legs over from a backtest or shape them here.
- Click + leg to add a leg, up to 6 (the Delta maximum). The header shows how many of 6 you have used.
- On Side, click BUY (you pay premium, a debit) or SELL (you collect premium, a credit).
- On Type, pick CE · Call (profits as price rises) or PE · Put (profits as price falls).
- Set the Strike with the minus and plus steppers, or type it. Steps match Delta (250 for BTC, 25 for ETH).
- Set Lots (your size on that leg) and check the Mark (the premium per unit at entry).
- Use the ✕ to remove a leg you do not want.
 1Add a leg (up to 6)2BUY or SELL3Strike steppers
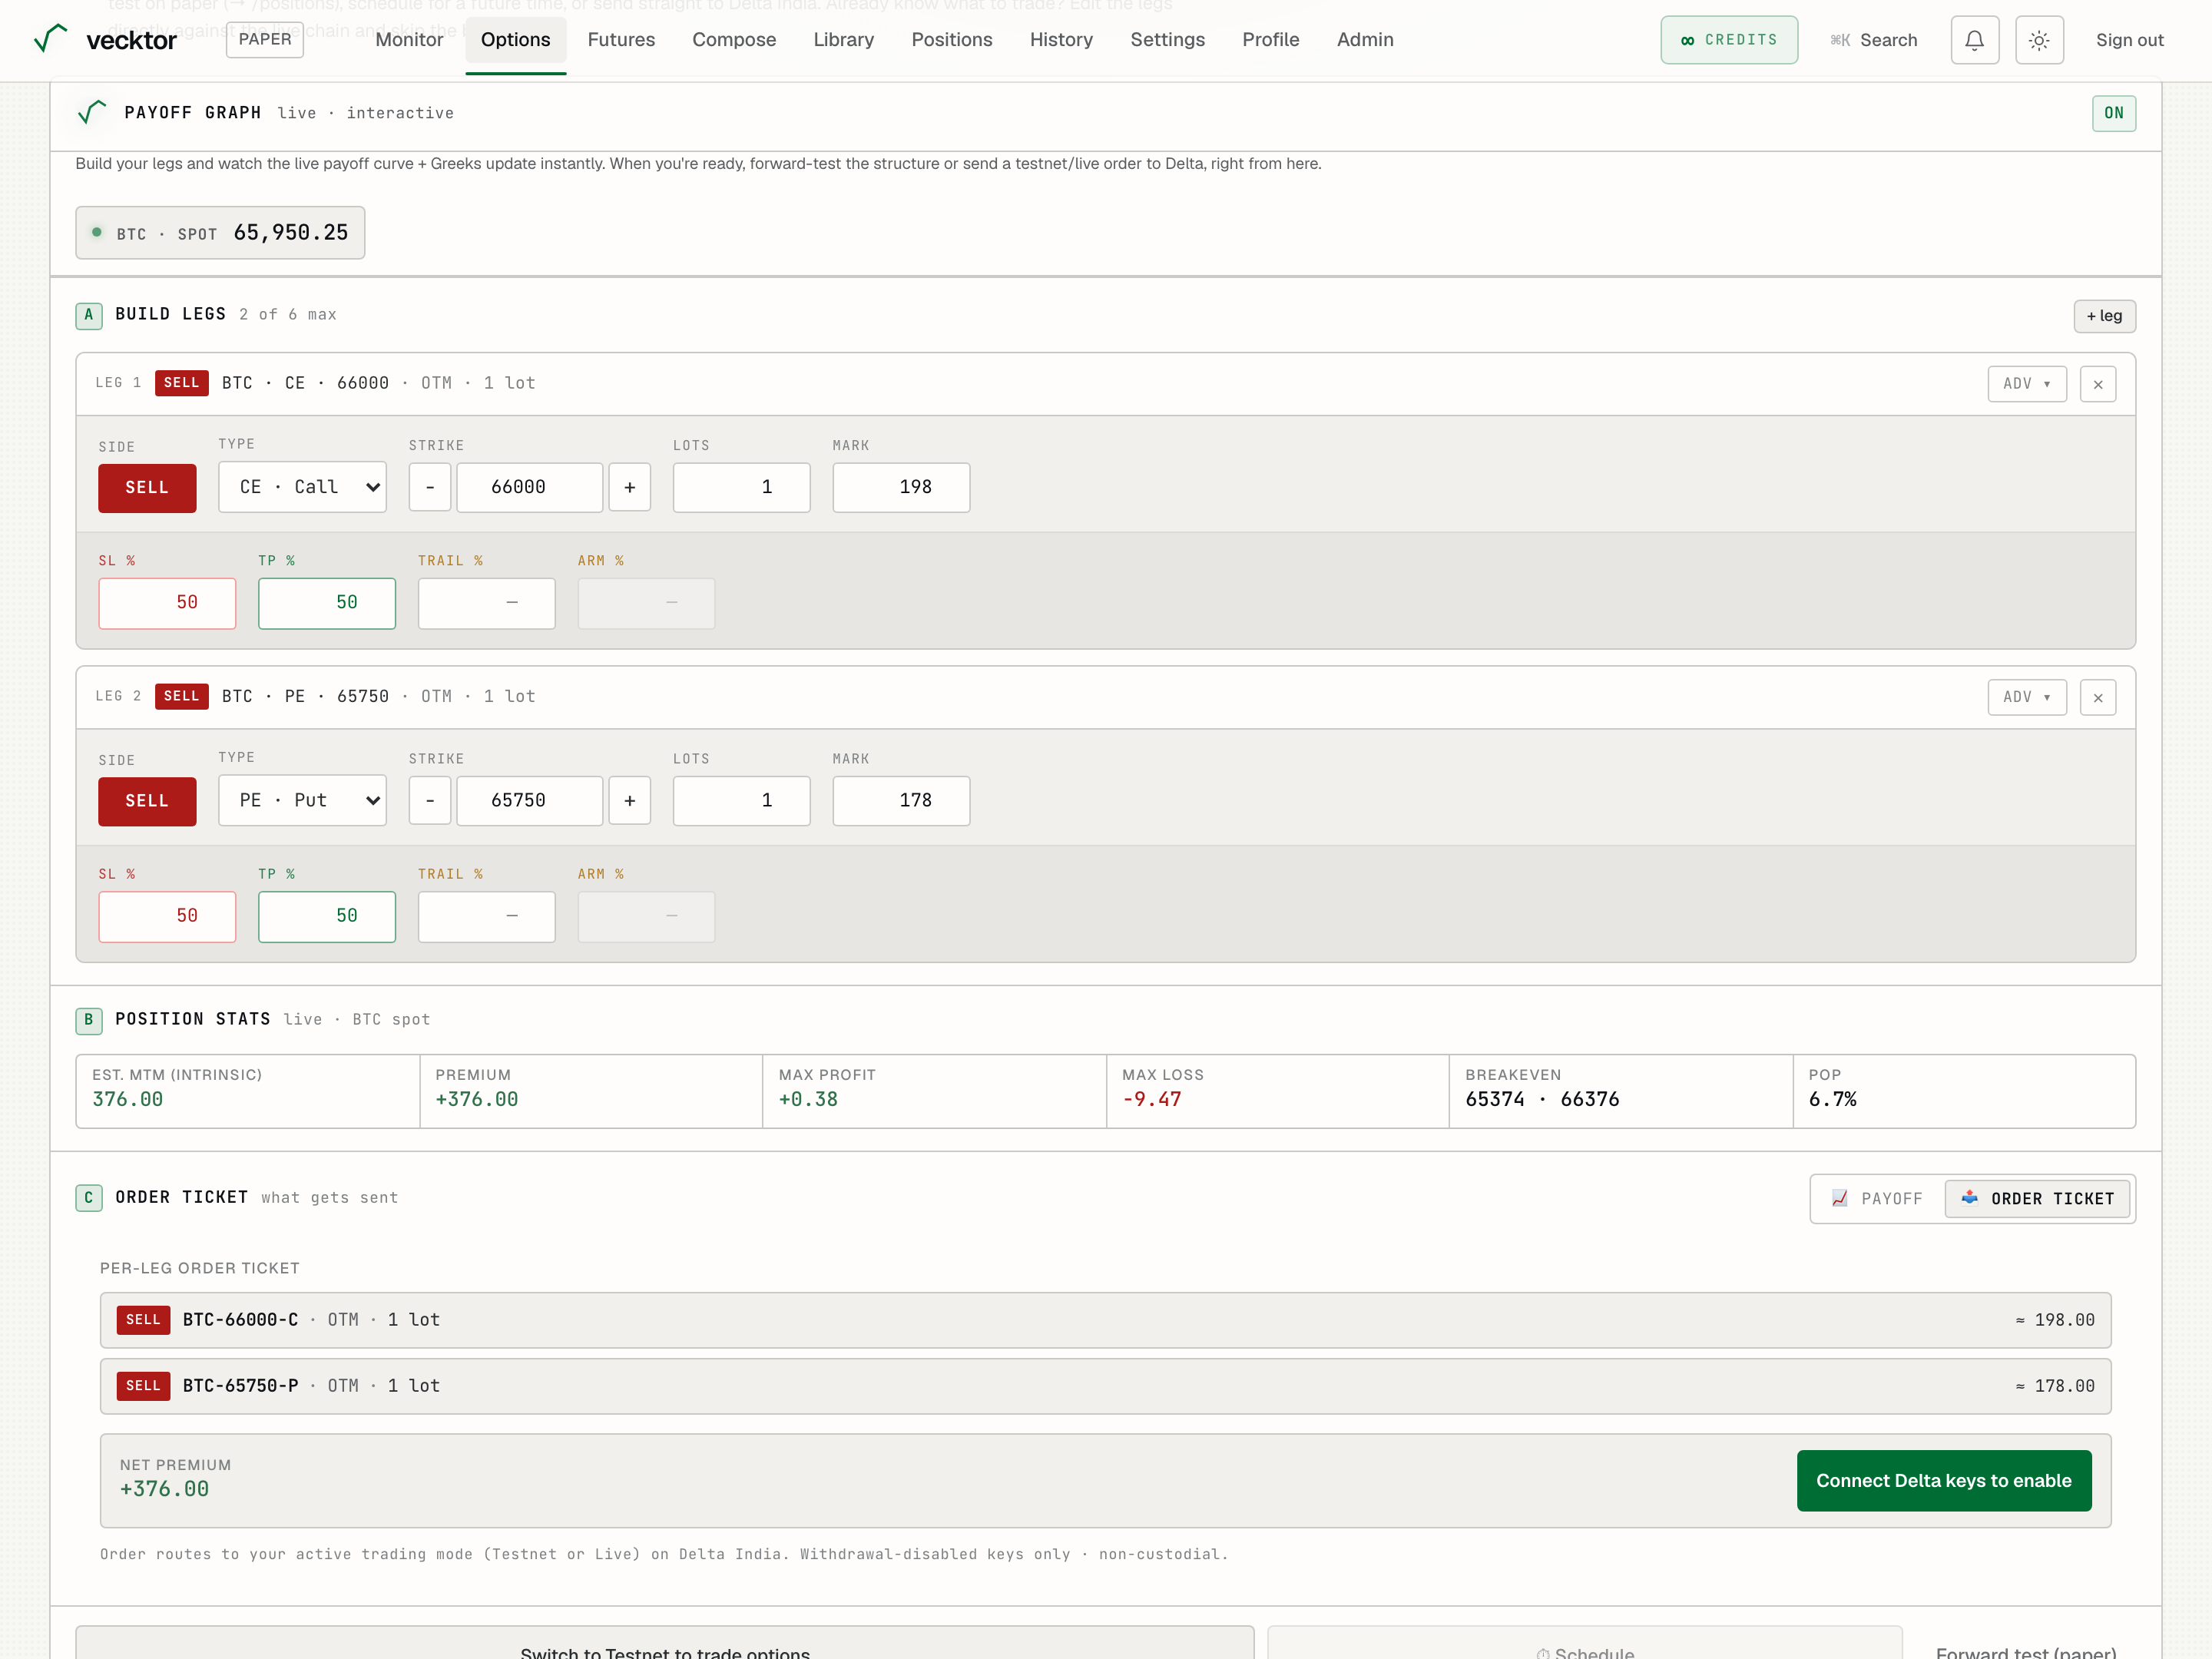
- Set Side to BUY or SELL (debit or credit)
- Pick CE · Call or PE · Put (up side or down side)
- Set the Strike (steppers snap to Delta steps)
- Set Lots (your size on the leg)
- Click + leg to add more (up to 6 legs)
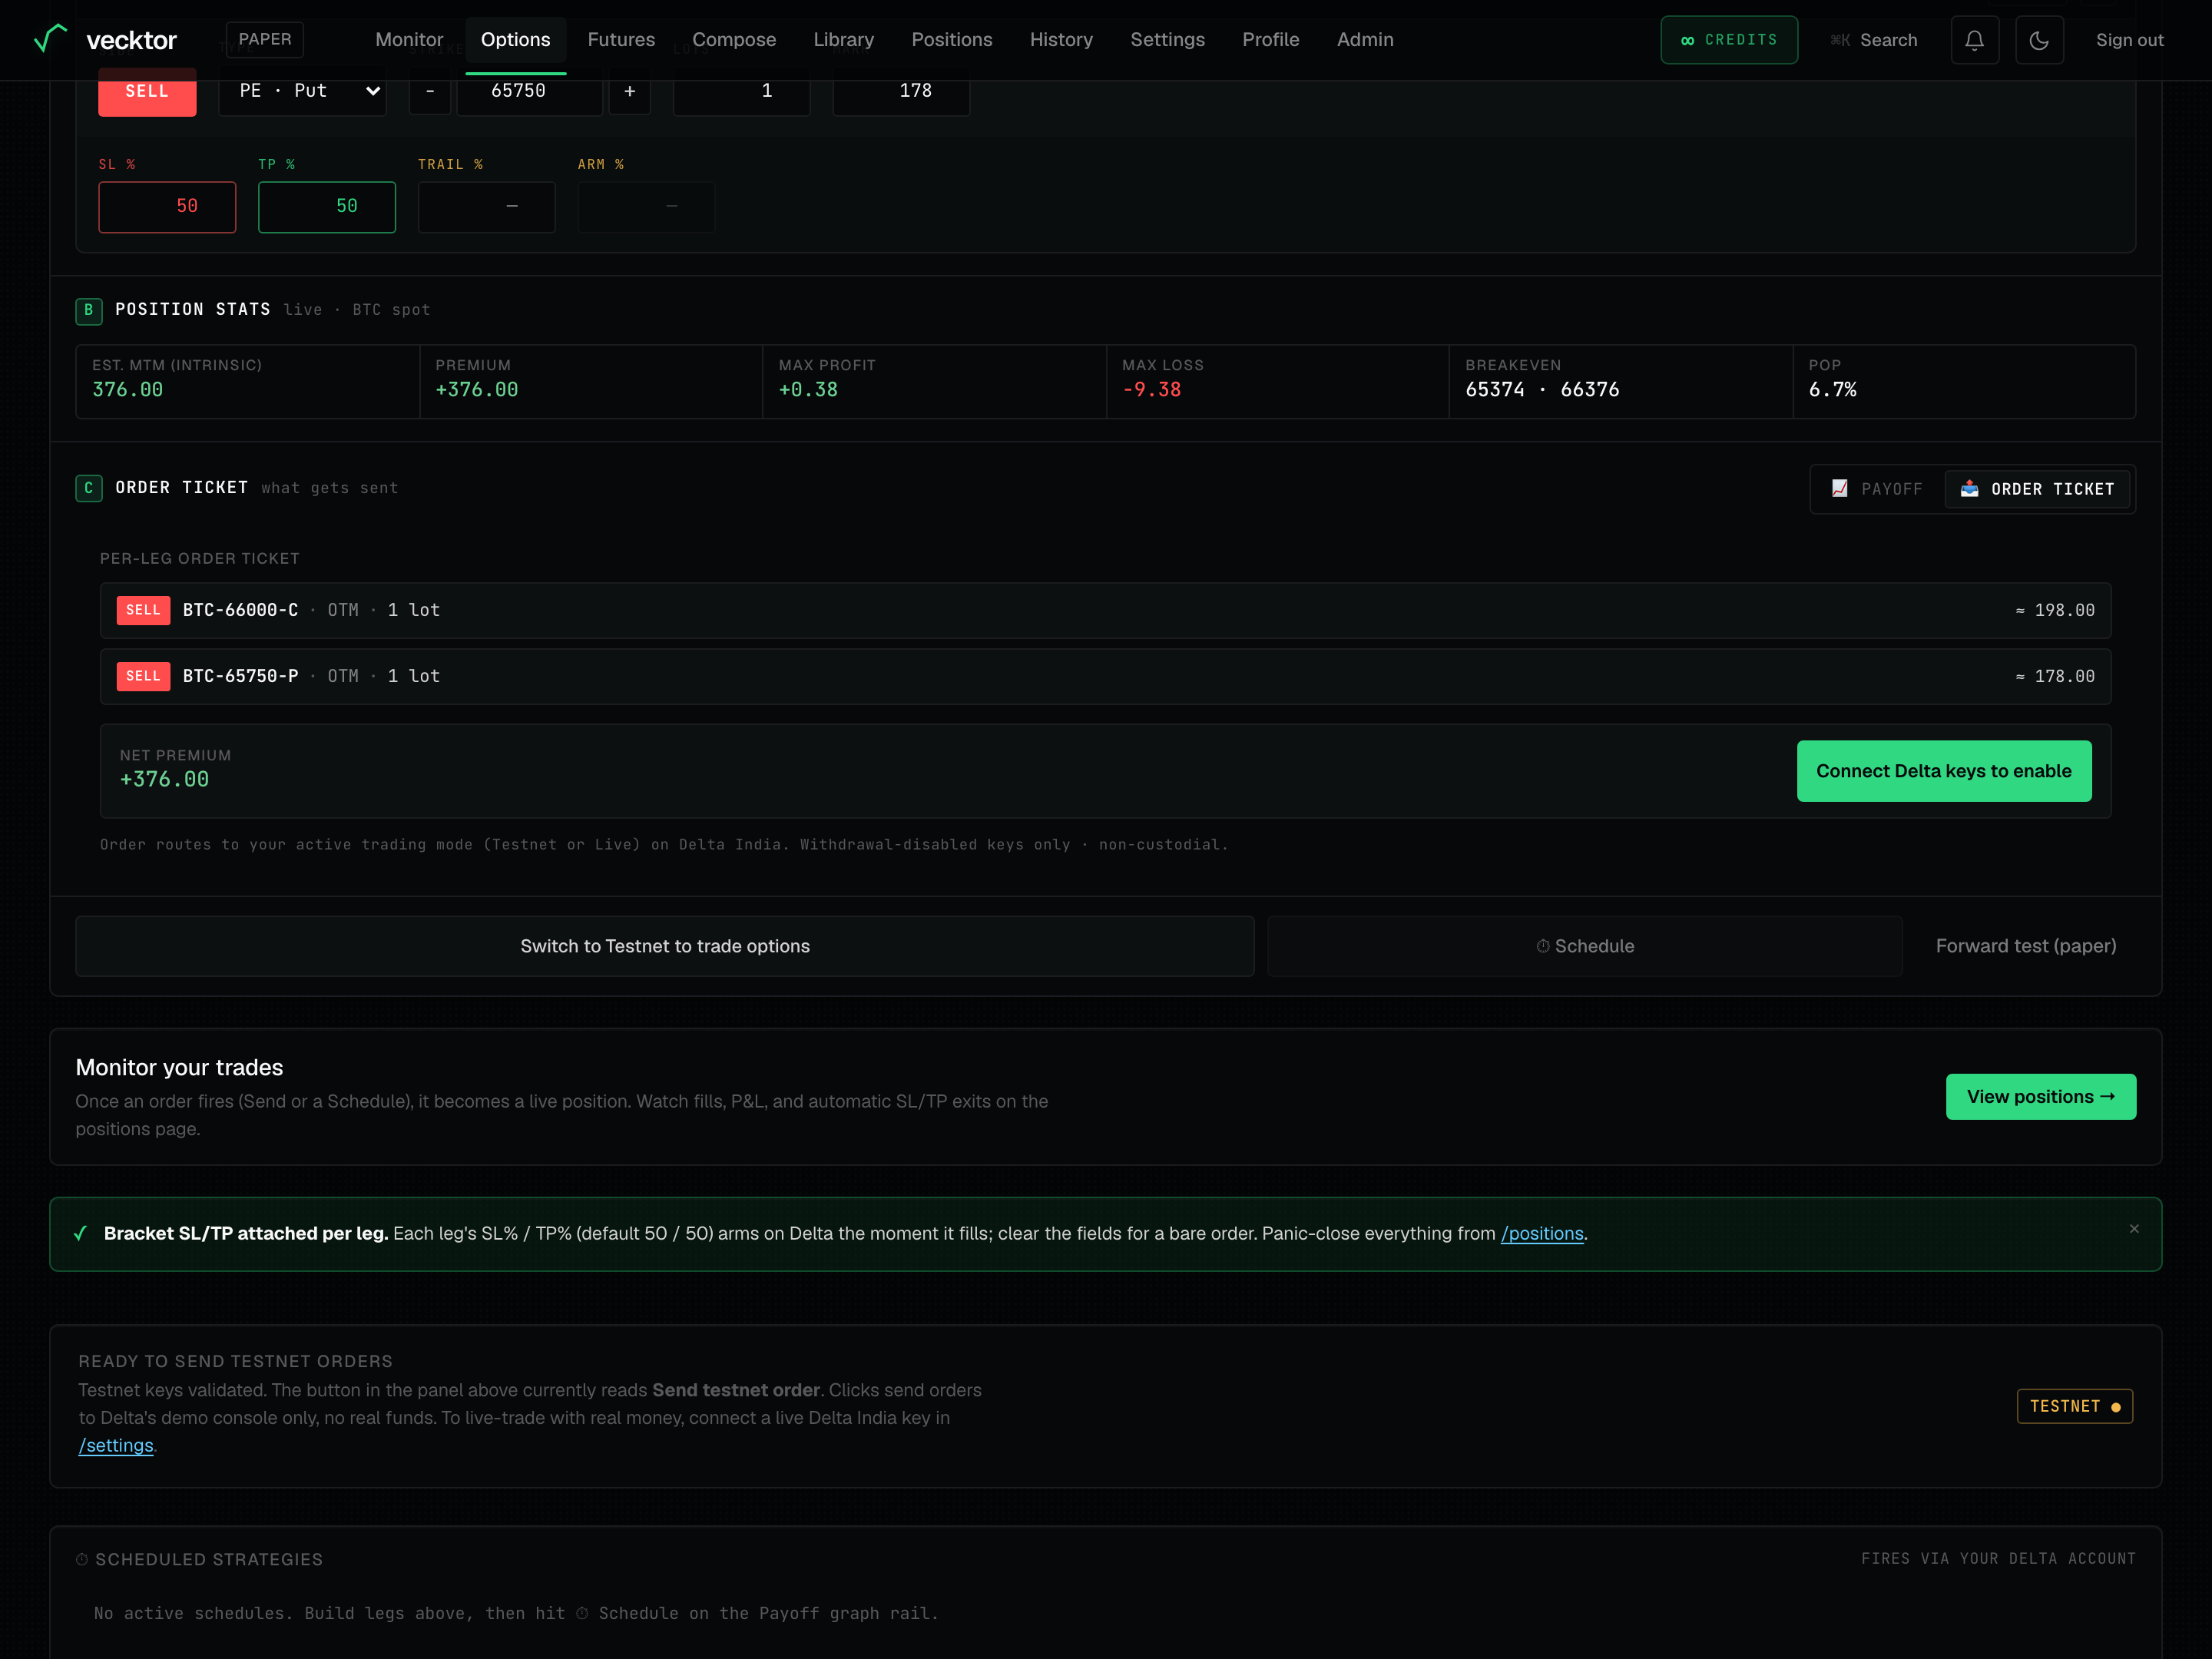
Set the per-leg stop, target, trail and arm
Each leg card has a risk row: SL %, TP %, Trail % and Arm %. These are the guards Vecktor enforces server-side once the trade is live.
- Set SL % (stop loss as a percent of the mark) to cap the loss on that leg. For a short leg it fires when the premium goes up by that percent.
- Set TP % (take profit as a percent of the mark) to lock in a win on that leg.
- Set Trail % (trailing stop, the drawdown from peak profit that triggers an exit). For example, trail 10 percent with a peak of plus 25 percent exits at plus 15 percent.
- Set Arm % to delay the trail until profit first reaches that level, so it does not fire on early noise. Arm is greyed out until you set a Trail.
- Open adv on a leg for the tp ladder (partial exits at tp1, tp2, tp3, each with a target % and a qty %) and intraday auto-close (a by time in IST, 24-hour Indian time).
 1Per-leg stop loss2Trailing stop3Delay the trail
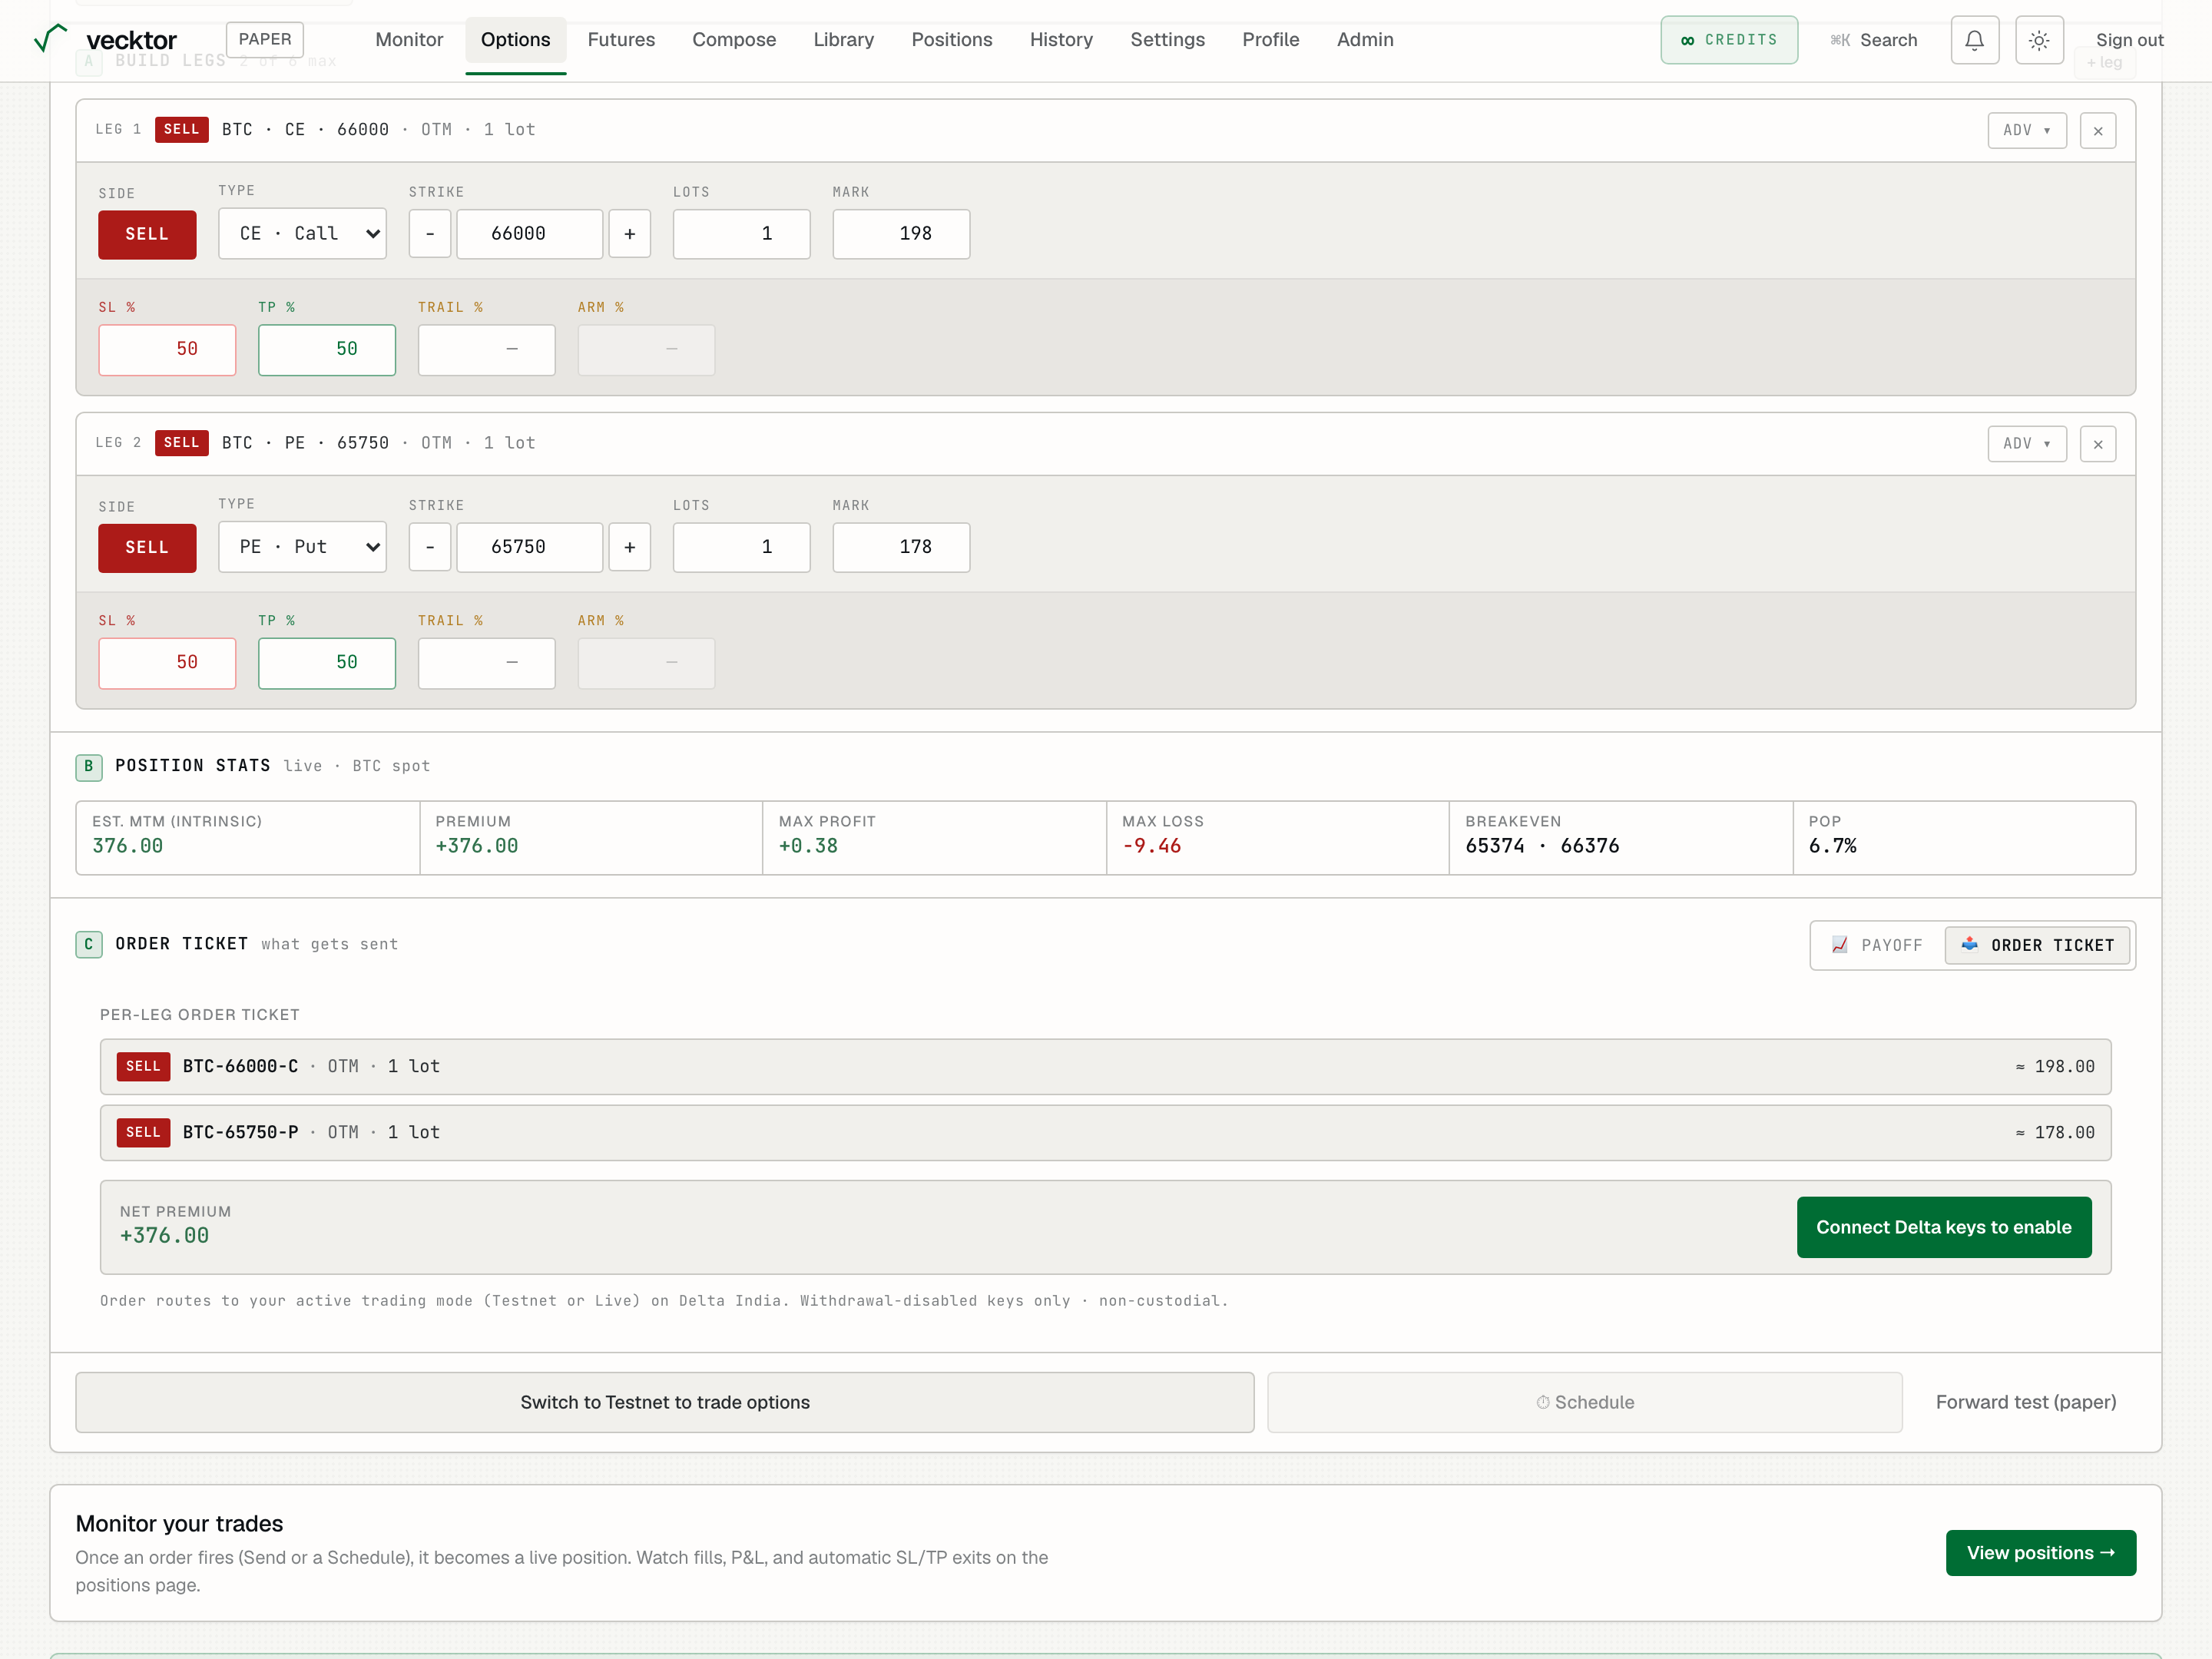
- Set SL % to cap the loss (percent of the mark)
- Set TP % to lock a win
- Set Trail % for a trailing stop (drawdown from peak profit)
- Set Arm % to delay the trail (needs a Trail first)
- Open adv for the TP ladder (partial exits + intraday close)
Stop types, trailing and breakeven (now enforced live)
Beyond a simple percent, stops and targets can be measured four ways, and every type now fires live exactly as it does in the backtest. This is the live-execution parity we shipped recently.
- Choose the stop/target measurement: percent of premium, points of premium, points of the underlying index, or percent of the underlying. Underlying-based stops are useful when you care about the spot move, not the option premium.
- Trailing stop: set it with X and Y, where for every X move in your favor the stop tightens by Y, locking in profit as the trade runs (the classic X-Y trail).
- Trail-SL-to-breakeven: on a multi-leg strategy, once it is in profit you can lock breakeven so a winning leg cannot give the gains back if a sibling leg stops out.
- These run on Vecktor's own monitor, not as a Delta bracket, so on the Positions page they show as pending guards (Delta's own SL/TP column stays empty). They are watched every few seconds and fire on their own.
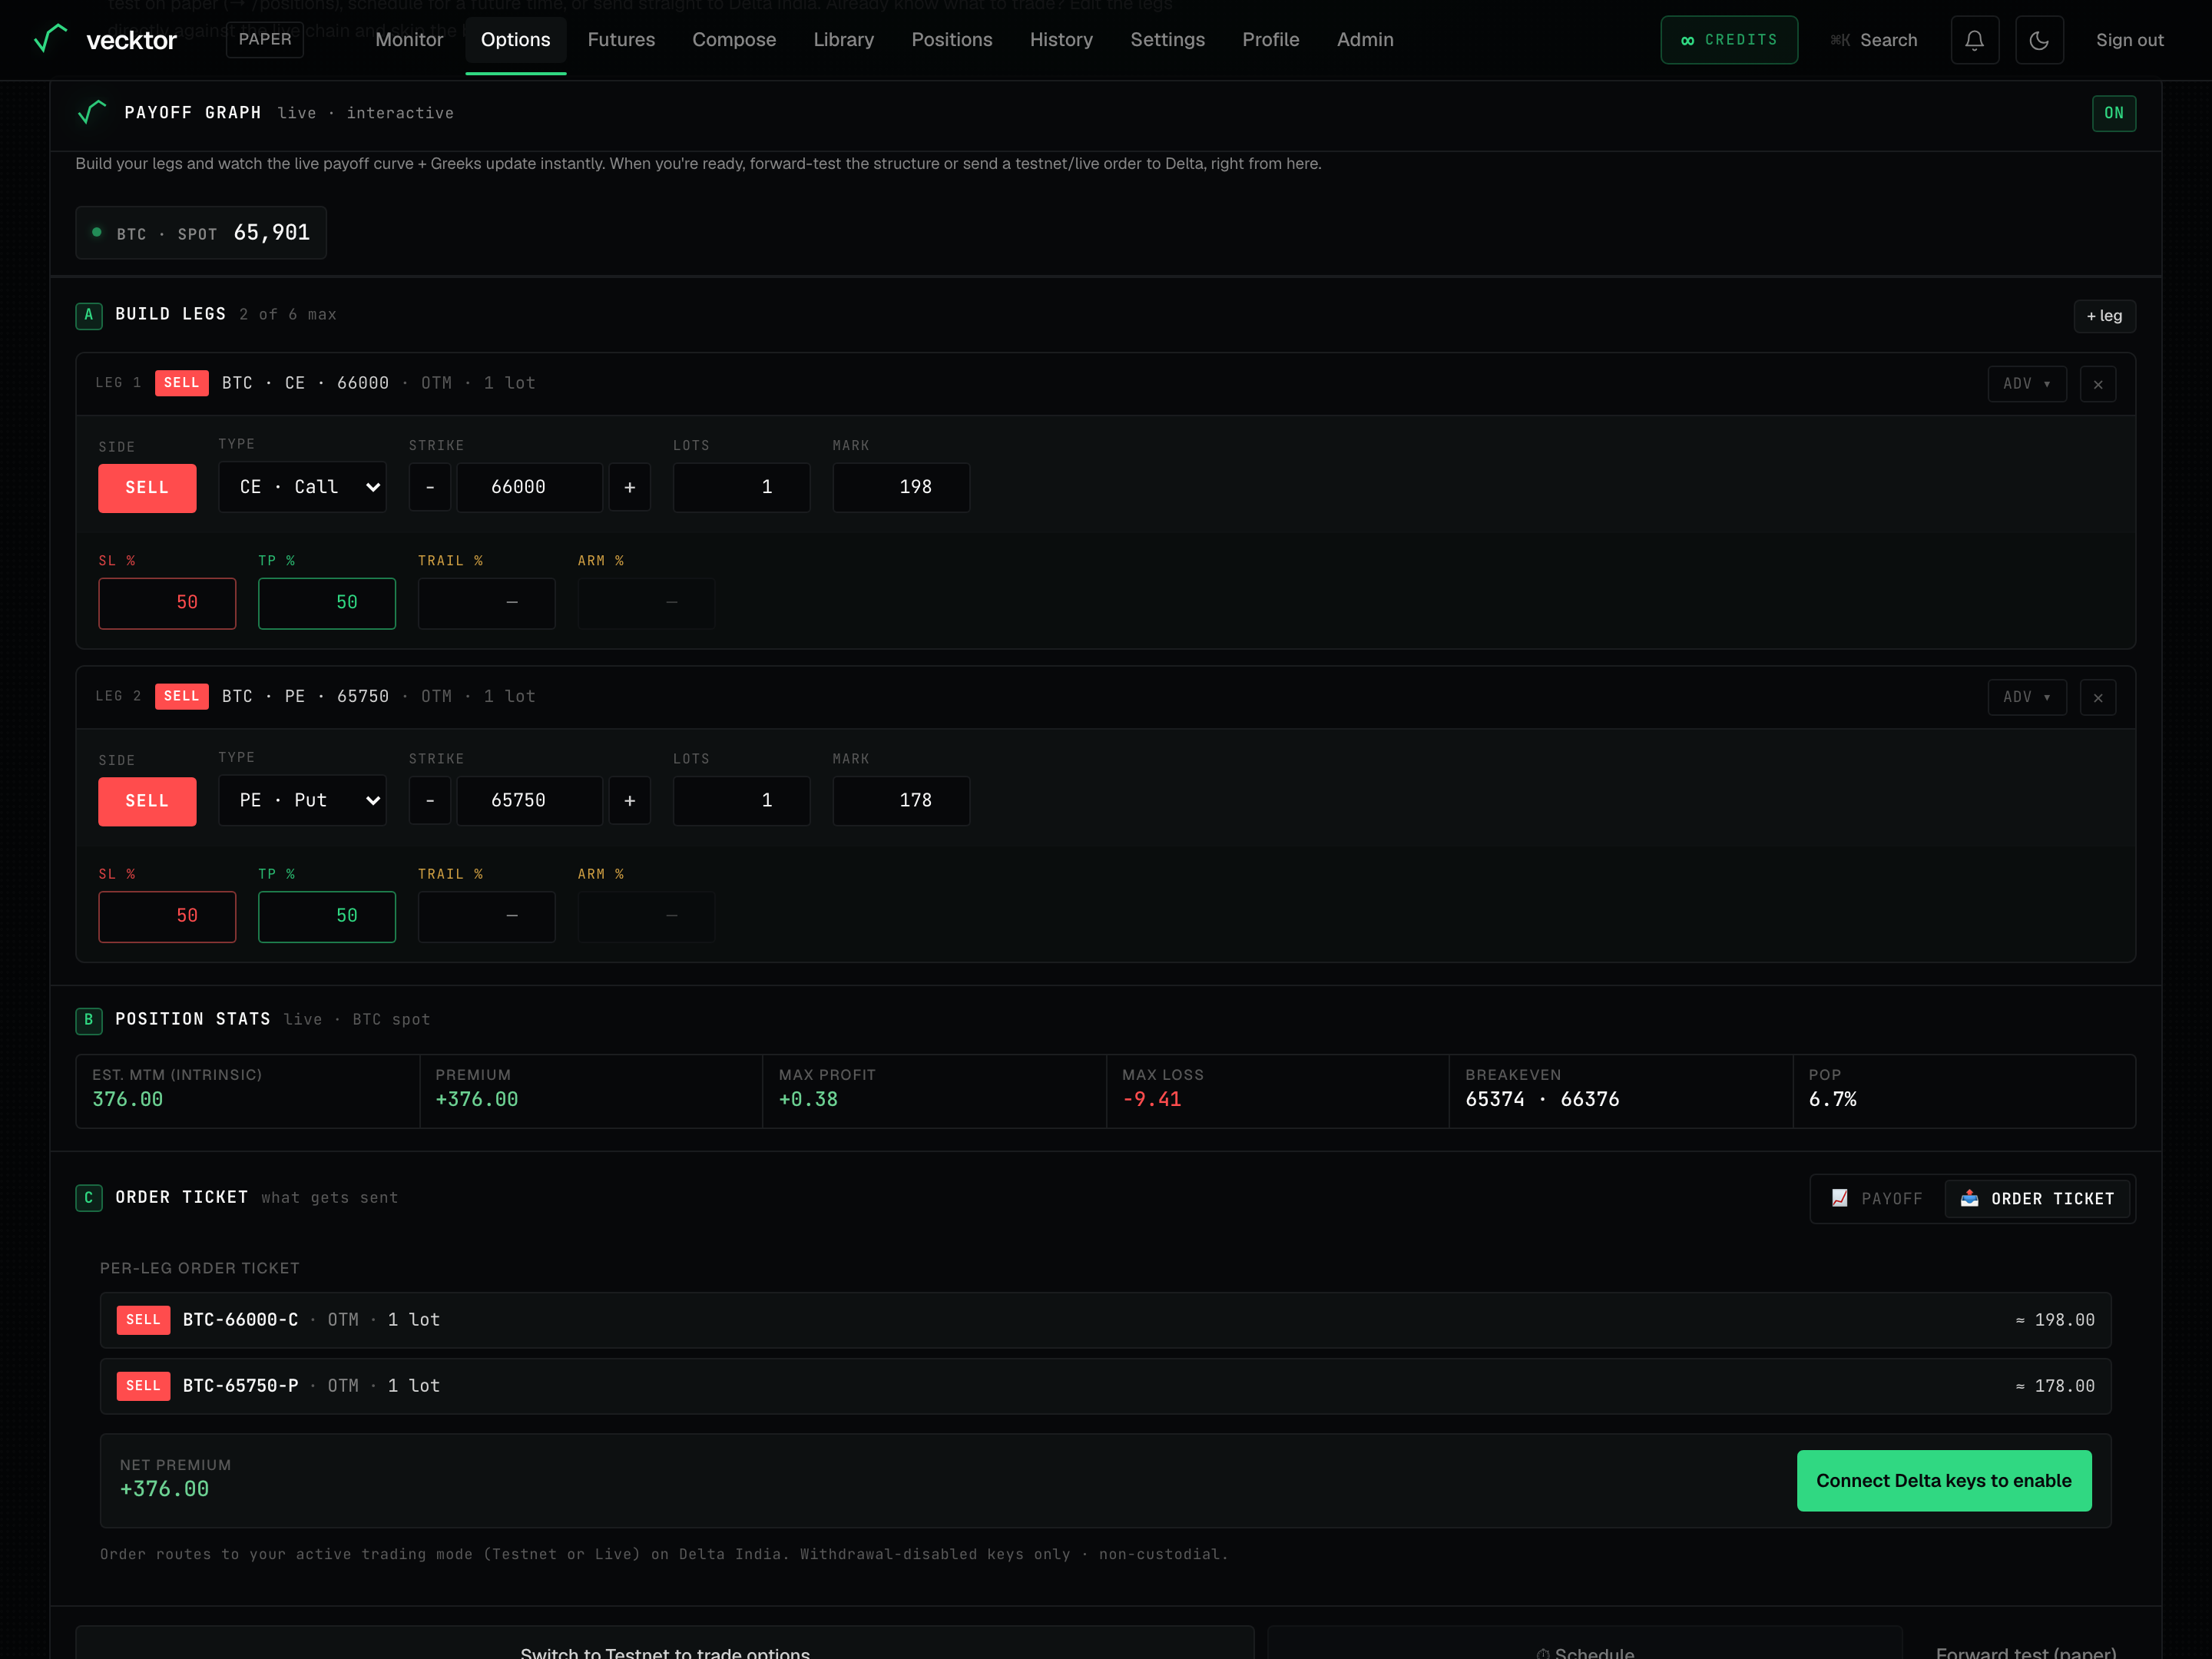
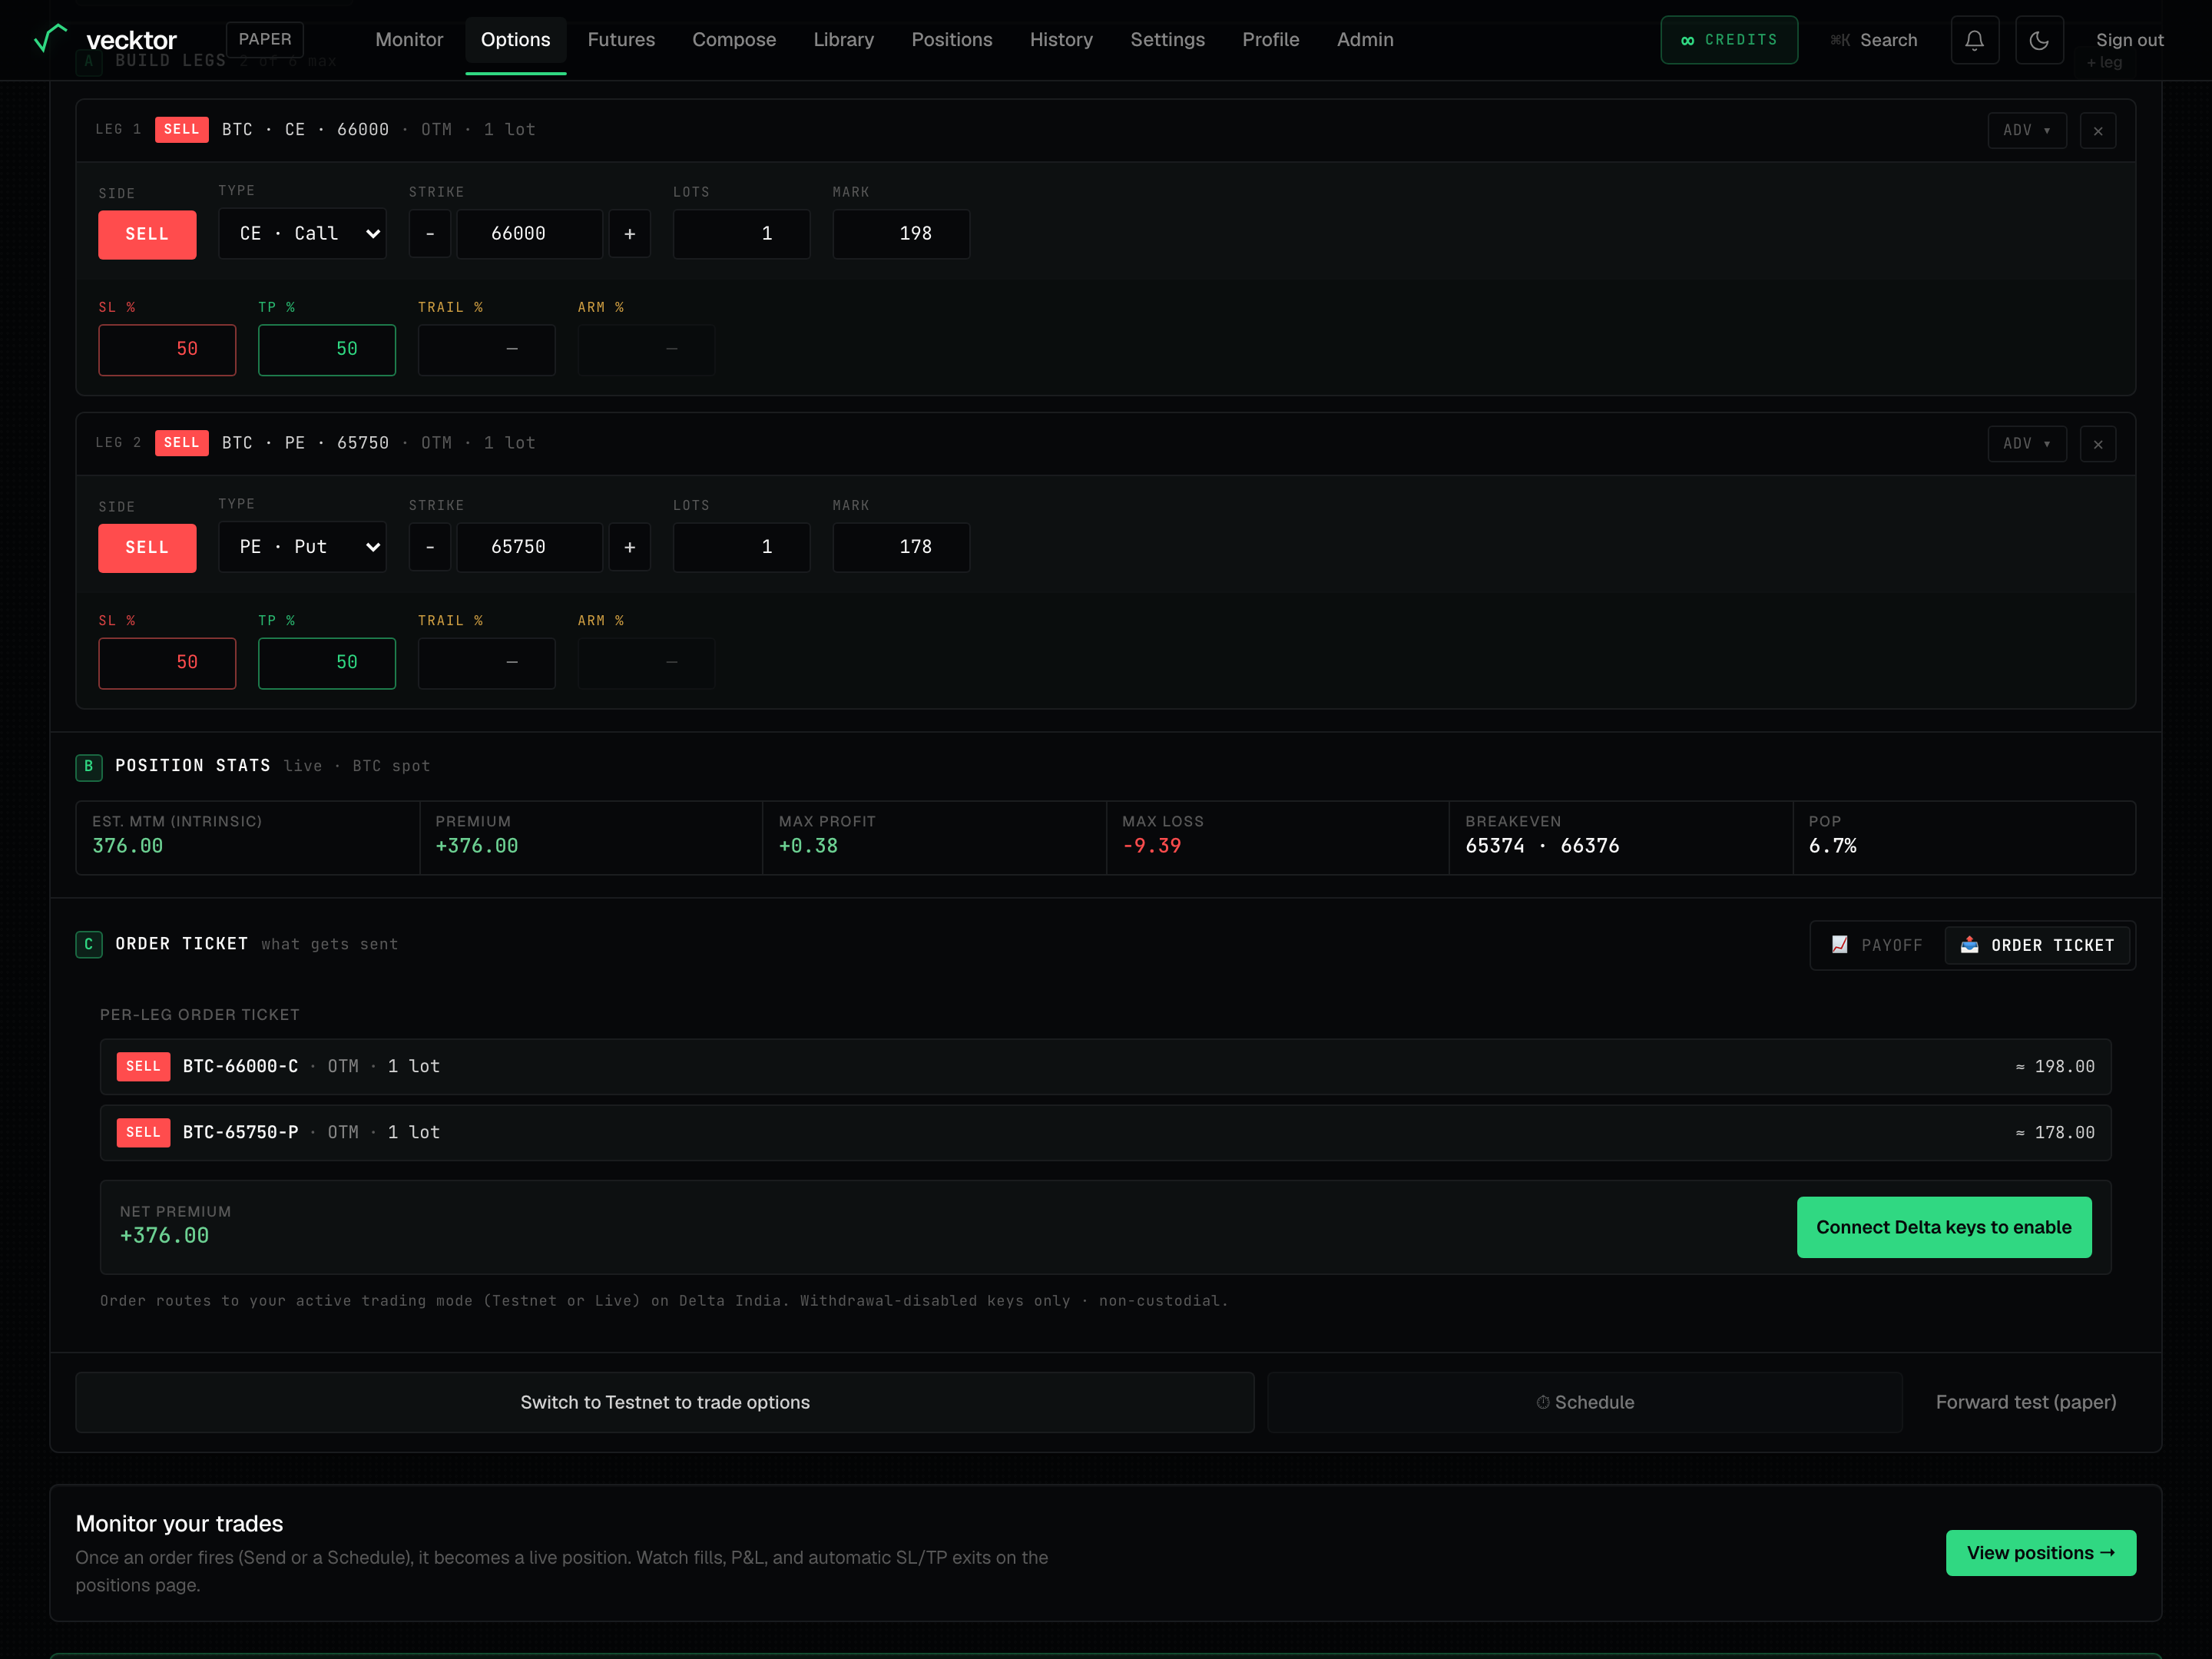
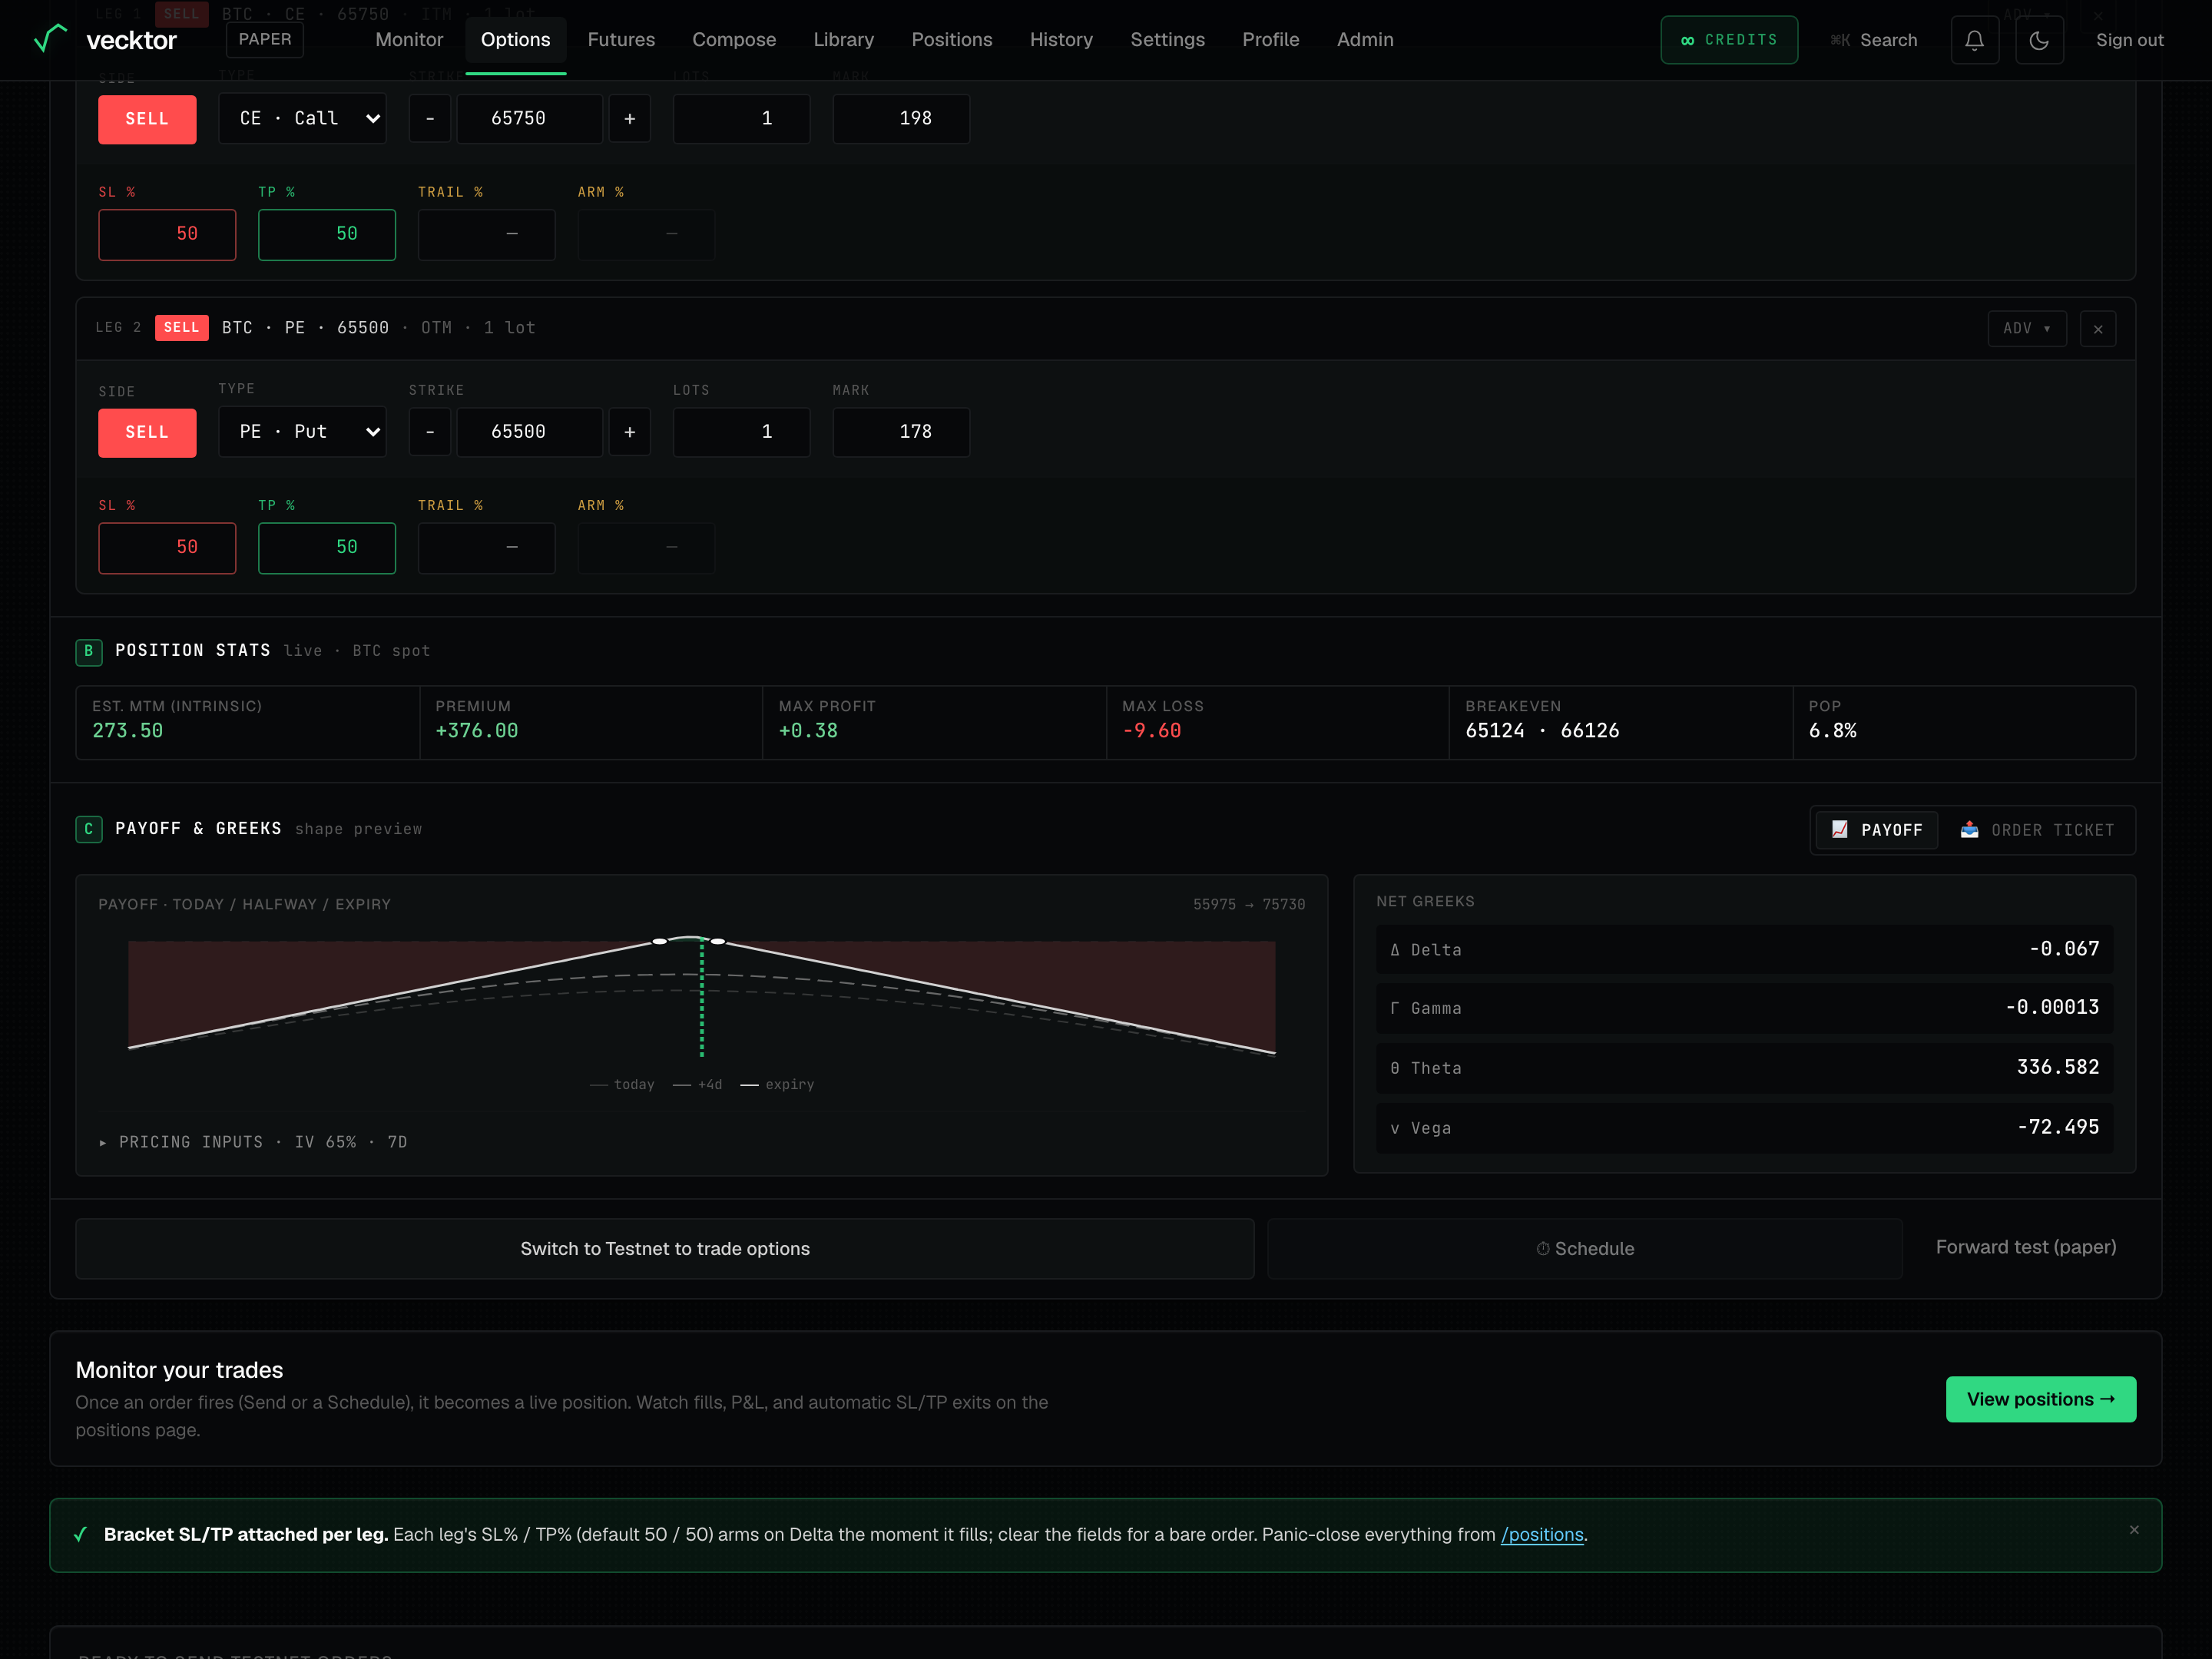
Read the position stats strip
Section B, Position stats, reads the legs you built and updates live as the price moves. It is a model estimate, not the exchange mark.
- Read Est. MTM (intrinsic): the estimated mark-to-market open profit or loss using intrinsic value at the current price. It ignores time value, so it is an estimate.
- Read Premium: the net premium, plus if you collect at entry, minus if you pay.
- Read Max profit and Max loss: the best and worst case at expiry across the modelled price range.
- Read Breakeven: the price or prices where the strategy crosses zero profit at expiry.
- Read POP: probability of profit (the model-implied chance the position is in profit at expiry).
 1Estimated open P&L2Worst case at expiry3Probability of profit
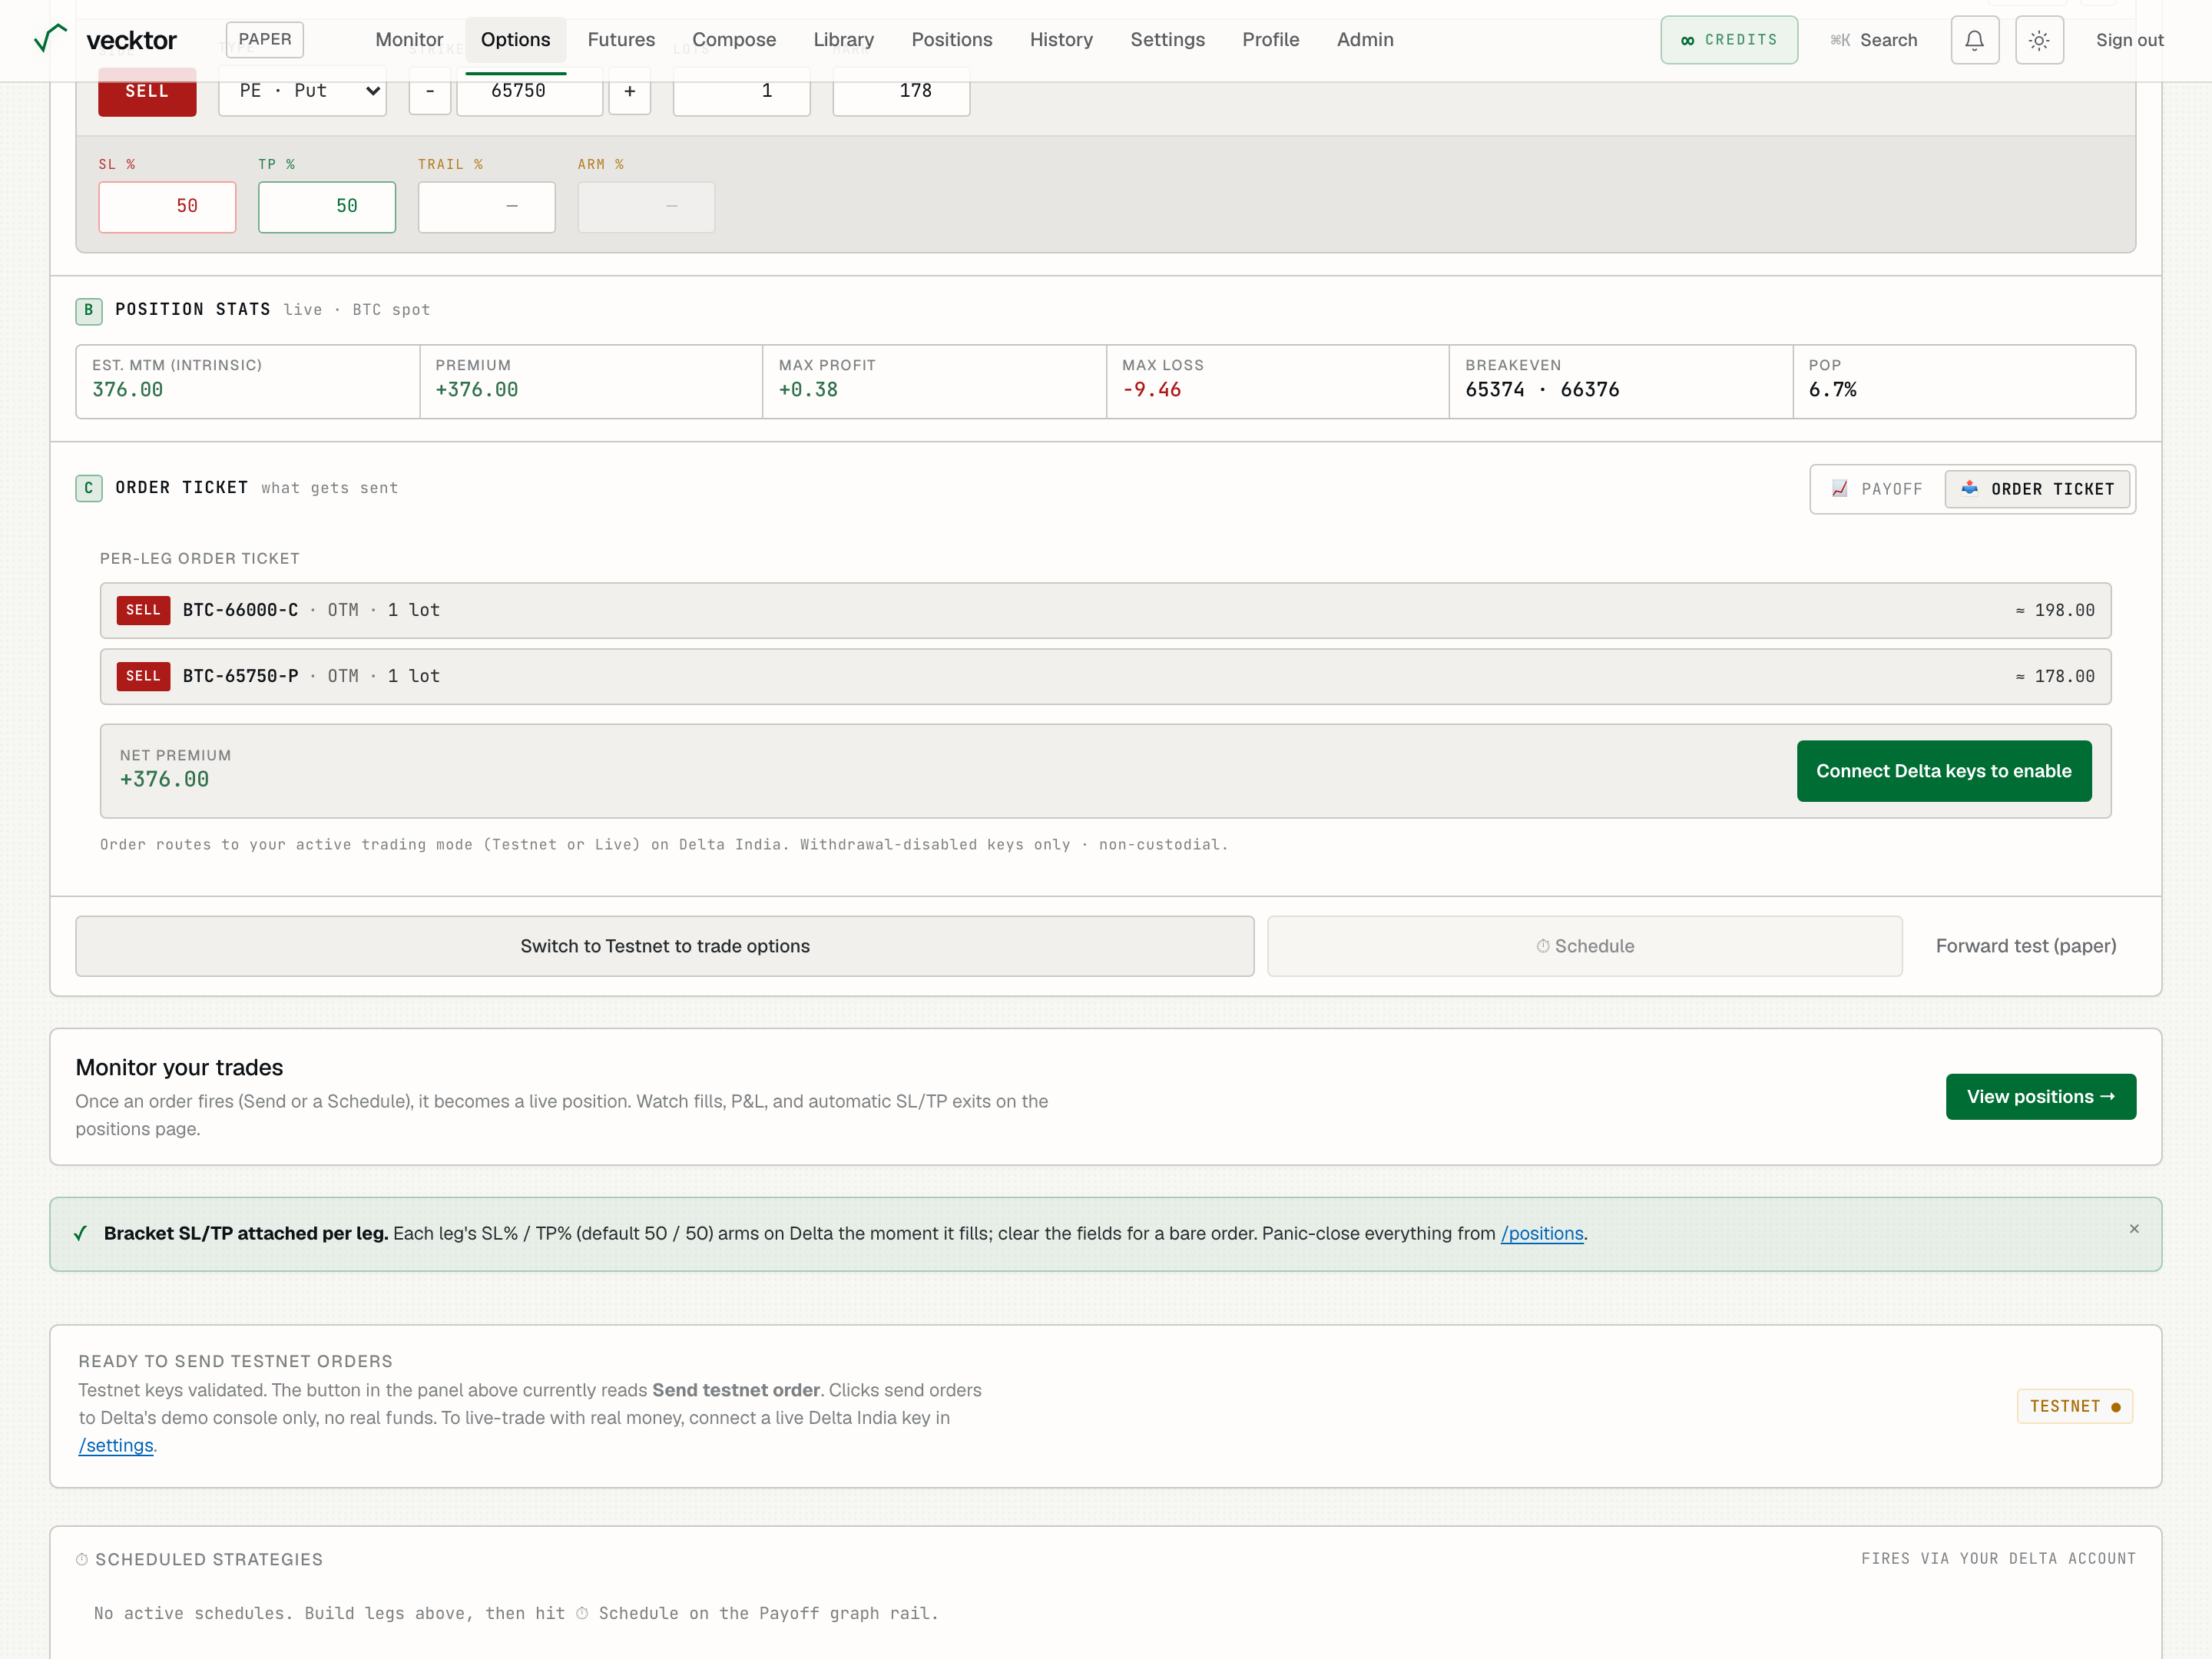
Tune the pricing inputs (IV and DTE)
On the Payoff tab, a pricing inputs row lets you change the volatility and time the model uses, which moves the stats and the curve.
- Click the 📈 Payoff pill to switch section C (Payoff & Greeks) to the chart and Greeks.
- Open the pricing inputs disclosure (the row that reads pricing inputs · IV nn% · nnd).
- Drag IV (implied volatility, the market's expected swing) to match the contract you are pricing.
- Drag DTE (days to expiry, how long until the option settles) to the expiry you intend to trade.
- Click reset to return to the defaults (65 percent IV, 7 days).
 1Payoff tab2IV and DTE inputs
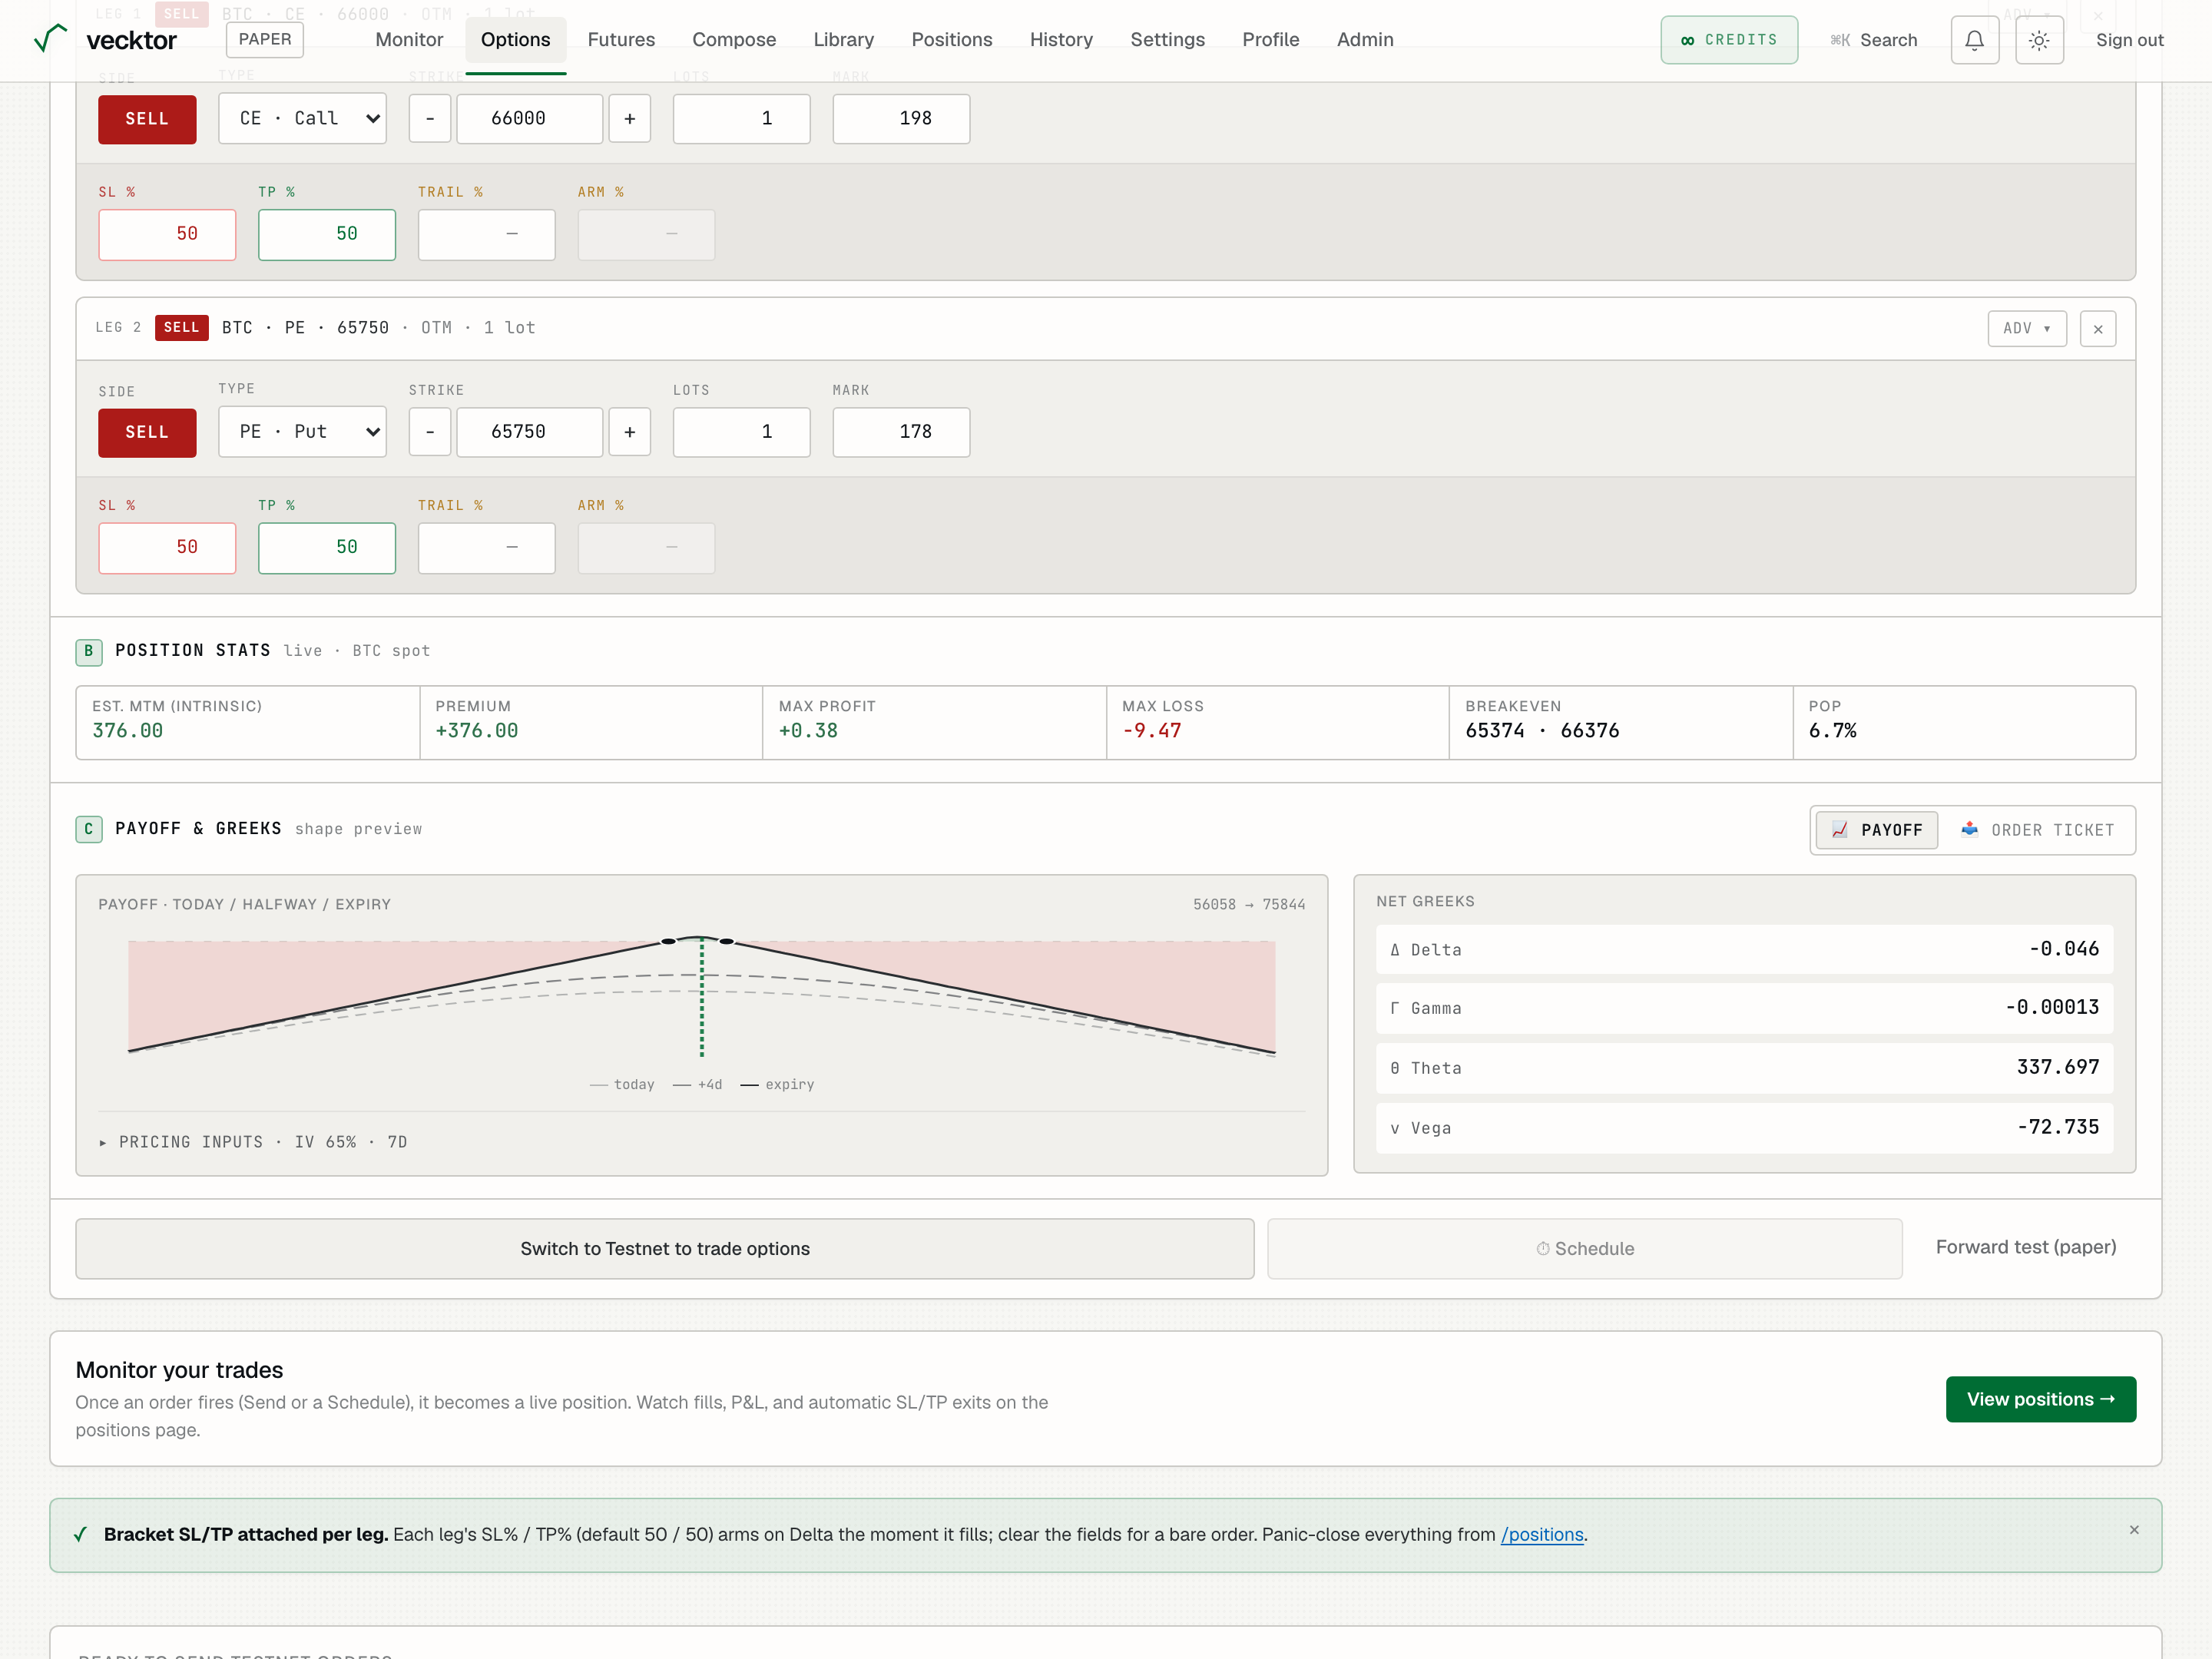
Read the net Greeks
On the Payoff tab, the Greeks pane sums the sensitivities of all your legs into one set of numbers.
- Read Δ Delta: how much the position moves per dollar of price. Near zero means it is roughly direction-neutral.
- Read Γ Gamma: how fast Delta itself changes. High gamma means a whippy, less stable position.
- Read Θ Theta: the daily profit or loss from time decay alone. Positive collects premium each day, negative bleeds it.
- Read ν Vega: profit or loss per one percent change in implied volatility. Negative means you profit when volatility falls.
 1Summed sensitivities2Theta: daily time decay
- Read Delta (move per $1 of price; near 0 is neutral)
- Read Theta (daily decay; positive collects premium)
- Read Vega (negative profits when volatility falls)
Check the order ticket before sending
The Order ticket tab is what you confirm against. It lists exactly what will be sent: each leg's side, symbol, size, and the net premium.
- Click the 📤 Order ticket pill in section C (it then reads Order ticket). The rows sit under the Per-leg order ticket heading.
- Read each per-leg row: BUY or SELL, the contract symbol (for example BTC-104000-C), its ITM, OTM, or ATM tag, and the lots.
- Read Net premium at the bottom: the total credit or debit the structure carries.
- Confirm the legs match what you intend before you send.
 1Order ticket tab2Exactly what gets sent3Total credit or debit
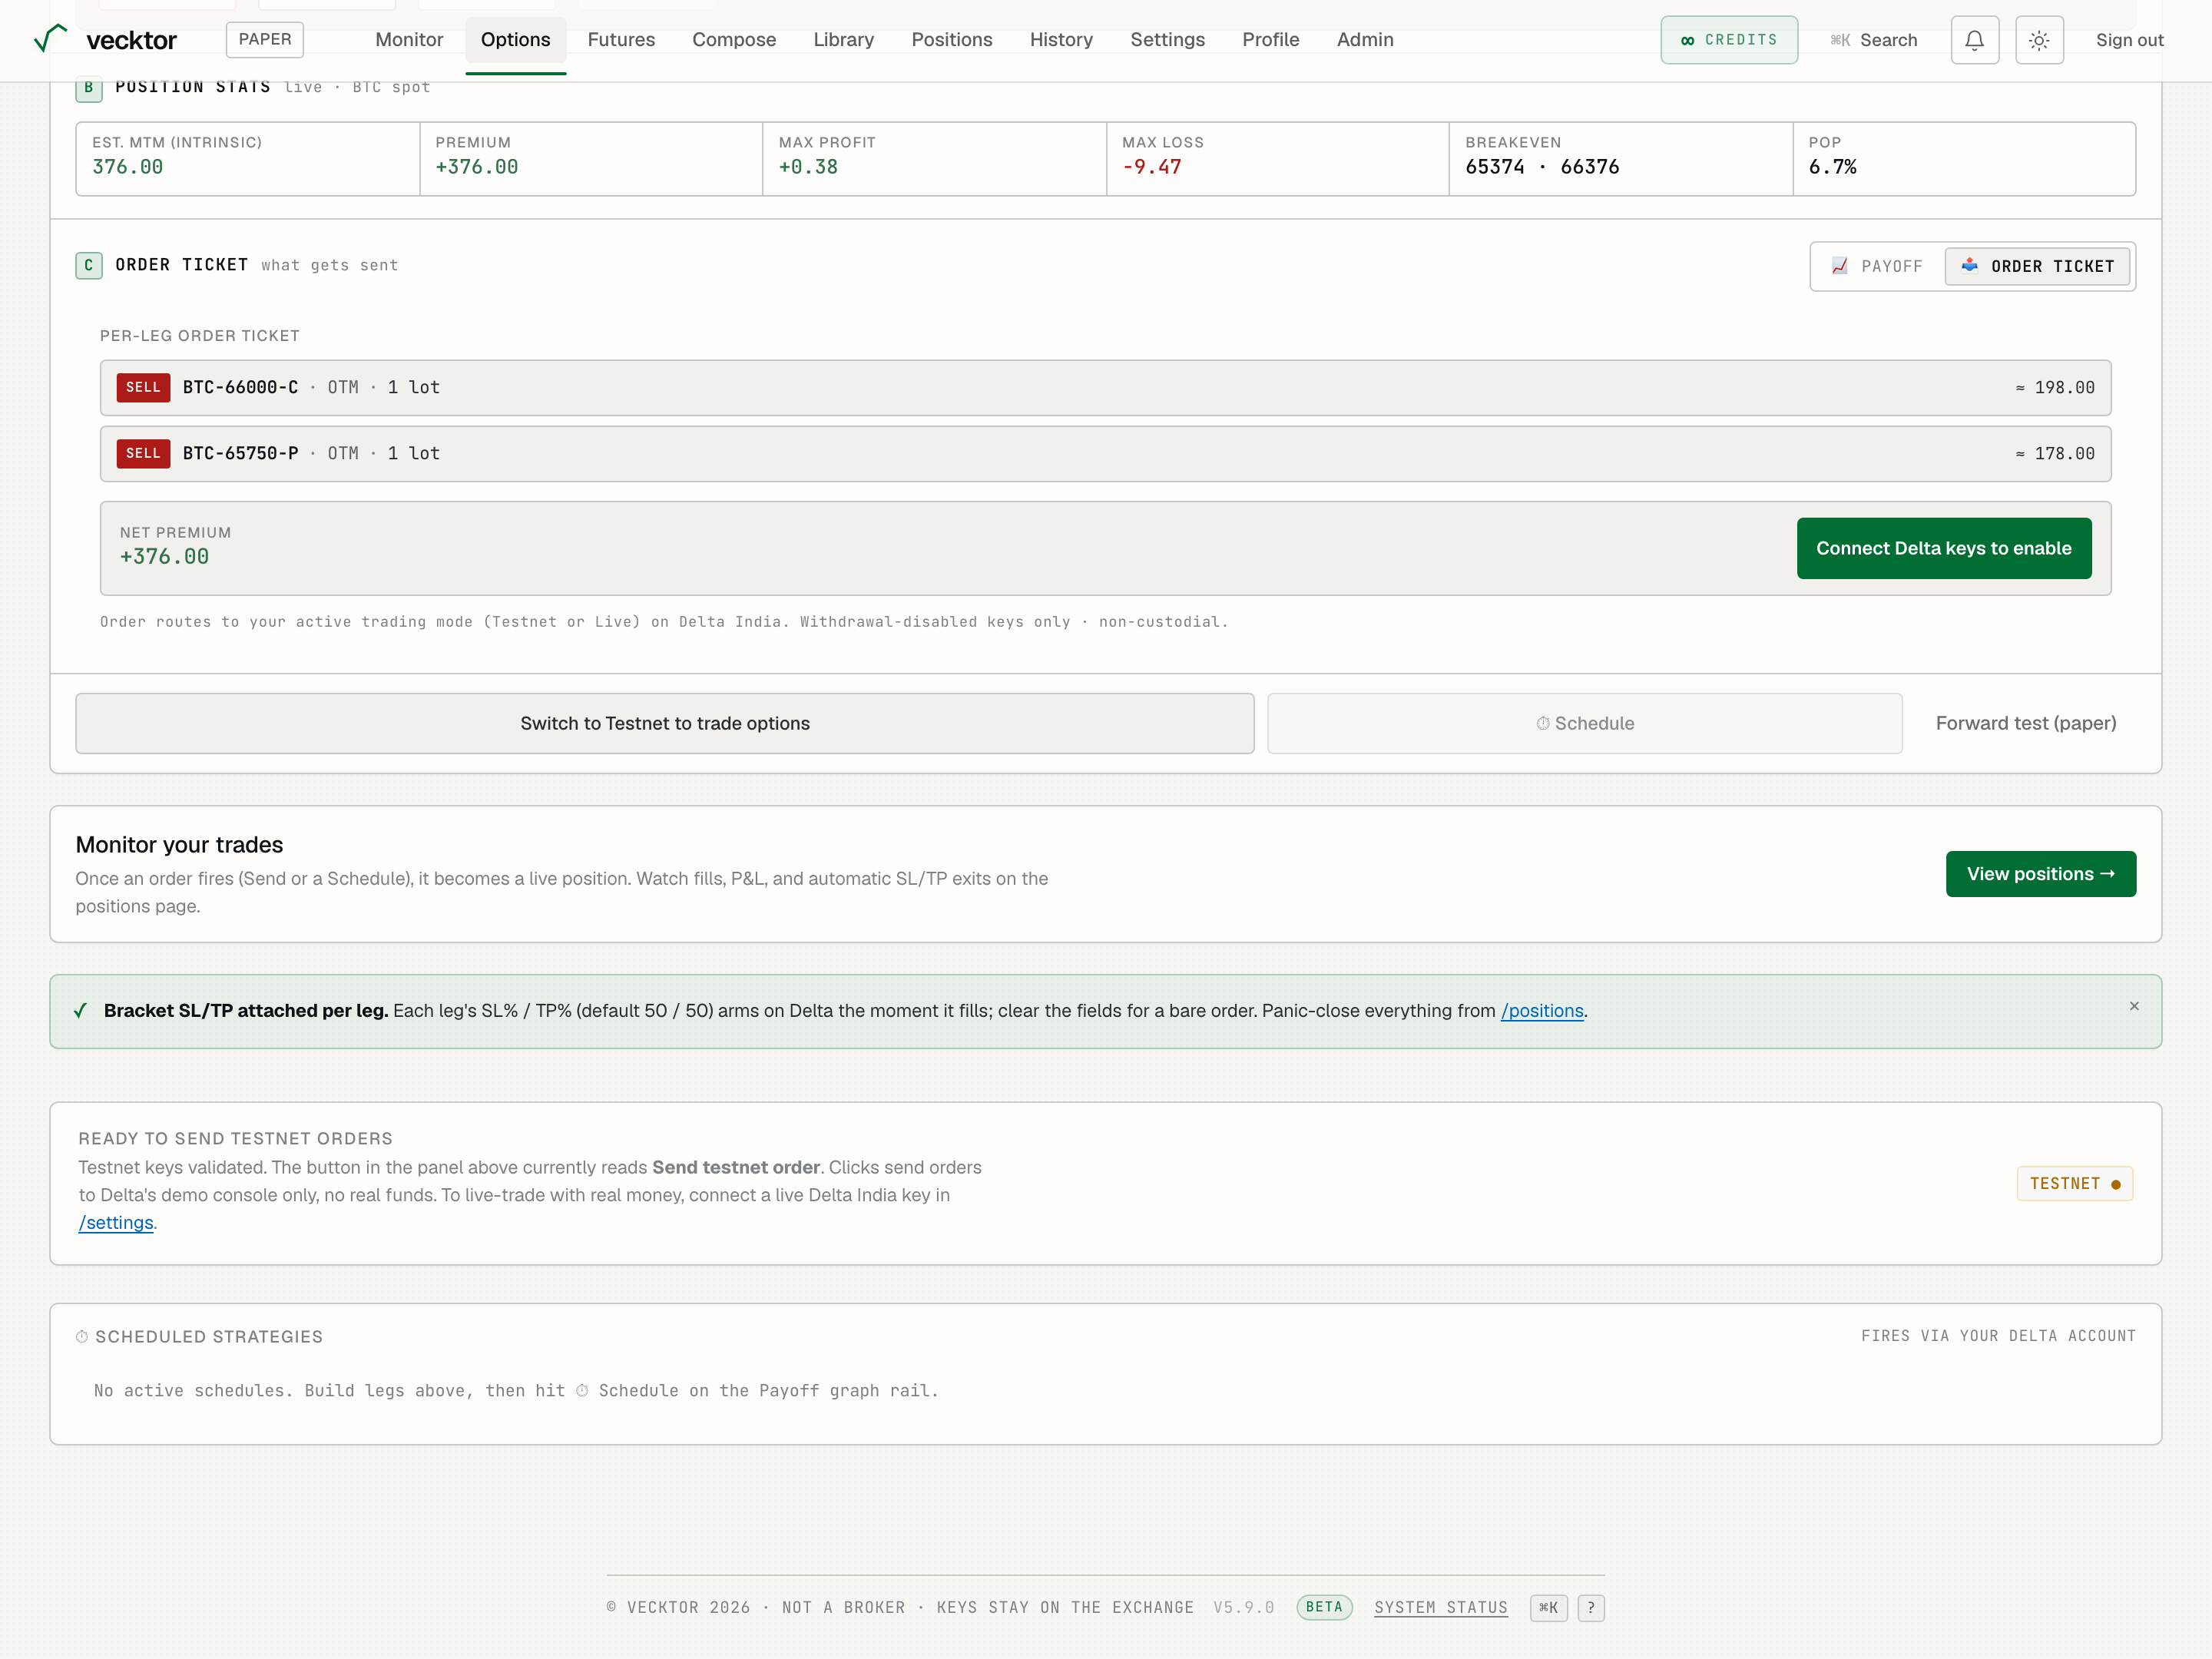
- Click the Order ticket pill (shows what will be sent)
- Check each leg row (side, symbol, size)
- Read Net premium (the total credit or debit)
Check available margin first
The panel shows the free margin that actually gates a new order, plus a warning when it looks too low.
- Find Available margin near the buttons. It shows the free margin in your Delta wallet for the active mode, not the total balance.
- Read the low-margin warning if it appears. Short option legs need significant margin, so the order may be rejected.
- Top up or trim your size if it warns, then check the figure again.
- Go ahead if the figure comfortably covers the structure.
Send a live order
The big Send button places a real order on your funded Delta account.
- Check your lots and your stop before you send.
- The button reads Send order · Delta. Clicking sends a real order with real funds, and there is no undo.
- Watch the status line under the buttons for the confirmation or the exact error.
 1Mode-aware Send button2Preview the legs live
- Check Available margin (the free figure that gates the order)
- Heed any low-margin warning (Delta returns the exact shortfall)
- Click Send (real order on your Delta funds - check your lots)
- Read the status line (confirmation or exact error)
Run now or schedule for later
The ⏱ Schedule button opens a small modal titled Run this strategy. Use it to fire now or set the same legs to run on a timer.
- Click ⏱ Schedule. It needs your Delta keys connected, so it is greyed out until you connect them.
- Under When, pick Now (sends straight away, same as Send), Once (a single future date and time), Daily, or Weekly.
- For Once, set the Date and the Time (IST). For Daily and Weekly, set the Time of day (IST). For Weekly, also tick the days under On these days.
- Optionally type a name under Save to library (optional) and click Save to reuse it later.
- Click Send now · Delta (for Now) or Schedule strategy to confirm.
- After scheduling, find your scheduled runs in the jobs list further down the options page (not in the modal), where you can Cancel a pending one.
 1Run now or on a timer
- Pick Now to send straight away (same as Send)
- Or pick Daily for a timer (Once, Daily, or Weekly)
- Set the Time of day (IST)
- Confirm the schedule (fires on your Delta account in the active mode)
Watch the trade after you send it
The options page sends and schedules. Watching and managing the trade happens on the positions page.
- Open /positions after you send an order.
- Watch fills, live profit and loss, and the guards (stop, target, trail) you set.
- Square off (close) a position there when you want out. Use the panic close-all if you need to flatten fast.
- Remember that turning off the payoff diagram, or leaving the page, does not close anything. Only a close on /positions does.